The Complete Sourdough Starter Guide
This complete sourdough starter guide is full of step-by-step instructions to teach you how to feed, maintain, and store a sourdough starter.
Save This For Later!
We’ll email this post to you so it doesn’t get lost in your open tabs!
By submitting this form, you consent to receive emails from Lockrem Homestead
Having a sourdough starter and learning how to take care of it is the first step to baking sourdough bread. Made with flour, water, and a colony of yeast and bacteria captured from the air, the sourdough starter is used to inoculate the bread dough and harnesses the power of natural fermentation to create great sourdough bread. Sourdough starters are a living organism that require regular feedings and maintenance with short term and long term storage options.
Whether you’re an experienced baker or a new baker, this guide will make baking with sourdough approachable for all home bakers. In fact, the flexibility to keep a sourdough starter is one of the reasons so many people choose to bake with it!
What is a Sourdough Starter?
What is a sourdough starter, and how does it work? A sourdough starter is a colony of wild yeast and lactic acid bacteria captured in a mixture of flour and water. Left to ferment, the microbes in this mixture eat the starch in the flour, digest it, and then expel carbon dioxide. Over time, the gas gets trapped in the mixture, causing the starter to grow in volume.
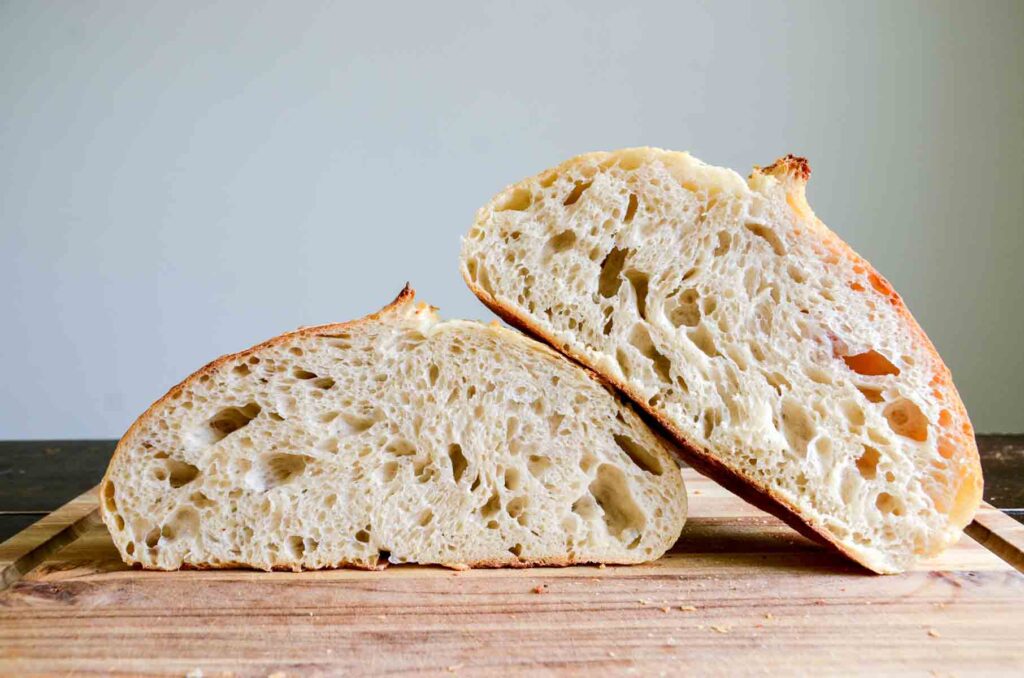
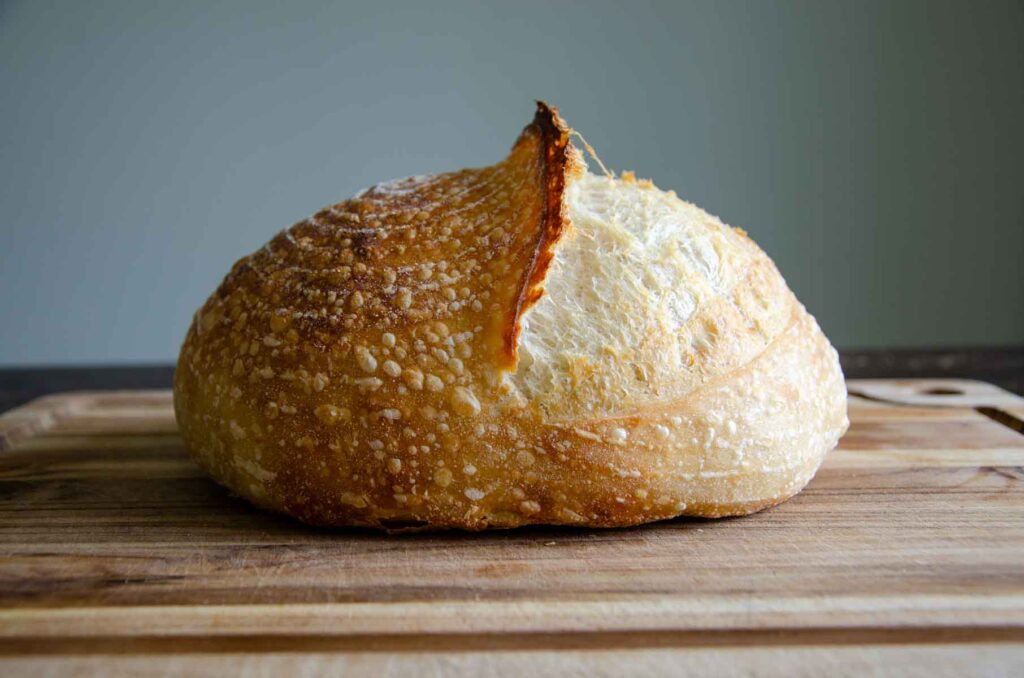
Once strong, this healthy sourdough starter can be used as is, or to create a levain to leaven breads instead of commercial yeast.
Taking a quick closer look at the finer details of sourdough starters, know that there are two different types of sourdough starters:
- Liquid starter: Has roughly 90% to 100% hydration, or just as much water as there is flour.
- Stiff starter: Has roughly 50% to 65% hydration, or half as much water as there is flour.
This post assumes you have an established starter already, whether you made it yourself, bought one, or were gifted one from a friend. However, if you need a sourdough starter, learn how to make your own in this Making a Sourdough Starter from Scratch Guide.
Sourdough Starter Ingredients
- Flour – I like to use organic all-purpose flour because it’s easy to find at most grocery stores. If you find the starter is sluggish to get started, you can use whole wheat flour. Its bran and germ are rich in minerals, nutrients, and enzymes that accelerate fermentation.
- Water – Use room temperature, unchlorinated water for the best results. If using tap water, let it sit out in an uncovered container for 24 hours to let the chlorine evaporate out of it before using it in your starter.
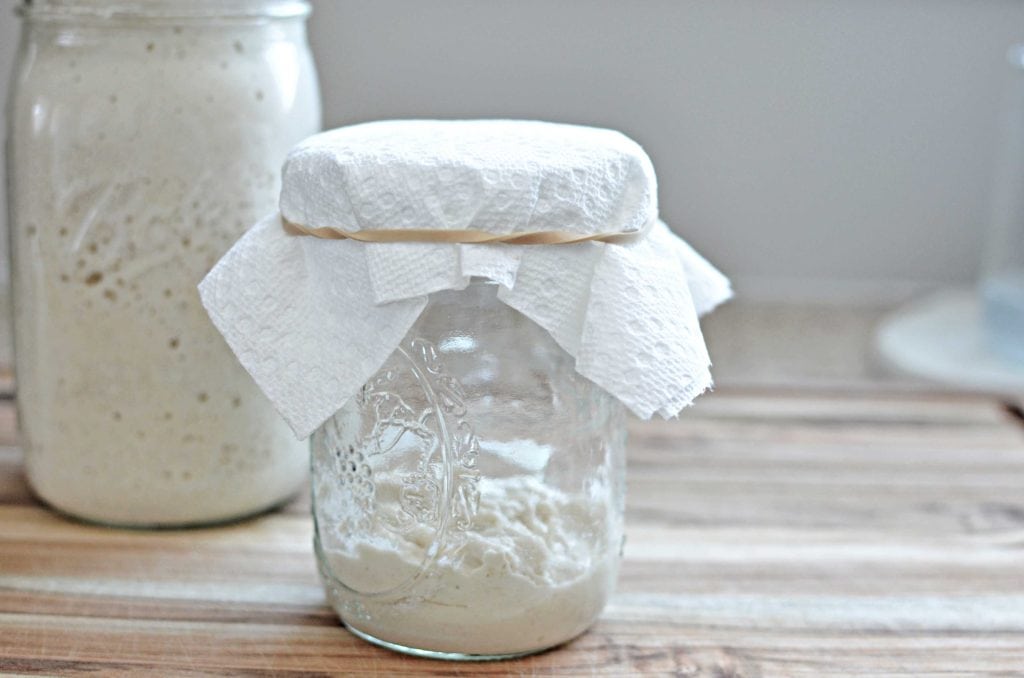
Tools You’ll Need for Sourdough Starter Feedings
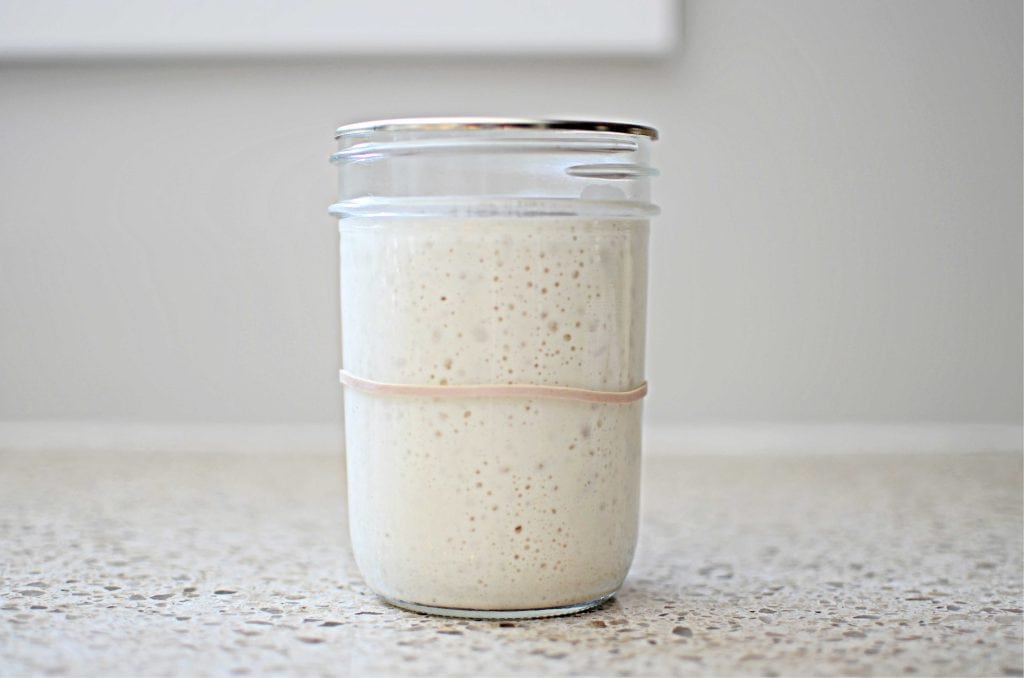
- Glass container, like a quart canning jar
- Kitchen scale
- Paper towel
- Rubber band
- A spatula or a non-metal utensil to stir the starter
How to Feed Your Sourdough Starter
Feeding a sourdough starter, also called refreshing it, requires two simple ingredients: flour and water. How much and how often largely depend on how you plan to use it. I recommend using a digital scale and measuring by weight for consistent feedings.
- To begin, feed your starter with a feeding ratio of 1:1:1 by weight: equal parts starter, flour, and water. This gives you a basic framework to learn how to care for a sourdough starter. I like to keep the flour and water ratio the same to make it easier to incorporate into discard recipes.
- Transfer 50 g sourdough starter into a clean jar. Discard the rest of the sourdough starter or save it to use in a variety of discard recipes.
- Add 50 g flour and 50 g water to the mason jar and stir well with the end of a wooden spoon, making sure to scrape down the sides of the jar.
- Cover the jar with a napkin fastened with a rubber band or a canning lid set on top of the starter jar to keep foreign matter out.
- Move to a draft-free warm spot in your kitchen.
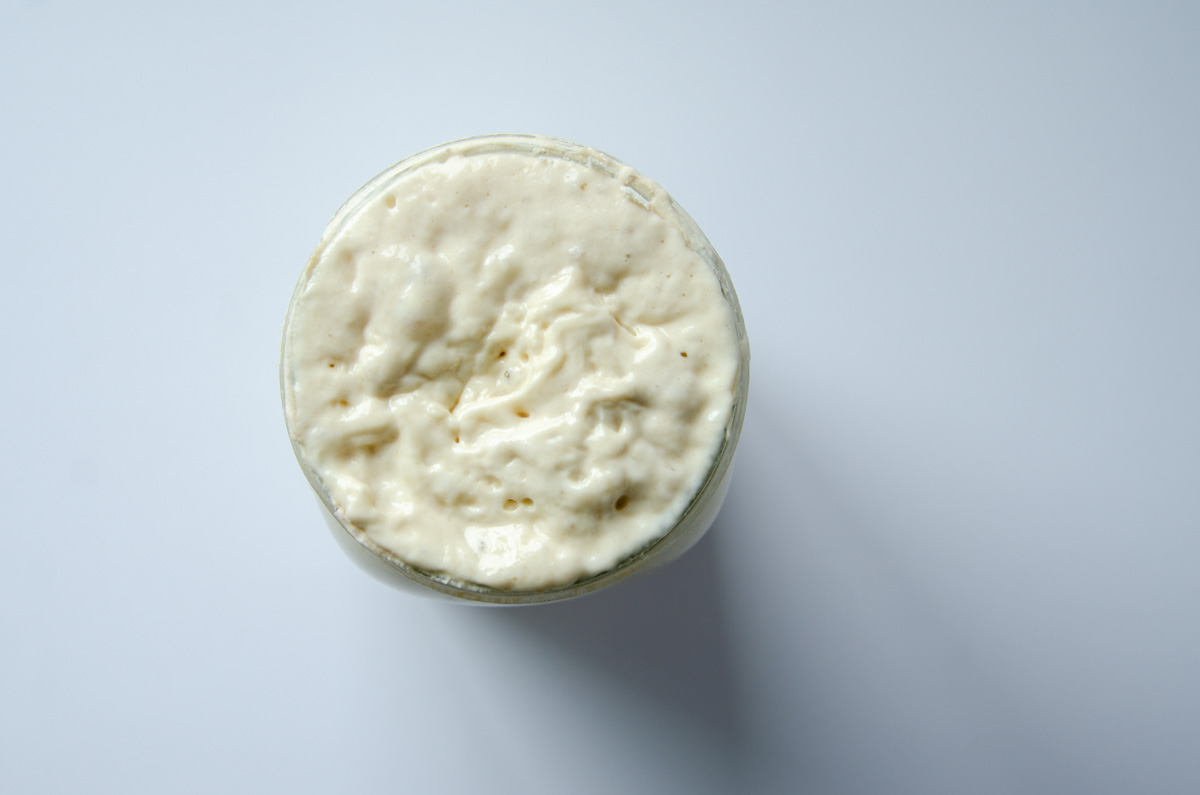
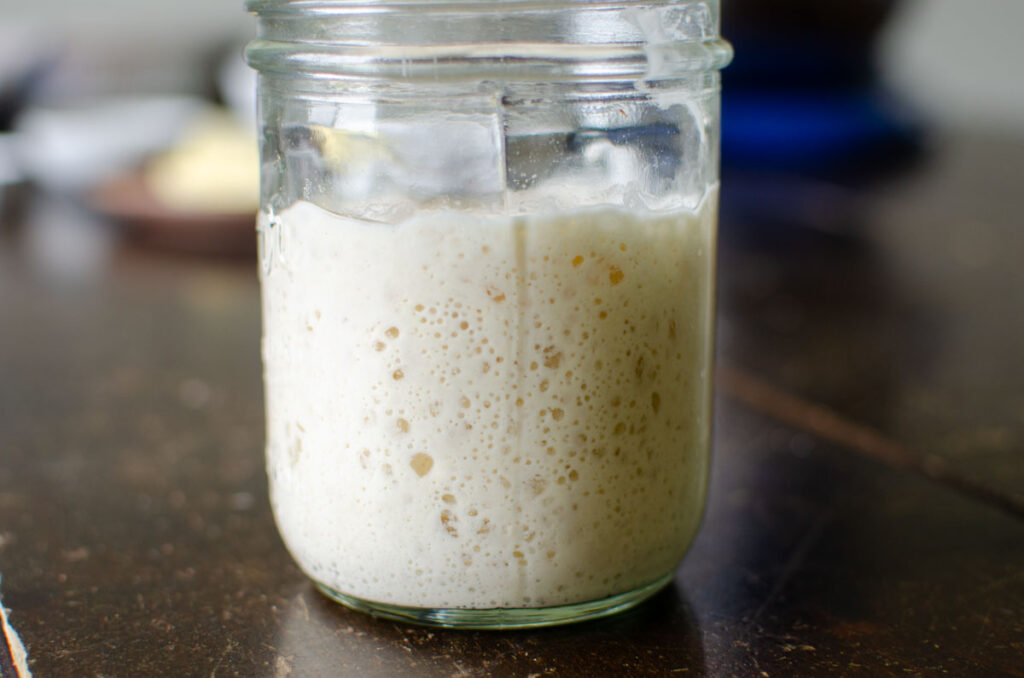
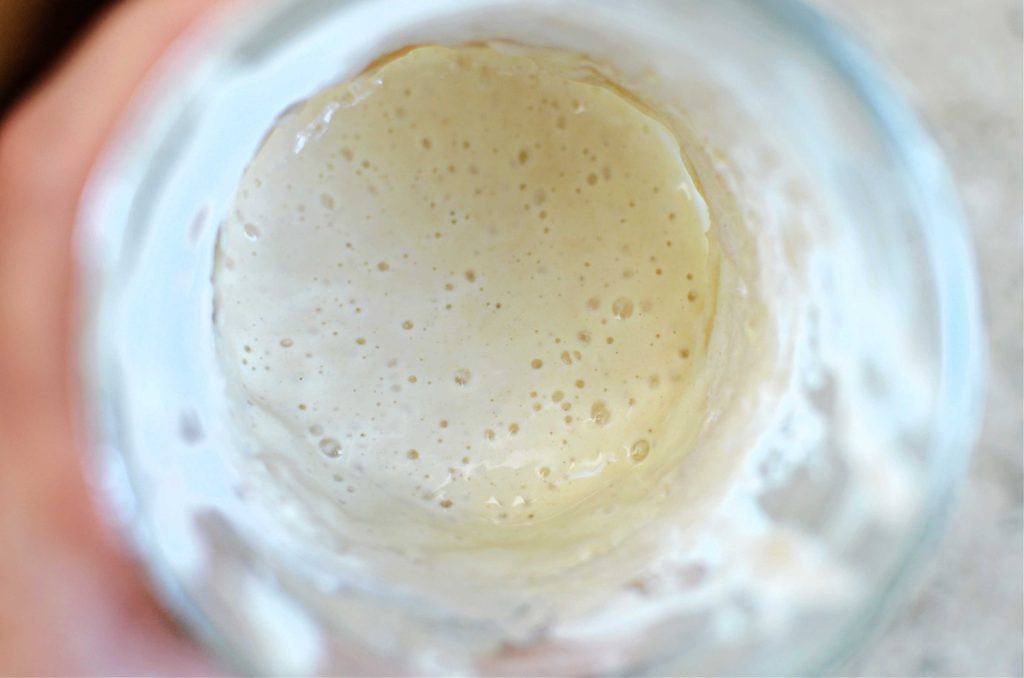
- After feeding the starter with a fresh supply of flour, the microbes discover their food and begin to consume the starch, digest it, and expel carbon dioxide. This is all happening at the microscopic level and may not appear like much is happening at first. Given enough time, you’ll begin to see the starter rise in volume as the microbes begin to expel gas. The starter will have a slightly domed top as it grows.
- When the starter has eaten much of its food supply, we refer to as “at its peak”, “active starter”, or “mature starter”, and is the optimal time to use! At this point, it’s ready to add to your sourdough recipe or create a levain.
- Finally, when the bacteria have eaten through all of their food supply, the sourdough starter begins to decline. Without any more food, the starter stops producing carbon dioxide and slowly starts to fall back down.
Maintaining A Healthy Starter
The health of your starter is the most important thing when it comes to successful sourdough baking. In order to keep it healthy, it’s important to know that temperature plays a large role in how quickly the microbes eat through their food supply.
Warm temperatures make for active microbes, causing them to eat the starch in the flour at a quick pace. But as the temperature cools, the microbes become slow and sluggish, slowing down the rate at which they eat through their food supply.
How often and what ratio you feed your starter depends on how often you plan to bake with it.
- Feed the starter.
- Cover it loosely and place it in a warm place in the kitchen. Allow it to peak.
- Use the active sourdough starter in your recipe.
- Refresh the starter (based on where you plan to store it and how long before the next feeding). I like to use a 1:5:5 ratio and store it in the refrigerator for my baking schedule.
Consider feeding your starter at a similar time of the day. Although this isn’t a hard and fast rule, it does create a healthier starter.
When the starter goes without food for an extended period, it causes an acidic environment in your starter, which weakens the microbes. The sluggish starter lacks enough active yeast and bacteria for a successful bake. While a few missed feeding times won’t be detrimental, it’s not the ideal rhythm to maintain over a long time.
Sourdough Starter Life Cycle
When I first started to learn about all things sourdough, I kept reading about the steps to take but was quickly frustrated when the result didn’t match the directions.
Once I finally understood the process and what visual cues to look for, I was able to create a timeline to bake bread that works within our family’s schedule. Understanding the starter’s life cycle teaches you what it’s doing and how to respond to it.
- Feed Starter – Like all fermented foods, a sourdough starter needs to be fed with a specific food source to begin the fermenting process. Adding flour and water to the inactive sourdough starter gives the microbes the food they need.
- Lag – There will be a lag time after the sourdough starter is fed, where it appears not much is happening. However, the yeast and bacteria are busy at work eating their newly introduced food supply.
- Growth – The sourdough starter is a colony of bacteria and yeast that eat and digest the starches in the flour, which in turn, creates carbon dioxide, causing the starter to grow.
- Peak – When the starter has eaten much of its food supply, this is what we refer to “at its peak” and is the optimal time to use. The starter will have a slightly domed top as it grows.
- Decline – When the bacteria have eaten through all of their food supply, the next stage is one of decline. The starter will slowly start to fall back down. Having eaten through their food supply, the starter stops producing carbon dioxide.
Temperature affects the rate of activity of the starter. Hence, the colder the starter’s environment, the slower they eat and digest their food. Whereas, the warmer the environment, the faster they move through this process.
Are You Tied to Daily Feedings Forever?
No! We leverage temperature to fit sourdough into our busy schedules.
For me, keeping a daily feeding schedule isn’t realistic. First, it requires more resources, mainly time and flour. Second, I don’t bake often enough that it makes sense to have a sourdough starter at its peak the majority of the week.
If you’re like me and bake once or twice a week, keeping the starter in the fridge might be more your speed.
After you feed the starter, it’s come to it’s peak, and you’ve use it in the recipe, place the starter into the fridge. If you know it will be longer than a week before using again, I suggest feeding it again before placing it into the fridge, giving it an adequate amount of food while it hybernates in the fridge.
The colder temperature slows down how fast the microbes eat through their food supply, extending the time between feedings. Once you’re ready to bake again, remove it from the fridge and feed it.
A refrigerated starter will take longer to begin to ferment since it has to go through the process of warming up before fermentation can begin, but once it’s at its peak, it’s ready to use. Add the required amount of active sourdough starter to your recipe, then replace the lid, and refrigerate until the next time you need to use it.
This method allows you to feed the starter once a week. If you keep a stiff starter, you can extend that time to once every few weeks.
As you gain more understanding of how your starter behaves, you can adjust the feeding ratios. Read more about Sourdough Starter Feeding Ratios with an easy feeding ratios calculator.
Signs of a Healthy Starter
It’s easy to know if you have a strong and healthy starter.
- First, it should have a pleasant yeasty smell, similar to beer.
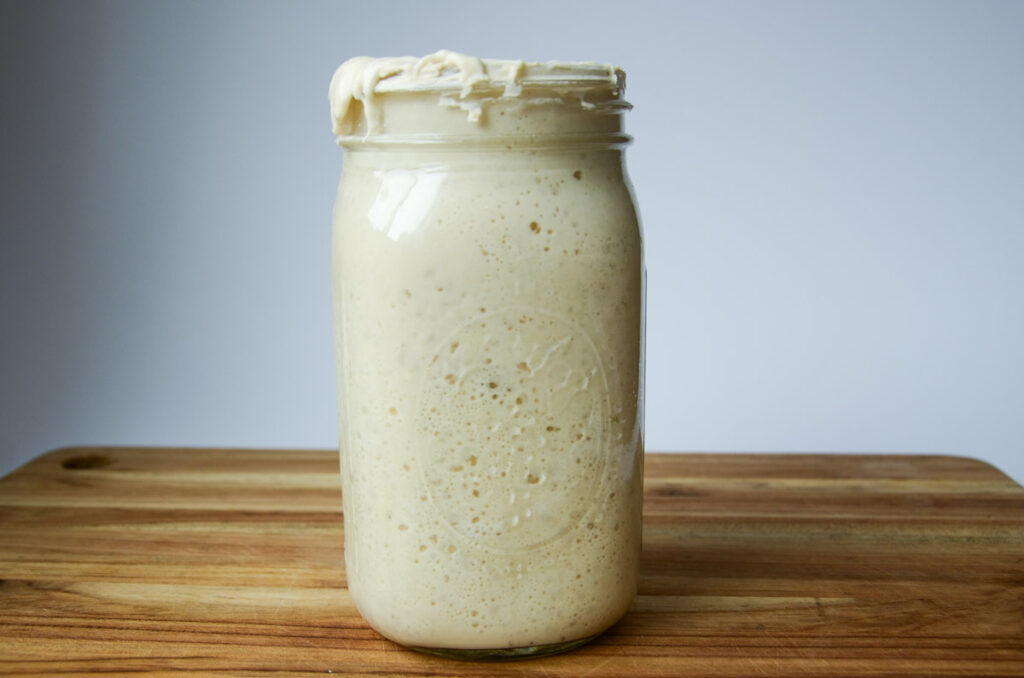
- A starter with a healthy colony of bacteria and yeast typically doubles within 3 to 5 hours of feedings.
- There are plenty of air bubbles throughout the starter.
However, going too long between feedings weakens the starter. It will have a sharp smell similar to acetone or nail polish remover. Refreshing the starter with a few rounds of feedings should bring it back to health.
What if You Find Yourself Asking, What is the Water on Top of My Sourdough Starter?
This is called hooch and signals that the starter is hungry and needs to be fed. The starter has consumed all of its food and starts to produce waste. Gross! But remember, it’s a living organism, so the process is perfectly natural. Either pour off the hooch or stir it in with the flour and water. If it gets to this point, you may need to discard and feed it a few rounds before it’s back to a strong and healthy starter.
If the top of the starter has a black layer, don’t panic! As the hooch sits, it begins to oxidize. Similar to how a cut apple oxidizes and discolors. The starter should bounce back once you return to regular feedings.
Although highly uncommon, if you notice pink or orange streaks in the sourdough starter, it’s likely mold. If this happens, it’s not worth the risk, so throw the sourdough starter out and make a new starter.

Ideal Storage Container
There are many storage container options to store your sourdough starter. Things to consider are size, the material, and what you have available.
Glass is the ideal material to store a sourdough starter. I keep my sourdough starter in a wide-mouth quart mason jar or Weck jars. Not only does it make it easy to see the fermentation activity and gives plenty of space as the starter expands, but it also won’t degrade or harbor smells and bacteria like plastic can.
In addition, the wide neck makes it easy to add and mix the ingredients. As a busy mom, the cherry on top is that it’s dishwasher safe…top or bottom rack. It really checks all of the boxes for me to move seamlessly throughout my day.
The only drawback is that glass can shatter. While this isn’t usual, it is worth keeping a dehydrated starter or frozen sourdough starter as backups.
Ceramic crocks are a good second option. The thick walls create a steady temperature, and they’re easy to clean. However, the solid walls mean you’re not able to easily monitor the fermentation at a quick glance, and they can be quite heavy.
Plastic containers, like the ones I use to freeze produce in, or deli containers, make a good option. They’re easy to wash, inexpensive, and easy to find. However, the acid in the starter does begin to break down the plastic over time and isn’t good for long-term storage.
If you choose a metal container, be sure that it’s not reactive to the acidic starter. Stainless steel is the ideal choice! Avoid aluminum, copper, or cast iron.
How to Store a Sourdough Starter
Short-term Storage
Temperature affects the rate of activity of the starter. Hence, the colder the starter’s environment, the slower they eat and digest their food. The warmer the environment, the faster they move through this process.
For short-term storage, feed the sourdough starter a ratio of 1:1:1 or 1:3:3 and allow it to sit at room temperature for an hour or two to get the fermentation process started. Then, tighten the cover and place it in the fridge. Here, it can go a week or two before its next feeding. (Note: the back of the fridge is colder than the front of your fridge.)
When you’re ready to bake, remove the starter from the fridge and feed your starter based on when you want the starter to peak. A starter cold from the fridge will take longer to come to peak since it needs time to warm up before any fermentation begins.
Long-term Storage
If you’re in a season of needing a break from maintaining a sourdough starter, there are a few ways to keep it for long-term storage.
- Dehydrate – You can dehydrate the starter and keep it in a jar on the shelf.
- Freeze – The cold puts the starter into a state of hibernation until you’re ready to use it again.
- 1:10:10 feeding ratio – Feeding the sourdough starter with an abundance of food and placing it in the fridge allows 2-3 months between feedings.
Once you’re ready to bake again, rehydrate or wake up the starter.
Helpful Tips on Sourdough Starters
- Use a kitchen scale. It’s an invaluable, inexpensive tool for baking sourdough breads. Measuring by weight, and not volume, helps ensure consistency in ingredient amounts.
- Don’t panic! Starters are pretty resilient and difficult to kill!
- Take good notes as you’re learning. Note how much you’re feeding the starter, the ambient temperature, and how the starter behaves. These observations will help you learn how to maintain your starter in your home as the seasons shift.
Ways to Use Your Sourdough Starter
- Add to breads to leaven like sandwich bread, ciabatta, tortillas, brioche, English muffins, and rolls.
- Create beautiful, artisan bread with different flavor add-ins like strawberry, double chocolate, cinnamon raisin, fig and walnut, and jalapeno and cheddar. With so many flavor combinations, the possibilities are endless. Discover more sourdough bread recipes.
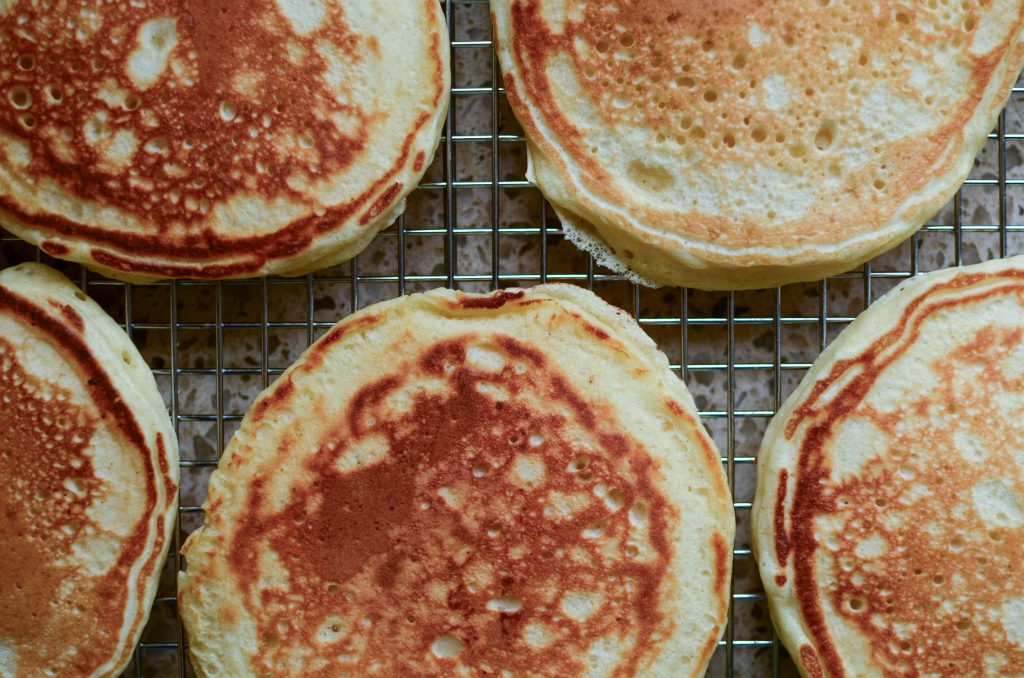
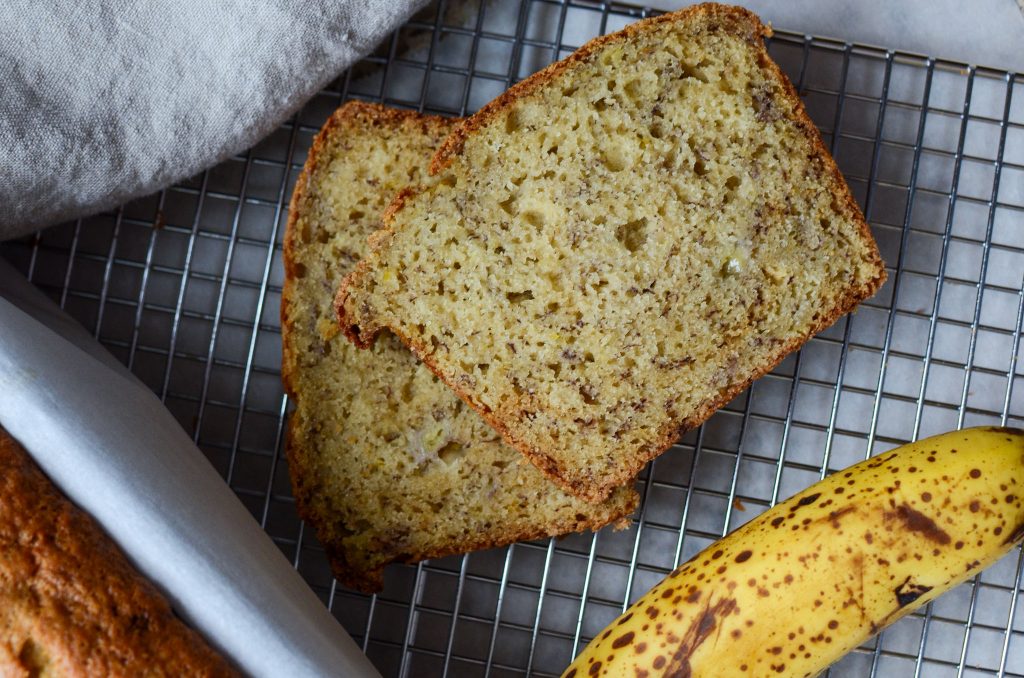
- Add sourdough discard to your favorite recipes for that classic sourdough tang, moisture, and its health benefits. Some of our favorites are pancakes, rhubarb muffins, mac and cheese, and lemon poppyseed scones. Find more sourdough discard recipes.
Common Sourdough Starter Feeding Mistakes
- The incorrect water temperature when feeding your starter – Because the starter is filled with living microbes, you want to have the correct water temperature when you feed it. Water that’s too hot can kill the microbes. Water that’s too cold won’t kill it, but it will delay how quickly the starter comes to its peak. For best results, use lukewarm water. Having a consistent water temperature each time you feed your starter allows you to create a predictable timeline for the starter to come to maturity.
- The wrong size container – You want to use a container with plenty of headspace, or space between the starter and the top of the jar, to accommodate the sourdough starter as it grows. If the container is too small, the starter will erupt and overflow, causing a doughy mess to clean up. If the container is too large, it will spread too much on the bottom, reducing how effective the fermentation is. Be sure to use a loose-fitting lid to cover the sourdough starter to keep debris out, but not airtight to allow the gas to escape!
- Chlorinated water – Chlorine in tap water can inhibit the yeast activity, causing the starter to not rise and ferment well. Use filtered water or leave water out uncovered at room temperature. Over the next 12-24hours, the chlorine will evaporate out, leaving you with ready-to-use room-temperature water to feed your starter!
FAQs About Making a Sourdough Starter
Why Do I Need to Discard Each Time I Refresh My Starter?
The short answer is, so you don’t have so much starter to feed. With a feeding ratio of 1:1:1, if you start with a large amount of starter, it requires the same weight of fresh flour and water. Keeping a small amount of starter is a good idea because it uses fewer resources.
What Should I Do With Sourdough Discard?
Don’t throw your sourdough discard away! Instead, use it to add flavor, texture, and moisture to a variety of sourdough discard recipes. Add discard to your favorite baked goods, like cookies, muffins, or scones. But don’t limit yourself. You can use it in granola to create big clusters, thicken sauces, or as a batter to coat meat.
What If I Don’t Have a Digital Kitchen Scale?
Order one! They’re cheap and will provide the greatest accuracy when working with your sourdough. But until your kitchen scale comes, here are some simple volume to weigh conversions. 1/2 cup of starter and water are the same weight as 1 cup of flour, all roughly 125 g.
How Do I Know When My Starter is Ready to Use?
It can be difficult to know when a sourdough starter is ready to bake with if you don’t know what you’re looking for. An easy way is to watch how it behaves after its feeding and notice these typical signs:
- A mature sourdough starter fed a ratio of 1:1:1 doubles 4-6 hours after a feeding, depending on the ambient temperature. (If your using different ratios, the time the starter comes to peak will be different.)
- The other indication the starter is ready is when it passes the float test. Take a spoonful of active sourdough starter and gently drop it into a glass of water. If there is enough carbon dioxide within the starter, it will float. If it sinks, it’s either not at its peak or it’s not quite ready.
- The starter has bubbles on top and at the sides.
- As the sourdough starter ferments, its consistency goes from thick and paste-like to loose and pourable.
If your starter has these characteristics, you’ve created a successful sourdough starter, and it is ready to begin baking with. If it’s not, you may want to read more about it in my How to Create Your Own Sourdough Starter post for tips.
What Type of Flour to Use for Sourdough Starter? What Type of Flour Should I Feed My Sourdough Starter?
There isn’t a right type of flour to feed your sourdough starter. While some flours are better for maintaining a healthy sourdough starter, what type you feed your starter is largely based on personal preference.
I like to use organic all-purpose flour for my sourdough starter’s regular maintenance feedings. It’s inexpensive, easy to access, and it doesn’t require buying a specialty type of flour. Whole wheat flour accelerates the fermentation of both the bacteria and the yeast in the starter and can be a good flour to establish a sourdough starter or strengthen your starter if it’s sluggish. Bread flour is an excellent choice with its higher protein content. Read more about the differences between all-purpose flour and bread flour and their best applications.
Working with sourdough is similar to so many other skills. At some point, you need to move from gaining understanding to diving into it and practicing. Know that it won’t be perfect at the beginning, but as you continue, you will level up in understanding and mastery as long as you don’t quit!

I’d love to hear from you! If you found this guide helpful, please leave a star rating and let me know how in the comments section below. Happy Baking!

I have been so excited to share this with you! Consider this your one stop shop for everything sourdough! Leave your questions and comments below, I look forward to hearing from you and responding to your thoughts!