
Easy Sourdough Ciabatta Bread Recipe
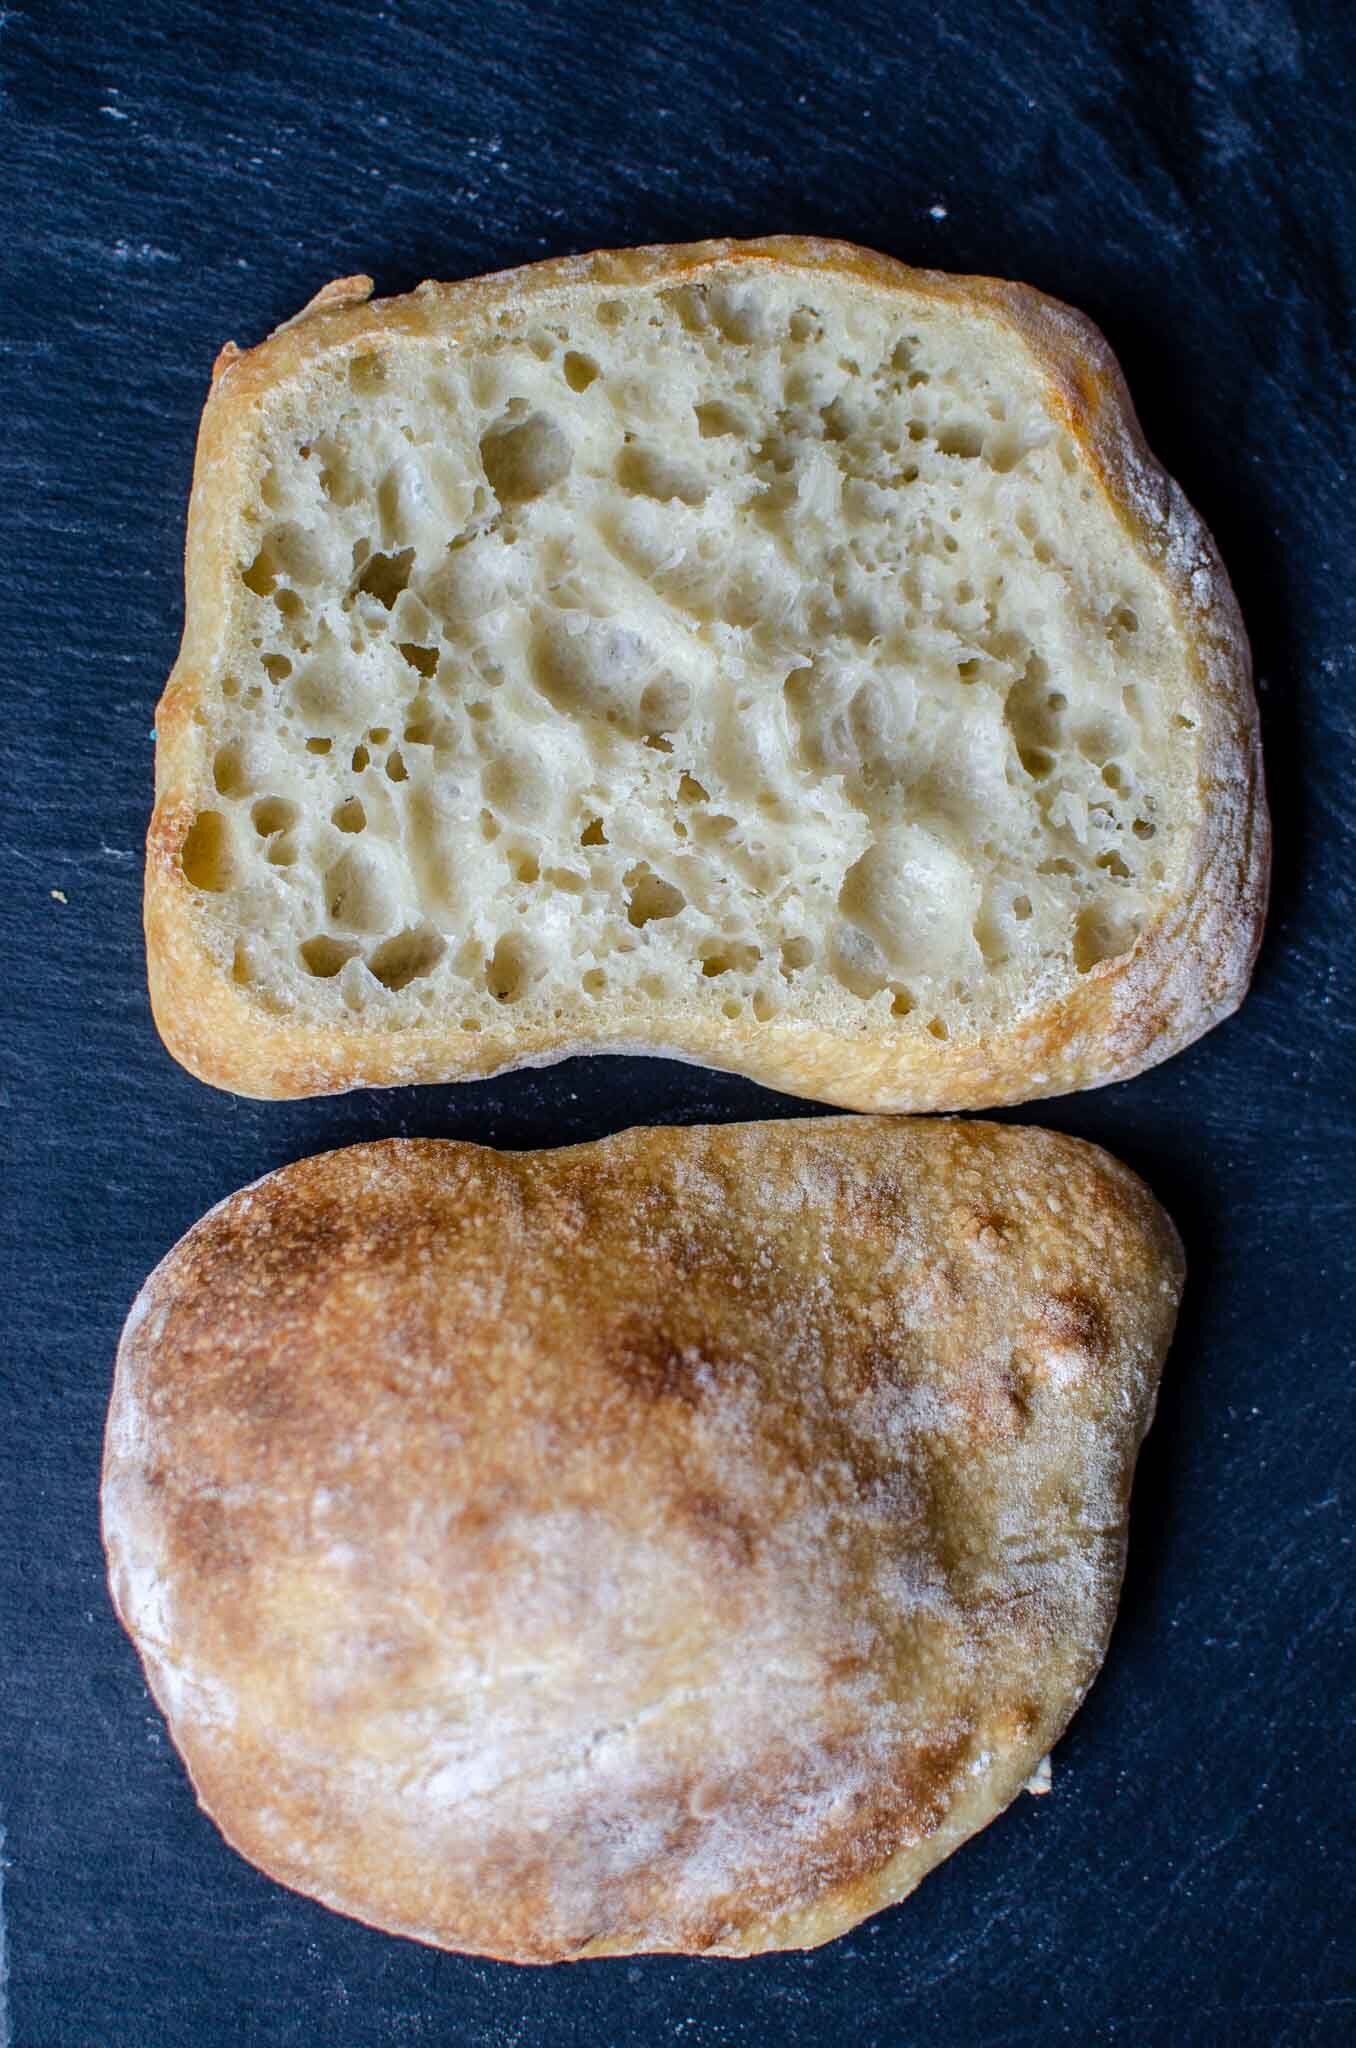
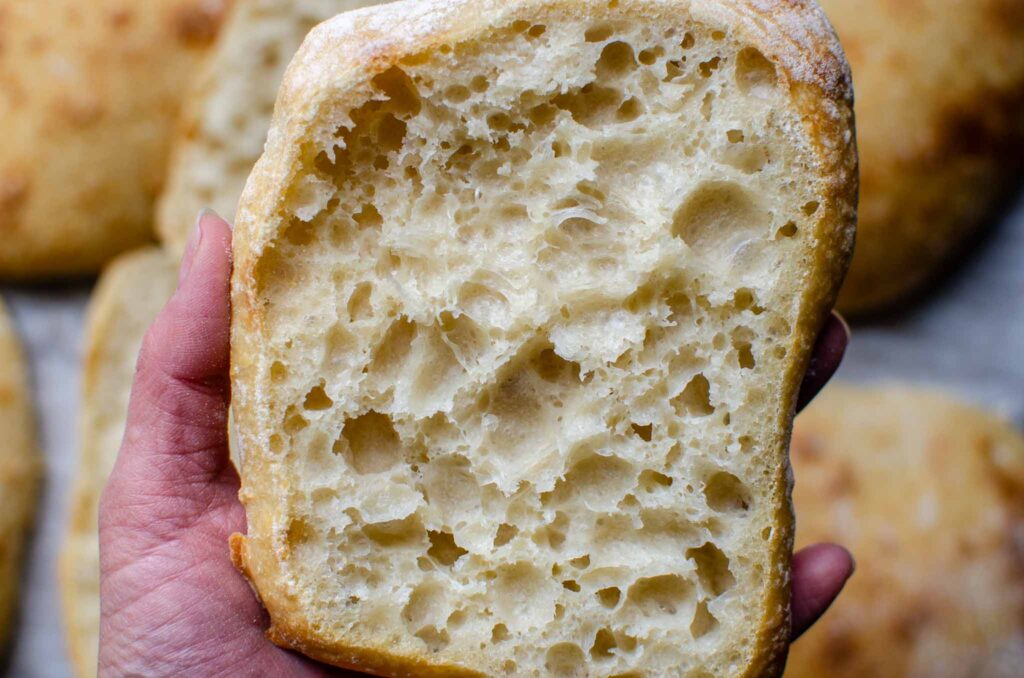
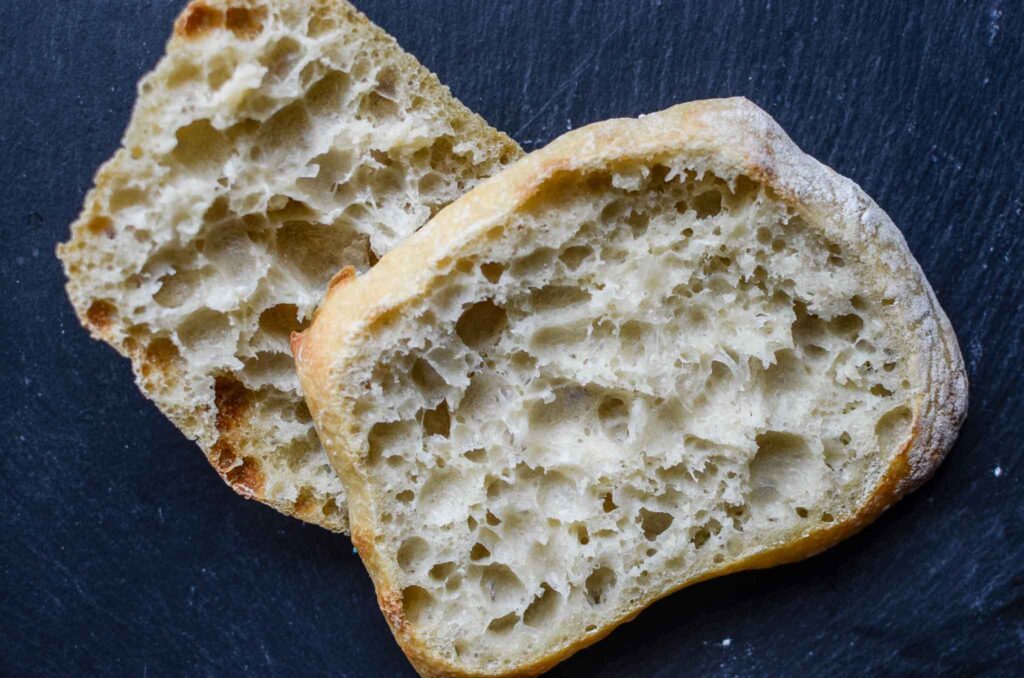
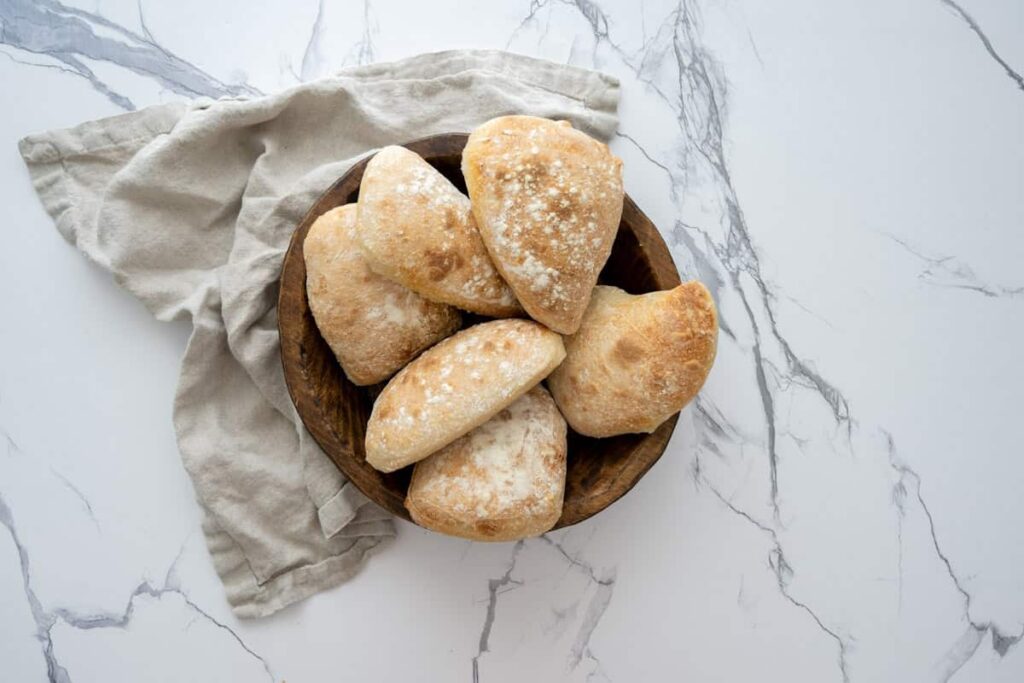
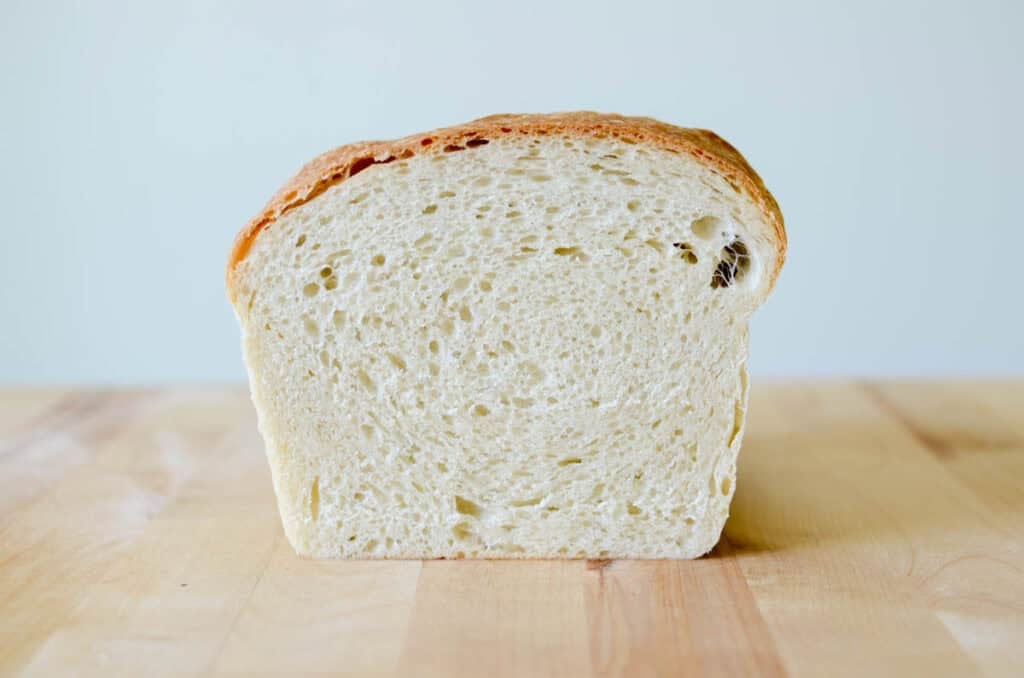
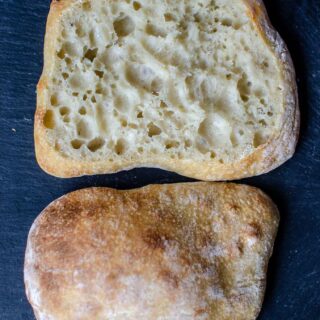
Easy Sourdough Ciabatta Bread, fresh from the oven, is simply delicious! This easy sourdough ciabatta recipe is made using 4 simple ingredients and has a chewy, thin, crisp crust with a soft, open interior full of irregular holes.
Save This For Later!
We’ll email this post to you so it doesn’t get lost in your open tabs!
By submitting this form, you consent to receive emails from Lockrem Homestead
New to Sourdough?
If you’re new to sourdough baking, these beginner-friendly guides will help you get started with confidence. Learn how to make a Sourdough Starter from Scratch, feed and maintain it with the Complete Sourdough Starter Guide, and bake your first loaf with this Easy Sourdough Bread Recipe. Together, these guides create a solid foundation for your sourdough journey.
I’ve come to love crafting artisan breads. There’s nothing like enjoying a piece of fresh bread, hot from the oven, slathered in butter and jam.
Working with your hands and baking bread is both satisfying and delicious. This ciabatta bread is no exception! The anticipation of cutting a ciabatta roll open to see how airy and light it is inside is the cherry on top. You and your family will enjoy these delicious bread rolls.
What Are Sourdough Ciabatta Rolls?
Traditional ciabatta means slipper in Italian and is a lovely, rustic white bread with an open, airy interior due to the high-hydration dough. Baked without a mold or bread pan, it has a long, flat, slipper-like shape. You’ll often find ciabatta rolls dusted in flour to keep the dough from sticking.
Ciabatta’s chewy crust is ideal for holding heavy fillings like cold cuts, melted cheese, and juicy toppings like tomatoes, bread and butter pickles, pesto, or mayo without becoming soggy.
But can you make ciabatta with sourdough starter? Yes! It’s a simple process that requires patience, but is rewarded with the most delicious bread roll. Learn how to work with this wet dough, along with a sample schedule, to produce baked sourdough ciabatta bread right at home.
More Sourdough Recipes
- Sourdough Lemon Blueberry Focaccia Bread
- Rosemary Olive Parmesan Sourdough Bread
- Sourdough Croissant Bread
Why You’ll Love Ciabatta Sourdough Bread
- Airy crumb – Ciabatta is known for an airy, open crumb that resembles Swiss cheese due to the high-hydration dough.
- Chewy texture – Using bread flour with its higher protein content creates a chewy texture.
- Sourdough flavor – The extended fermentation process produces a lovely sourdough flavor.
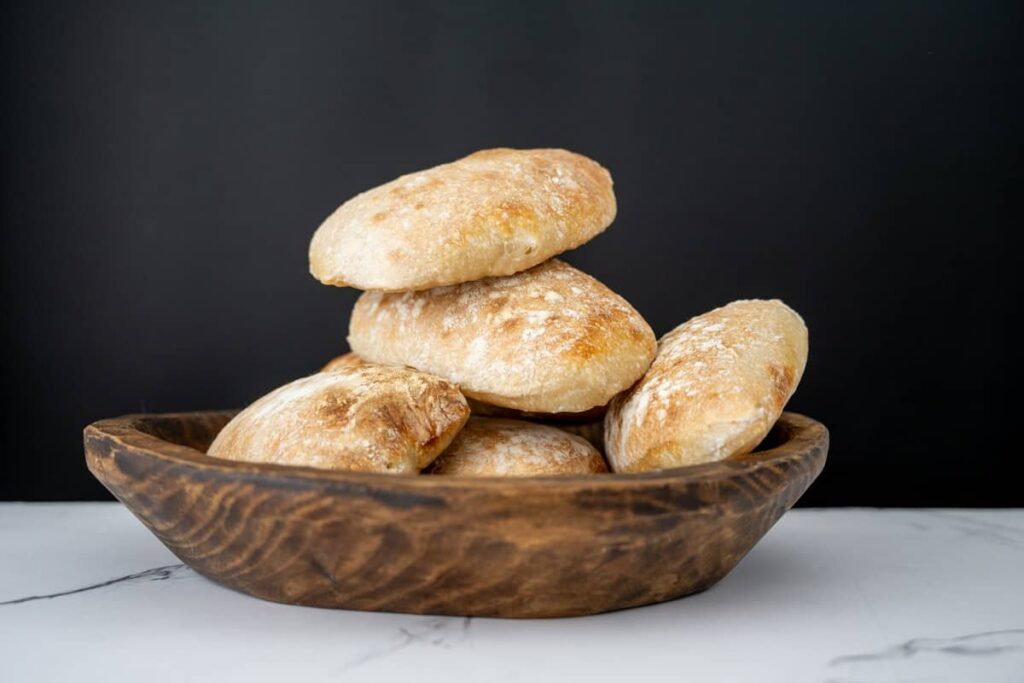
- Large or small – Keep it simple and divide the dough into long loaves to feed a crowd. Alternatively, parse the dough into small portions for sourdough ciabatta rolls, perfect for sandwiches or paninis.
Sourdough Focaccia Cinnamon Roll Ingredients
- Sourdough starter – Use active sourdough starter that’s been fed recently and allowed to come to its peak.
- Water
- Bread flour – Using bread flour with its higher protein content (12-15%) not only provides great chew but also creates a stronger gluten network to hold the air pockets.
- Salt – Helps develop the gluten and flavors the bread.
Tools You’ll Need
- Large bowl
- Kitchen scale
- Parchment paper
- Pizza stone
- Stand mixer or dough whisk
How to make Sourdough Ciabatta Bread
Autolyze
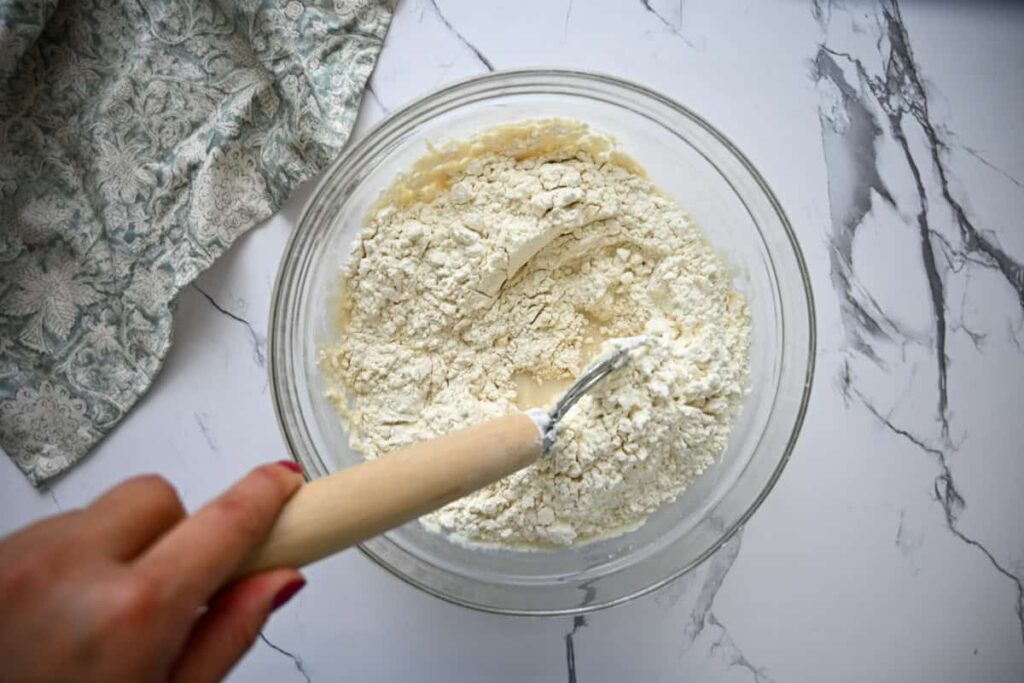
Mix the flour and water in a large mixing bowl. Cover and allow it to rest for 30 minutes to give the flour time to absorb the water.
Mix the Dough
Add the active starter and salt to the bowl and mix well.
Hand Mixing Option
Use the pinch-and-fold method to incorporate the salt and active starter into the autolyse dough. Grip a portion of the dough, pinch and squeeze it to build tension and distribute the ingredients, and fold it over the center for a minute or two, or until it’s completely worked in. Cover and let the dough rest for 15 minutes.
Stand Mixer Option
Add the autolyze, starter, and salt to the bowl of a stand mixer. Mix on medium for 10 minutes, or until the dough passes the windowpane test and is smooth and elastic. Skip the stretch and fold step, and continue to bulk ferment.
Stretch and Folds
Grab a side of the dough and stretch it straight up 6-8 inches, then fold it over to the center of the dough. Rotate the bowl a quarter turn, then do another stretch-and-fold. Continue stretches and folds until all of the dough has been worked and starts to become stiff.
Let the dough rest for 10-15 minutes and do another set of stretches and folds, performing 4-5 sets or until the windowpane test is passed. Use wet hands if the dough is too sticky.
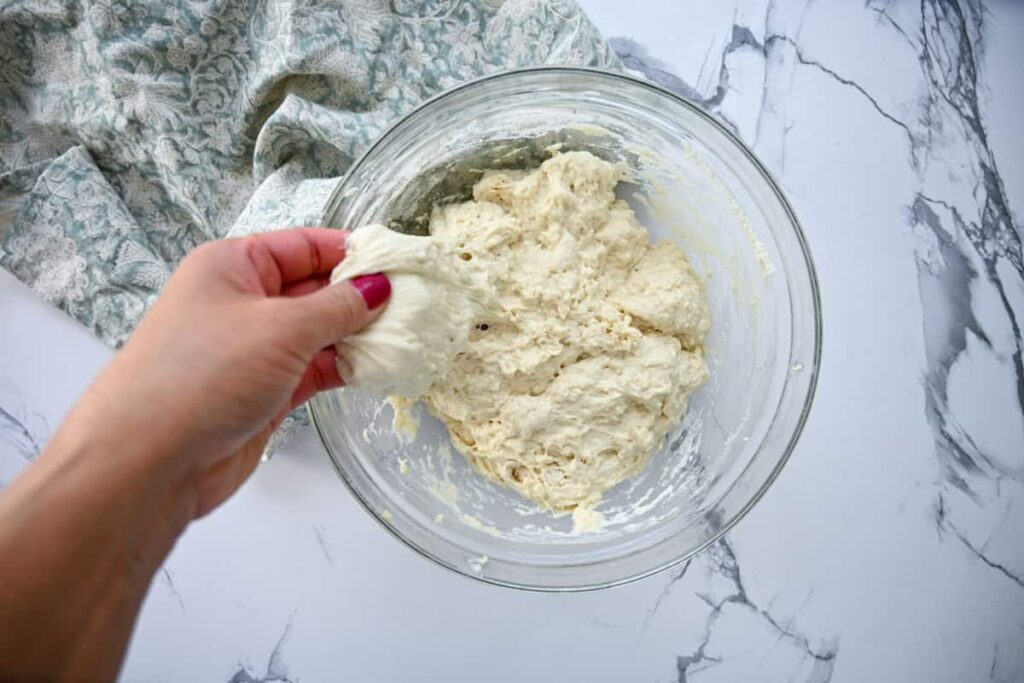
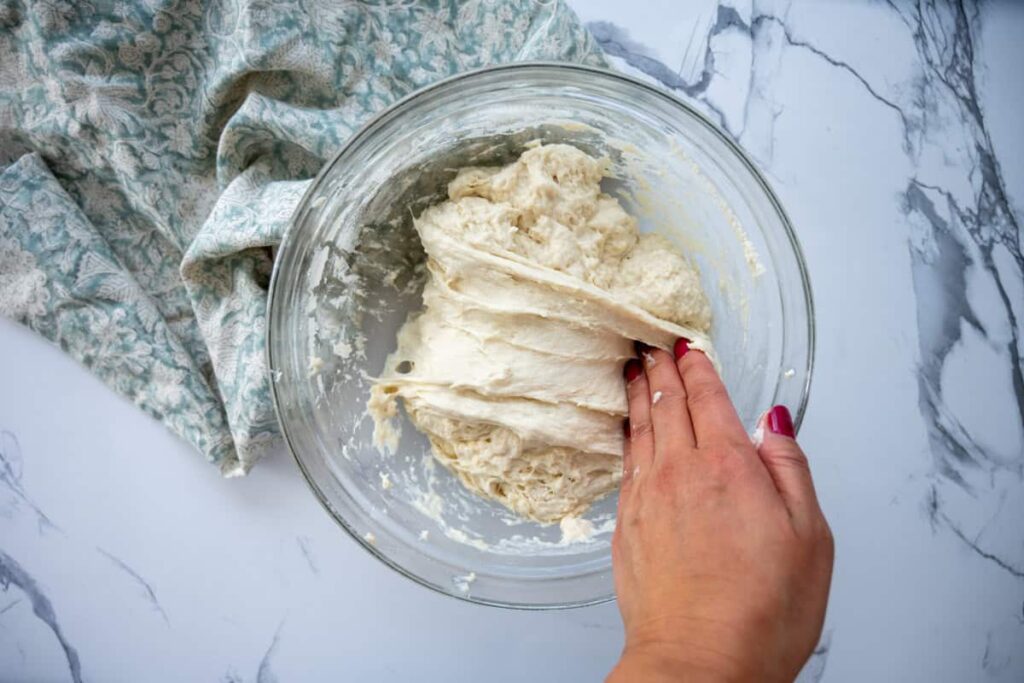
The dough will gain strength and elasticity with each set of folds. By the last set of stretch and folds, the dough is smooth and is able to hold its shape.
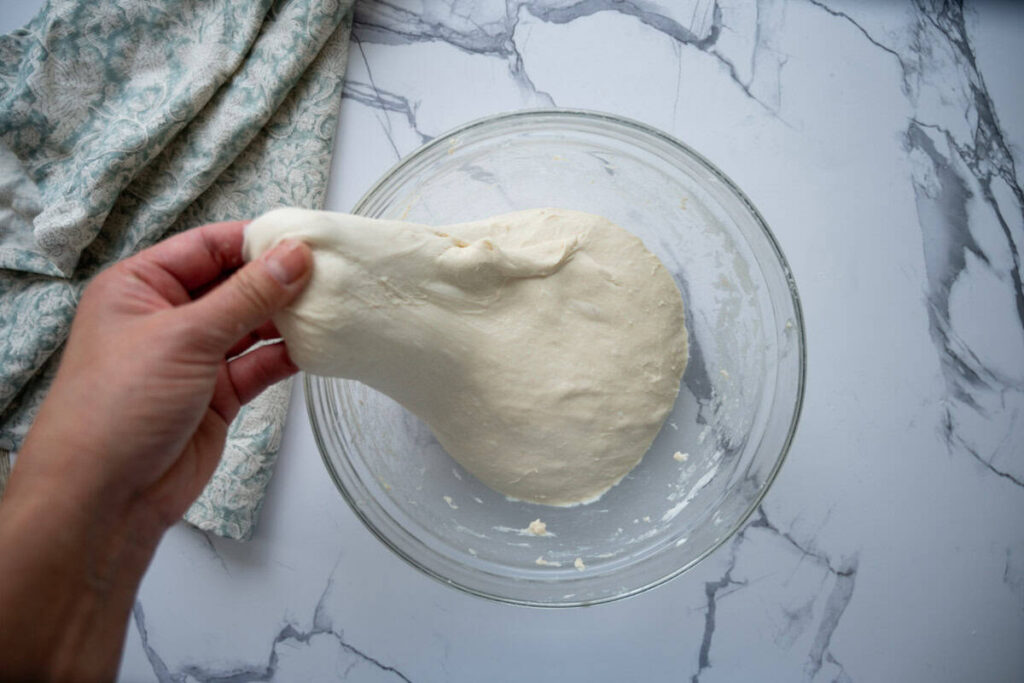
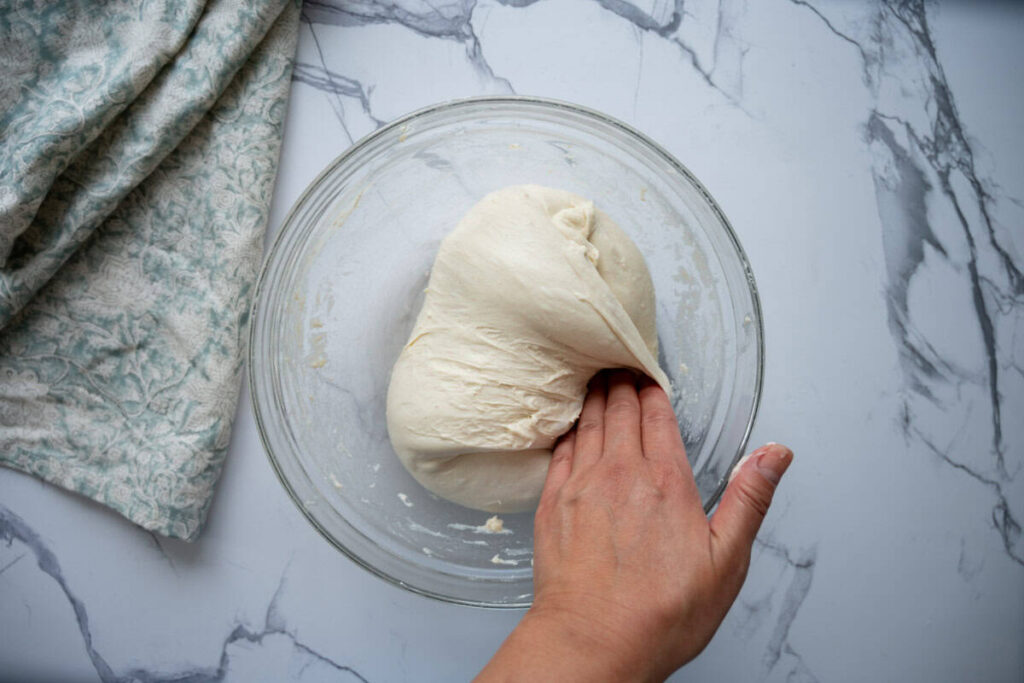
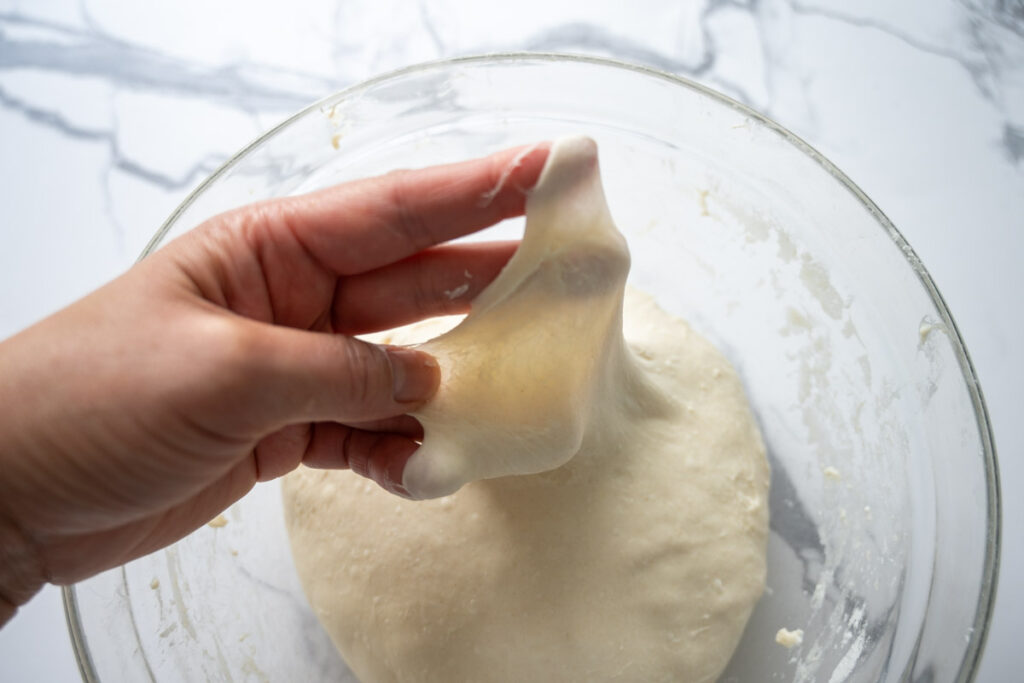
Window Pane Test
Using the windowpane test is a simple way to test if the gluten in the dough has been developed properly. Stretch the dough and hold it up to the light. If it stretches thin enough to see through it, like a window pane, the gluten is strong, and the dough is ready.
If the dough breaks and isn’t able to stretch thinly, do more stretch and folds until it passes.
Bulk Fermentation
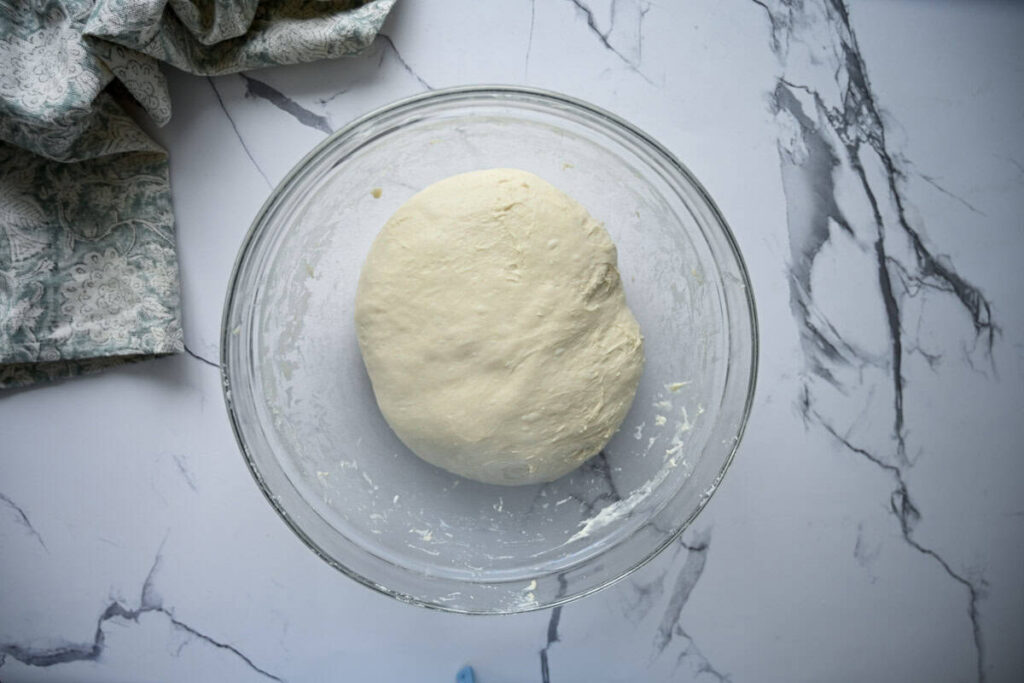
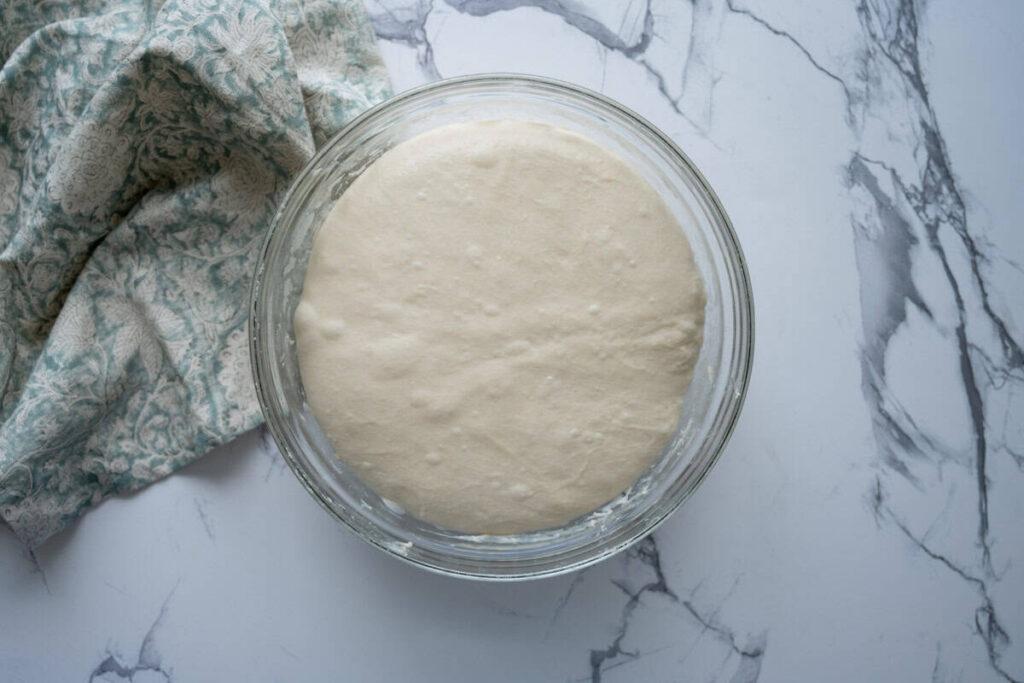
Once the dough passes the window pane test, cover the bowl with a tea towel, plate or plastic wrap and allow to rest at room temperature until it has risen by 50 percent.
In my 72°F/C 22°home, this takes roughly 4-6 hours, but this time will largely depend on the temperature of your kitchen. A warmer kitchen means the bulk fermentation time will be shorter.
Cold Ferment
Move to the dough to the refrigerator and allow to cold ferment for 8-12 hours.
Divide and Shape
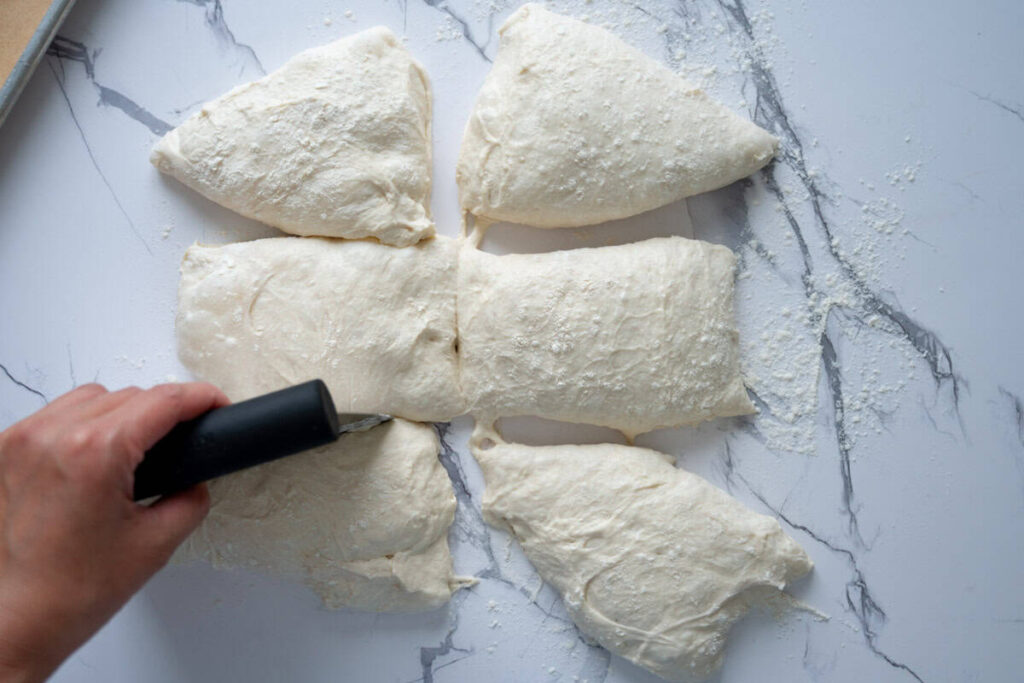
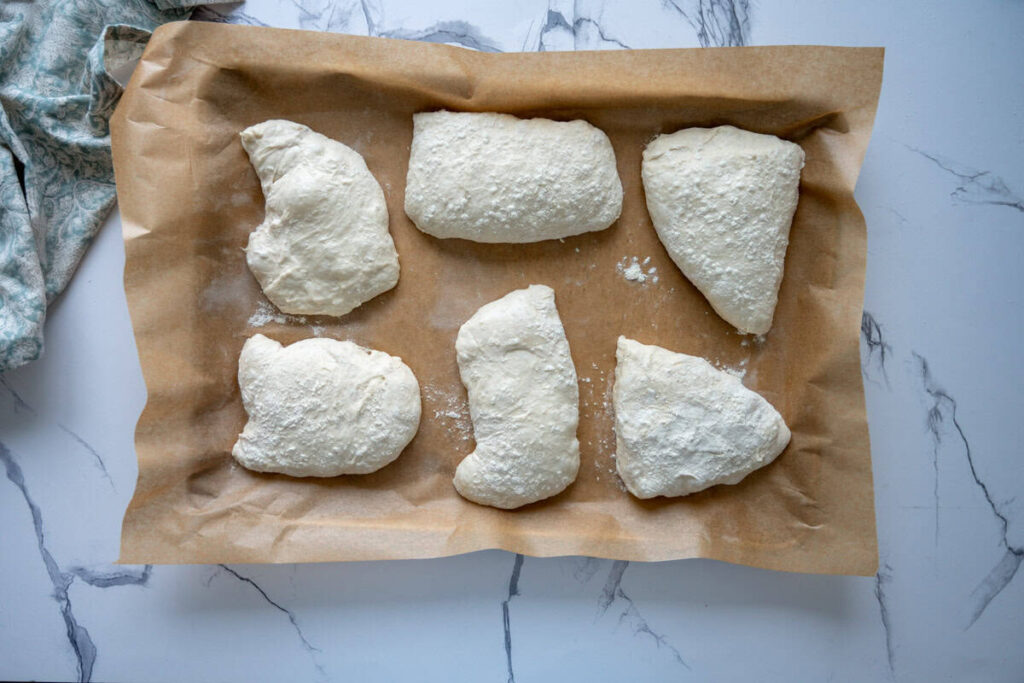
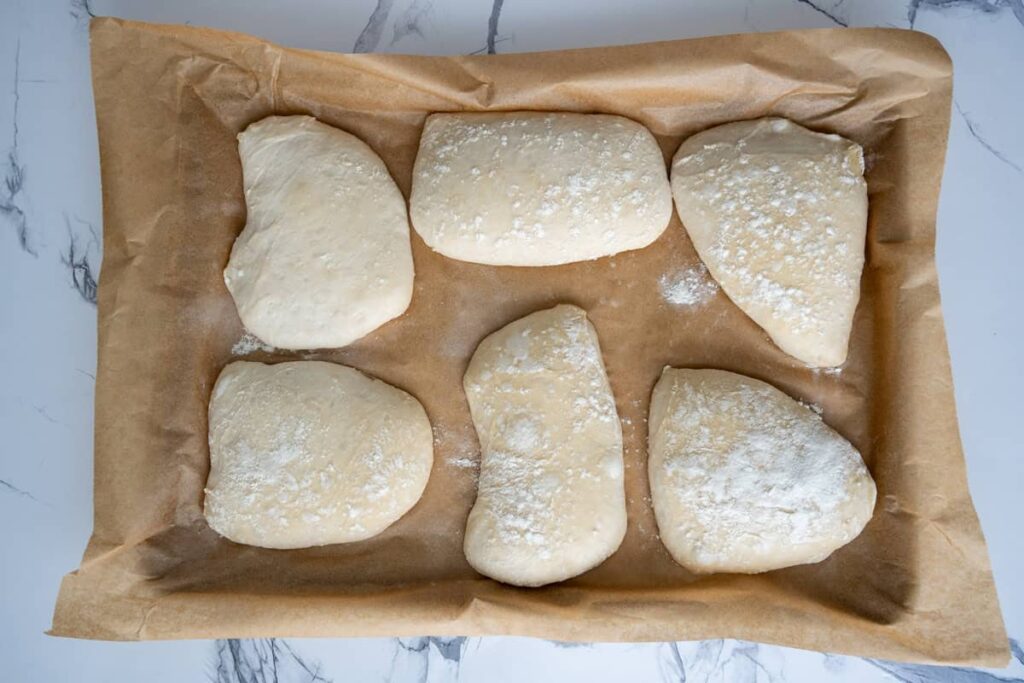
The next morning, gently turn the dough out onto a floured work surface and shape the dough into a rectangle. Dust the tops of the dough with flour. Using a bench scraper or dough knife, divide the dough into 6 equal pieces. Alternatively, you can divide the dough down the center to create two loaves.
Use the bench scraper to lift the ciabatta roll onto a parchment-lined baking sheet, 1 inch apart.
Proof
Cover the dough with a clean kitchen towel and let it rest on the counter at room temperature for 1 -2 hours, or until the dough puffy.
Bake
When the dough is ready, preheat the oven with a baking stone or pizza stone in it to 450°F/232°C for 45 minutes with a cast iron skillet on a lower rack.
Slide the ciabatta onto the pizza stone. Quickly add ice cubes to the cast-iron skillet and close the door to trap the steam. Bake for 25 minutes.
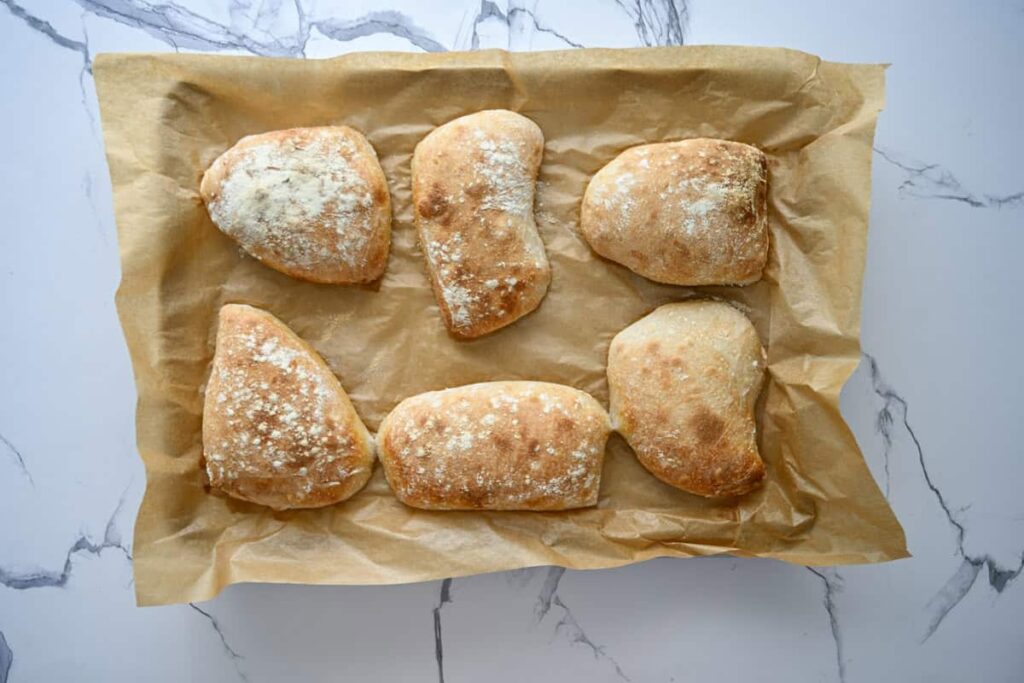
The ciabatta rolls are done when they’re golden brown, have a crisp crust, and the internal temperature reads 200°F/93° on a digital thermometer. Move to a wire rack to cool.
Store
Allow the ciabatta rolls to cool to room temperature and place them in an airtight container. Store at room temperature for up to 4 days.
Helpful Tips for Sourdough Ciabatta
- Use plenty of flour – The high hydration level makes the dough sticky and harder to work with. Generously flour your work surface, hands, and the dough when shaping to help it from sticking.
- Move quickly – Make quick, decisive motions when moving the slack dough. It doesn’t need to be perfect, and you can easily adjust the dough once it’s in its resting place. Remember, this is a rustic bread, and the variety of shapes adds some charm.
- Cool – Wait to cut the ciabatta until they’re cool for the best texture.
Sample Baking Schedule
| Day 1 – 8:00 am | autolyse the dough |
| 8:30 am | mix in the salt and active starter |
| 8:45 am | stretch and folds |
| 10:00 am | bulk ferment |
| 3:00 pm | cold ferment |
| Day 2 – 8:00 am | divide the dough |
| 8:10 am | proof |
| 10:15 am | preheat the oven bake the ciabatta bread |
FAQs
What Do You Eat With Sourdough Ciabatta?
- Using sourdough ciabatta bread takes your sandwiches up a notch, providing the structure to hold all of the fixings with a soft, tender crumb. Use it for paninis or swap out hamburger buns for your next grill out.
- Sourdough ciabatta is perfect to pair with a bowl of soup.
- Serve with a dipping oil for a delicious appetizer.
Sourdough vs. Ciabatta – What’s the Difference?
Sourdough ciabatta bread and sourdough bread have many similarities. Both are made of sourdough starter, flour, water, and salt, and have the benefit of long fermenting, making them easier to digest, but that is where their similarities end.
With ciabatta’s higher water level, its texture is light and airy with a crust that is thin and crisp. While being able to shape into a long, flat loaf, it can easily be made into individual rolls by parsing the dough out smaller. These make excellent sandwiches, with the perfect crust for holding your fixings together and a soft and tender texture making each bite worthy of taking another.
A boule of sourdough bread has a thicker, chewier crust with a denser crumb than ciabatta. Sourdough bread loaves, often shaped into a round or oval loaf, can have a range of hydration levels, which will change how open the crumb is, whereas ciabatta always has high hydration.
Is Sourdough Ciabatta Healthy?
Sourdough ciabatta bread boasts all the benefits of sourdough. The long fermentation process breaks down the phytic acid found in grains, beans, and nuts. Phytic acid is an anti-nutrient that interferes with the absorption of certain nutrients. Once it’s broken down, our bodies can absorb more of the nutrients in sourdough breads and also makes them easier to digest. Fermenting it won’t completely eliminate the gluten, but it does greatly reduce it. Those with gluten sensitivities can often handle enjoying sourdough bread.
I’d love to hear from you! If you made this Easy Sourdough Ciabatta Bread recipe and loved it, I would love it if you gave it 5 stars! Happy Baking!
Easy Sourdough Ciabatta Bread Recipe
Want to Save This Recipe?
Enter your email & I’ll send it to your inbox. Plus, get great new recipes from me every week!
By submitting this form, you consent to receive emails from Lockrem Homestead
Equipment
- kitchen scale
- mixing bowl
- dough whisk
- parchment paper optional
- Baking Sheet
- bench scarper
- Digital thermometer
Ingredients
- 468 g bread flour 3¾ cups
- 360 g water 1½ cups
- 12 g salt 2 tsp
- 125 g active sourdough starter ½ cup
Instructions
Feed Starter
- You will need a ripe sourdough starter for this recipe. Feed the starter 4-8 hours before mixing your dough. The starter should show plenty of signs of life, be full of air bubbles, and have risen substantially.
Autolyse
- Mix the flour and water in a large mixing bowl. Cover and allow it to rest for 30 minutes to give the flour time to absorb the water.
Mix the Dough
- Add the active starter and salt to the bowl and mix well.
Hand Mixing Option
Use the pinch-and-fold method to incorporate the salt and active starter into the autolyse dough. Grip a portion of the dough, pinch and squeeze it to build tension and distribute the ingredients, and fold it over the center for a minute or two, or until it's completely worked in. Cover and let the dough rest for 15 minutes.Stand Mixer Option
Add the autolyze, starter, and salt to the bowl of a stand mixer. Mix on medium for 10 minutes, or until the dough passes the windowpane test and is smooth and elastic. Skip the stretch and fold step, and continue to bulk ferment.
Stretches and Folds
- Grab a side of the dough and stretch it straight up 6-8 inches, then fold it over to the center of the dough. Rotate the bowl a quarter turn, then do another stretch-and-fold. Continue stretches and folds until all of the dough has been worked and starts to become stiff.
- Let the dough rest for 10-15 minutes and do another set of stretches and folds, performing 4-5 sets or until the windowpane test is passed. Use wet hands if the dough is too sticky.
- The dough will gain strength and elasticity with each set of folds. By the last set of stretch and folds, the dough is smooth and is able to hold its shape.
Bulk Fermentation
- Once the dough passes the window pane test, cover the bowl with a tea towel, plate or plastic wrap and allow to rest at room temperature until it has risen by 50 percent. In my 72°F/C 22° home, this takes roughly 4-6 hours, but this time will largely depend on the temperature of your kitchen. A warmer kitchen means the bulk fermentation time will be shorter.
Cold Ferment
- Cover the bowl and refrigerate to cold ferment for 8-12 hours.
Divide and Shape
- The next morning, gently turn the dough out onto a floured work surface and shape the dough into a rectangle. Dust the tops of the dough with flour. Using a bench scraper or dough knife, divide the dough into 6 equal pieces. Alternatively, you can divide the dough down the center to create two loaves.
- Use the bench scraper to lift the ciabatta roll onto a parchment-lined baking sheet, 1 inch apart.
Final Proof
- Cover the dough with a clean kitchen towel and let it rest on the counter at room temperature for 1 -2 hours, or until the dough puffy.
Bake
- When the dough is ready, preheat the oven with a baking stone or pizza stone in it to 450°F/232°C for 45 minutes with a cast iron skillet on a lower rack. Slide the ciabatta onto the pizza stone. Quickly add ice cubes to the cast-iron skillet and close the door to trap the steam. Bake for 25 minutes.The ciabatta rolls are done when they're golden brown, have a crisp crust, and the internal temperature reads 200°F/93° on a digital thermometer. Move to a wire rack to cool.
Store
- Allow the ciabatta rolls to cool to room temperature and place them in an airtight container. Store at room temperature for up to 4 days.
Notes
Window Pane Test
Using the windowpane test is a simple way to test if the gluten in the dough has been developed properly. Stretch the dough and hold it up to the light. If it stretches thin enough to see through it, like a window pane, the gluten is strong, and the dough is ready. If the dough breaks and isn’t able to stretch thinly, do more stretch and folds until it passes.Tips
- Use plenty of flour – The high hydration level makes the dough sticky and harder to work with. Generously flour your work surface, hands, and the dough when shaping to help it from sticking.
- Move quickly – Make quick, decisive motions when moving the slack dough. It doesn’t need to be perfect, and you can easily adjust the dough once it’s in its resting place. Remember, this is a rustic bread, and the variety of shapes adds some charm.
- Cool – Wait to cut the ciabatta until they’re cool for the best texture.
Sourdough ciabatta rolls are worth the effort! With a great texture and chew, you’ll be wanting to make these on repeat.
Don’t hesitate to ask me a question here, and I’ll get back to you!