How to Make No-Knead Sourdough Bread | Easy Beginners Recipe
Learn how to make no-knead sourdough bread with little hands-on time. This homemade sourdough bread is the perfect bread for beginner bakers and includes easy step-by-step instructions to keep the process simple, but also includes optional steps as your skill and time allow. Enjoy crusty, no knead sourdough bread in Dutch oven in no time!

Save This For Later!
We’ll email this post to you so it doesn’t get lost in your open tabs!
By submitting this form, you consent to receive emails from Lockrem Homestead
New to Sourdough?
If you’re new to sourdough baking, these beginner-friendly guides will help you get started with confidence. Learn how to make a Sourdough Starter from Scratch, feed and maintain it with the Complete Sourdough Starter Guide, and bake your first loaf with this Easy Sourdough Bread Recipe. Together, these guides create a solid foundation for your sourdough journey.
There’s nothing like fresh-baked bread from the oven. How could it get any better? Well, what if you could minimize the whole process? Sounds too good to be true? It’s not! No knead sourdough bread with starter may be one of the easiest breads you’ll ever make!
Accidental Discovery
I actually stumbled on this method one late summer night, early in my sourdough journey. I mixed up my dough like usual, got ready for bed, then sat down to watch a show while I waited to stretch and fold my dough.
As it turns out, I fell asleep on the couch! When I finally awoke, sleepy-eyed and half-conscious, I crawled into bed and completely forgot about the sourdough bread until the next morning. Still unaware of any memory of my sourdough, I stumbled into the kitchen half awake to pour myself a cup of coffee. Instead, I found my bread right where I left it.
Oh yeah, that’s right!
A classic case of having too many things going on at one time. Can you relate?
Not having high hopes, I shaped the sourdough loaf and baked it as usual. To my surprise, it baked beautifully.
This was years ago, but it let me know that you can get very detailed about baking sourdough bread, searching for the perfect ear, developing more sour flavor, and so forth.
But it can also be very simple because, at the end of the day, the star of the whole process is using a sourdough starter to leverage fermentation to make real bread for your family.

What is a No-Knead Bread?
The no-knead bread was made popular by Jim Lahey and his no-knead method. In the simplest terms, all of the ingredients are added to a bowl, mixed, and then left to do their thing. The process is so simple and straightforward, it hardly feels like it warrants a recipe.
His original recipe adds a tiny amount of commercial yeast to handle a long first rise, allowing the bread to develop plenty of flavor. Of course, I use my sourdough starter and adapt the recipe for a sourdough no knead bread.
What about No Knead Sourdough Bread?
The real gift of this style of bread-making method is the streamlined kneading process, or lack thereof. It’s ideal for those short on time or the beginner baker who is starting to learn the art of bread making and benefits from a simple process.
Now, it could be argued that stretch and folds aren’t kneading in the traditional sense. Afterall, you’re not standing at the counter wrestling a ball of dough until it becomes elastic. But if that’s how we’re defining a no-knead sourdough, then most sourdough bread recipes would be considered no-knead recipes. To make the differentiation clear, this recipe doesn’t use any type of kneading, including stretch and folds, after the sourdough starter is added.
Here’s the question we all ask. Why does it work? How can you make a loaf of bread without kneading? Why wrangling the bread dough?
No one wants to go through the effort of making no-knead bread just to have it flop.
It’s important to know that without kneading the dough, gluten still forms, just not to the same degree as a traditional kneaded bread.

What does this mean? You can create sourdough bread with minimal effort.
But what’s the catch? Surely, there’s got to be a downside. Keep reading to understand a bit of the science behind why it works and what to expect.
How is a No Knead Bread Recipe Different Than a Traditional Sourdough Recipe?
Can you make a no knead bread recipe and have it turn out just as good as one that goes through a series of stretch and folds? If so, then why bother with the stretch and folds?
Traditional sourdough breads go through a process of strengthening the dough to develop its gluten content. Whether it’s doing a series of stretches and folds or time in the mixer, the aim is all the same: build structure, aka gluten.
Here’s a bit of food science to understand. Once water comes into contact with flour, the two proteins within flour, glutenin and gliadin, link together and form gluten. Different flours contain varying levels of proteins. Thus, the higher the protein content, the stronger the flour. This is why bread flour, and its higher protein content, is preferred over all-purpose flour in this type of bread. This post goes into more depth about the flour difference.
A strong gluten network within the dough can handle the dough as it grows and expands, holding in the carbon dioxide gas released from the sourdough starter or yeast.
Compare the Two
Below are two loaves of sourdough bread I baked at the same time. The loaf on the left is made traditionally, with a series of stretch and folds. The loaf on the right is made at the same time with the same recipe, but without the stretch and fold process. The dough on the left has a smooth, elastic texture, showing signs of gluten development. While the no knead dough on the right still has a shaggy texture.

The differences remain after baking. From the outside, the difference between the two is minimal, as seen in the photo below.
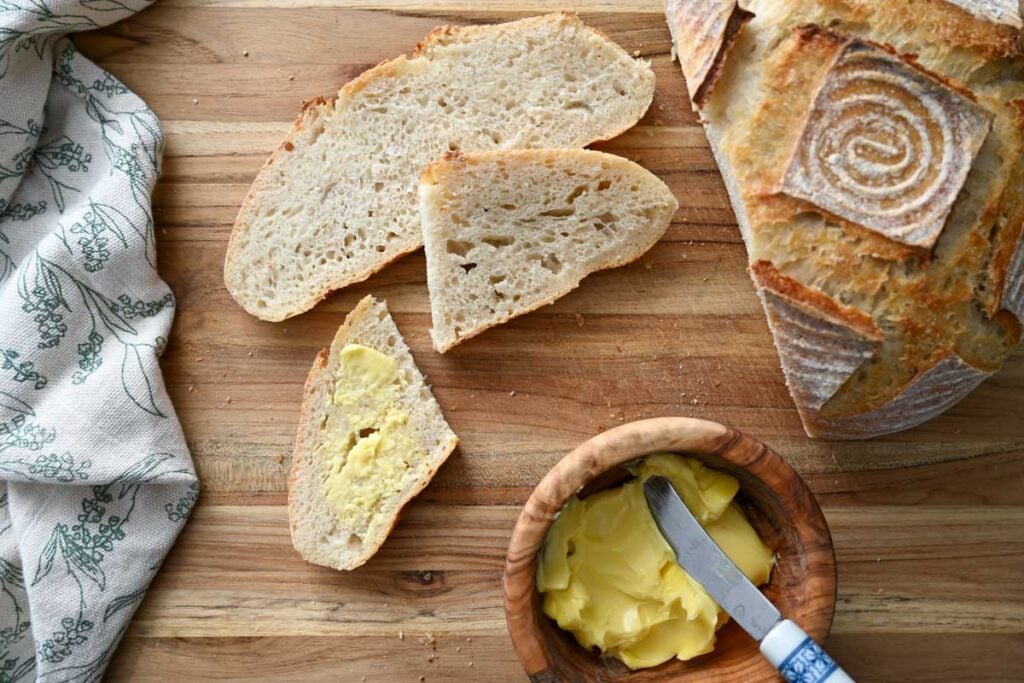
However, the real difference is evident once the loaves are cut. The traditional loaf on the left has an open structure and taller rise, while the no knead loaf on the right is more compact. Since the gluten wasn’t developed to the same degree in the no knead bread, it’s doesn’t have the strength to hold the carbon dioxide, resulting in a tighter crumb, smaller rise, and less oven spring.


Why You’ll Love No Knead Bread
A no knead sourdough bread comes in handy when you’re short on time or new to baking bread. However, it’s good to temper your expectations. My hope in showing you the differences is to help you understand what you’ll get in a no knead bread, but also what you won’t get.
- Great Tasting Bread – Homemade bread is far better than anything you buy in the stores. Not only is it fresh, but it’s made without preservatives. By making bread at home, you have full control over the quality of the ingredients.
- Simple Process – Bypassing the kneading process saves time and the need to attend to the dough after its initial mix. This comes in handy if you want homemade bread, but have limited time.
- Redeem – If life gets in the way and you forget the stretch and fold steps, it’s not too late. Redeem it with the no knead sourdough method for great-tasting bread.
If you’re in the early stages of learning how to make sourdough bread, start with an easy sourdough bread recipe and bake it exclusively to learn the process. As you understand more, change one variable at a time, like changing the hydration or type of flour, but not both at the same time, or it becomes hard to pinpoint the exact cause of any changes. Note the changes you make and their results.
How to Make No Knead Sourdough Bread
Levain
Mix active sourdough starter, flour and water in a clean container. Cover, set in a warm place, and allow to come to its peak.
Alternatively, substitute 150 g ripe sourdough starter in place of the levain if your starter has been fed recently and is well established.
Autolyse
This is an optional step, but it will help give the dough a chance to hydrate, resulting in a taller loaf. Read more about autolyse in sourdough. If you choose to skip it, continue to the ‘Mix the Dough No Autolyse’ step.
Add the bread flour and water in a large mixing bowl, and mix with a Danish dough whisk until fully combined, about 30-45 seconds. Cover the bowl with a plate or a piece of plastic wrap and let it rest at room temperature for 30 minutes.
Mix the Dough
Autolyse Option: Add all of the levain and salt to the bowl and incorporate the autolyse dough (water/flour mixture) with the levain (active sourdough starter) and salt. I find that squeezing the dough with my hand as I turn the dough helps incorporate the levain.


No Autolyse Option: Add all the levain, water, and salt to a large bowl. Mix with a fork or Danish dough whisk to break up the starter. Then, add the bread flour to the bowl and stir, fully combining the flour into the liquid.

Tip: Since this is the only time you mix the dough, it’s important to fully work the levain into the autolyse dough. Be sure to incorporate all of the flour, scraping the sides of the bowl as needed.
Bulk Fermentation
Cover the bowl with a plate, plastic wrap, or clean towel, and place it in a warm, draft-free place in the kitchen. Let the dough bulk ferment until it doubles in size. It took 4 hours in my 72°F/22°C kitchen.
During the cold winter months, I have a deep kitchen drawer above a heating vent where I bulk ferment and proof my bread doughs. Another option is to place the bowl in the oven with the light on or use a warming mat.


Shape
Use a dough scraper to turn out the dough onto a lightly floured work surface. Fold the top and bottom of the dough towards the middle of the dough.


Next, fold each side to the center. Turn the dough over so it’s seam side down.
Using a bench scraper, slide it under the far side of the dough and gently pull the dough towards yourself. This creates a bit of surface tension. Reposition the bench scraper and repeat until the dough forms a ball shape. Work gently so it doesn’t knock out all of the air bubbles.


Proof
Lift the dough using a bench scraper, and place it seam side up into a proofing basket dusted with a bit of rice flour. Pinch the seams together.
Cold Proof Option: Place the proofing basket in a plastic bag and refrigerate for 8-12 hours. I like to do this step overnight. This second rise, also known as a cold proof, develops the flavors and creates a delicious bread with plenty of character and deeper classic sour flavors.
However, if you plan to bake right away, cover the dough with a clean cloth and proof the bread dough at room temperature for 1-2 hours before baking. The exact time depends on the conditions. The dough is done proofing when it’s light, airy, and springs back halfway when gently poked with your finger.
Heat oven and Dutch oven to 450°F/232°C as the dough proofs.
No banneton basket? No worries. Place the shaped dough seam side down onto a piece of parchment paper, and then lift it into a bowl. Cover and let proof for an hour or two, or place it in the fridge for an optional cold proof.
Bake
The next morning, preheat the Dutch oven to 450°F/232°C for 30 minutes.
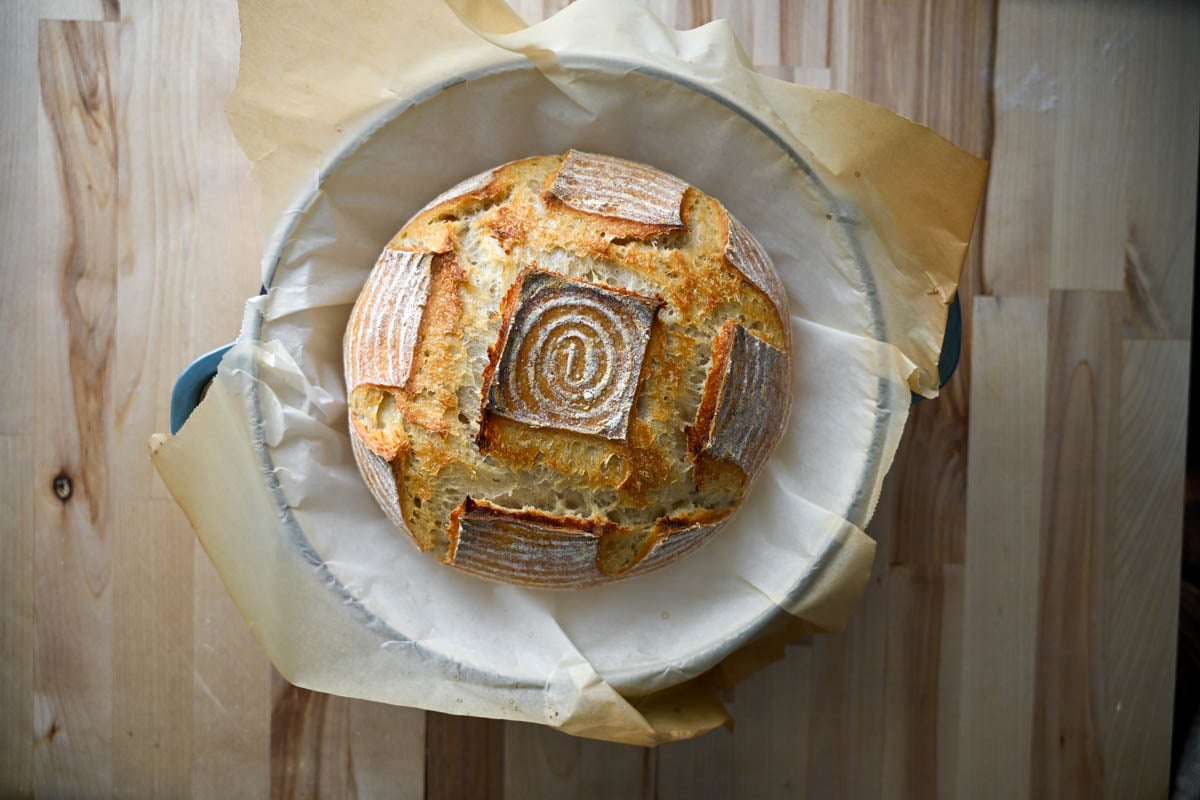
Remove the banneton from the fridge and gently flip the dough over onto a piece of parchment paper. Use a lame razor blade or a sharp knife and score the top of the bread dough 1/2 inch deep. A swift, decisive cut is best for a clean score.
Lift the dough using the parchment paper as handles into the preheated Dutch oven. Place the lid on and bake for 30 minutes. Then remove the lid, and bake for an additional 10-15 minutes. The bread is done when you tap the bottom of the bread, and it sounds hollow, or when a digital thermometer inserted into the center of the bread reads 200°F/94°C.

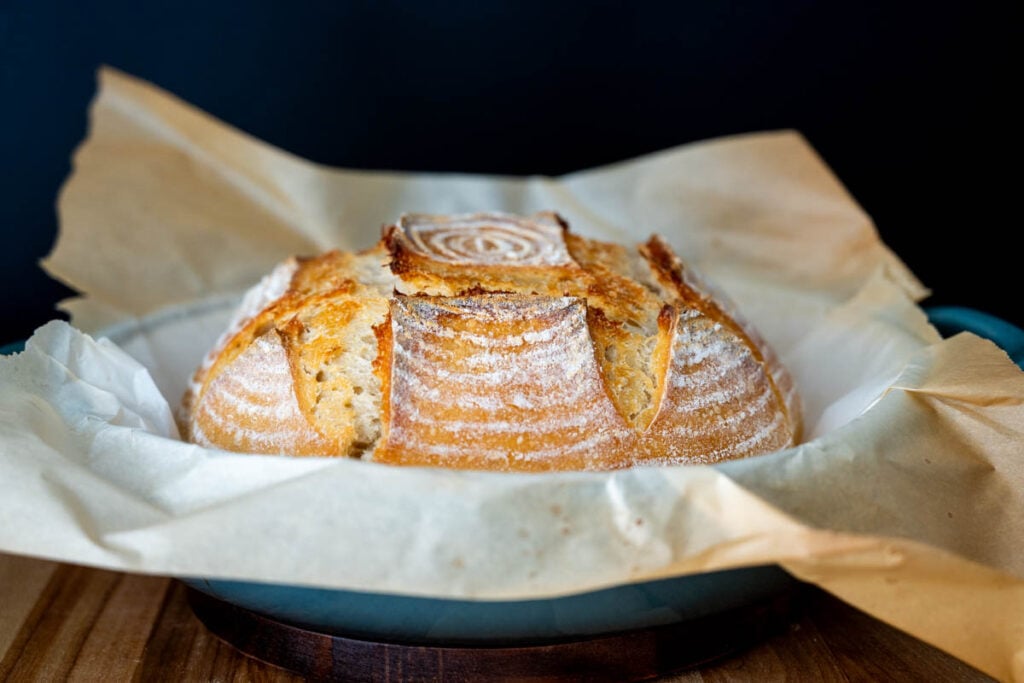
Remove the bread from the Dutch oven and place it on a cooling rack. Allow the bread to cool completely before slicing for the best texture.
Storage
Allow the bread to cool completely before placing it into an airtight container. Store at room temperature up to 3 days. For longer storage, slice the bread, place it in a freezer bag, and freeze it up to 3 months. Remove bread slices as you need them, thaw, and enjoy.
No Knead Artisan Sourdough Bread Recipe Tips
- A digital scale is an invaluable tool in your kitchen. They’re inexpensive and help create consistent bakes because the ingredient amounts remain the same. The challenge to measuring by volume is the wide variety of ways of adding the ingredient to the measuring cup, which changes the density of certain ingredients, like brown sugar and flour. In the world of sourdough, with so many other variables like temperature and humidity that affect each bake, keeping the ingredient amounts consistent is an easy way to minimize the varying factors as you learn the baking process.
- The temperature of your kitchen affects dough rise times. Cooler temperatures slow down the fermentation, while warmer ones speed it up. Adjust the recipe according to your environment.
- Take the time to preheat your Dutch oven. The combination of a hot Dutch oven and the cold dough helps create good oven spring, for a taller rise in the dough as it bakes.
Key Takeaways
- Use the no knead sourdough bread recipe with starter when you have limited time, but still want freshly baked homemade sourdough bread.
- Sourdough no knead bread has a smaller rise, but still delivers great flavor. In contrast, building the gluten structure through a series of stretches and folds results in a taller bread loaf. For a middle ground between a true no-knead bread recipe and traditional methods, try an almost no knead sourdough bread recipe and autolyse the flour and water first for better structure and rise.
No Knead Bread Recipe Sample Baking Timeline
| Day 1: 9:00 am | Mix the levain |
| 12:00 pm | Autolyse |
| 1:00 pm | Mix the Dough |
| 1:15 pm | Bulk Ferment |
| 6:00 pm | Shape the dough and place into a banneton |
| 6:00 pm – 8:00 am | Cold Proof |
| Day 2: 8:00 am | Preheat Dutch oven |
| 8:30 am | Score and bake |
I’d love to hear from you! If you made this No-Knead Sourdough Bread recipe and loved it, I would love it if you gave it 5 stars! Happy Baking!

No-Knead Sourdough Bread
Want to Save This Recipe?
Enter your email & I’ll send it to your inbox. Plus, get great new recipes from me every week!
By submitting this form, you consent to receive emails from Lockrem Homestead
Equipment
- kitchen scale
- measuring spoons
- Dutch Oven
- large mixing bowl
- Danish dough whisk
- parchment paper or bread sling
- bread lame or shape knife
Ingredients
Levain
- 50 g active sourdough starter
- 50 g water
- 50 g all-purpose flour
No Knead Bread
- all levain or 150 g active sourdough starter
- 350 g water 1½ cups
- 2 tsp sea salt
- 500 g bread flour 4 cups
Instructions
Levain
- Mix active sourdough starter, flour and water in a clean container. Cover, set in a warm place, and allow to come to its peak.50 g active sourdough starter, 50 g water, 50 g all-purpose flour
- Alternatively, substitute 150 g ripe sourdough starter in place of the levain if your starter has been fed recently and is well established.
Autolyse
- This is an optional step, but it will help give the dough a chance to hydrate, resulting in a taller loaf. Read more about autolyse in sourdough.
- Add the bread flour and water in a large mixing bowl, and mix with a Danish dough whisk until fully combined, about 30-45 seconds. Cover the bowl with a plate or a piece of plastic wrap and let it rest at room temperature for 30 minutes.500 g bread flour 350 g water
Mix the Dough
- Autolyse Option: Add all of the levain and salt to the bowl and incorporate the autolyse mixture (flour and water) with the levain (active sourdough starter) and salt. I find that squeezing the dough with my hand as I turn the dough helps incorporate the levain.all levain, 2 tsp sea salt
- No Autolyse Option: Add all the levain, water, and salt to a large bowl. Mix with a fork or Danish dough whisk to break up the starter. Then, add the bread flour to the bowl and stir, fully combining the flour into the liquid.all levain, 350 g water, 2 tsp sea salt, 500 g bread flour
- Since this is the only time the dough is going to be mixed, it's important to fully work the levain into the autolysed dough. Be sure all of the flour is incorporated, scraping the sides of the bowl as needed.
Bulk Fermentation
- Cover the bowl and place it in a warm, draft-free place in the kitchen. Let the dough bulk ferment until it doubles in size. It took 4 hours in my 72°F/22°C kitchen. During the cold winter months, I have a deep kitchen drawer above a heating vent where I bulk ferment and proof my bread doughs. The oven with the light on makes an excellent warm spot.
Shape
- Use a dough scraper to turn out the dough onto a lightly floured work surface. Shape the dough using the envelope folds.
- Fold the top and bottom of the dough towards the middle of the dough. Next, fold each side to the center. Turn the dough over so it’s seam side down.
- Using a bench scraper, slide it under the far side of the dough and gently pull the dough towards yourself. This creates a bit of surface tension. Reposition the bench scraper and repeat until the dough forms a ball shape. Work gently so it doesn't knock out all of the air bubbles.
Proof
- Lift the dough using a bench scraper, and place it seam side up into a proofing basket dusted with a bit of rice flour.
- Cold Proof: Place the proofing basket in a plastic bag and refrigerate for 8-12 hours. I like to do this step overnight. This second rise, also known as a cold proof, develops the flavors and creates a delicious bread with plenty of character and deeper classic sour flavors.
- However, if you plan to bake right away, cover the dough with a clean cloth and proof the bread dough at room temperature for 1-2 hours before baking. The exact time depends on the conditions. The dough is done proofing when it's light, airy, and springs back halfway when you poke it gently with your finger.
- Heat oven and Dutch oven to 450°F/232°C as the dough proofs.
Bake
- The next morning, preheat the Dutch oven to 450°F/232°C for 30 minutes.
- Remove the banneton from the fridge and gently flip the dough over onto a piece of parchment paper. Use a lame razor blade or a sharp knife and score the top of the bread dough 1/2 inch deep. A swift, decisive cut is best for a clean score.
- Lift the dough using the parchment paper as handles into the preheated Dutch oven. Place the lid on and bake for 30 minutes. Then remove the lid, and bake for an additional 10-15 minutes. The bread is done when you tap the bottom of the bread, and it sounds hollow, or when a digital thermometer inserted into the center of the bread reads 200°F/94°C.
- Remove the bread from the Dutch oven and place it on a cooling rack. Allow the bread to cool completely before slicing for the best texture.
Storage
- Allow the bread to cool completely before placing it into an airtight container. Store at room temperature up to 3 days. For longer storage, slice the bread, place it in a freezer bag, and freeze it up to 3 months. Remove bread slices as you need them, thaw, and enjoy.
I love that the process of making sourdough can be as simple or as complicated as you’d like to make it. This recipe is living proof! I look forward to hearing your thoughts, questions, and comments below!
I’m a beginner with sourdough and this is the second recipe I’ ve tried, I think I’ve found exactly what I was hoping for! It’s delicious and so much easier to make. I really appreciate the thorough instructions, only one suggestion about using the parchment paper. I haven’t used it very often but I like to use the unbleached parchment paper, I was being cautious so I read the box and it said to not go above 420 degrees in the oven. I was using an old, heavy iron Dutch oven in a gas oven so I was hoping it would turn out ok at 420 degrees for a total of 45 minutes. I checked it with a thermometer and it was well over but turned out perfect! One more thing, do you have a similar recipe that could use the dough cycle on a bread-maker? Thanks!
Jackie, I’m so glad you found a sourdough recipe you resonate with! Unfortunately, I don’t have any recipes using a bread maker, but there are plenty of other simple sourdough bread recipes, including discard recipes. I hope you check them out! I use this unbleached parchment paper as it has a temperature rating up to 450°F.