Easy Sourdough Bread Recipe
This easy sourdough bread recipe shows how to make homemade bread with easy step-by-step instructions and pictures for the beginner sourdough baker.
Have you wanted to learn how to make sourdough but felt intimidated by the process? Or have you always dreamt of making loaves of sourdough bread for your family, warm from the oven, but just felt like it was too great of a commitment?
“My favorite recipe so far! Comes out great every time” -Shelly
Save This For Later!
We’ll email this post to you so it doesn’t get lost in your open tabs!
By submitting this form, you consent to receive emails from Lockrem Homestead
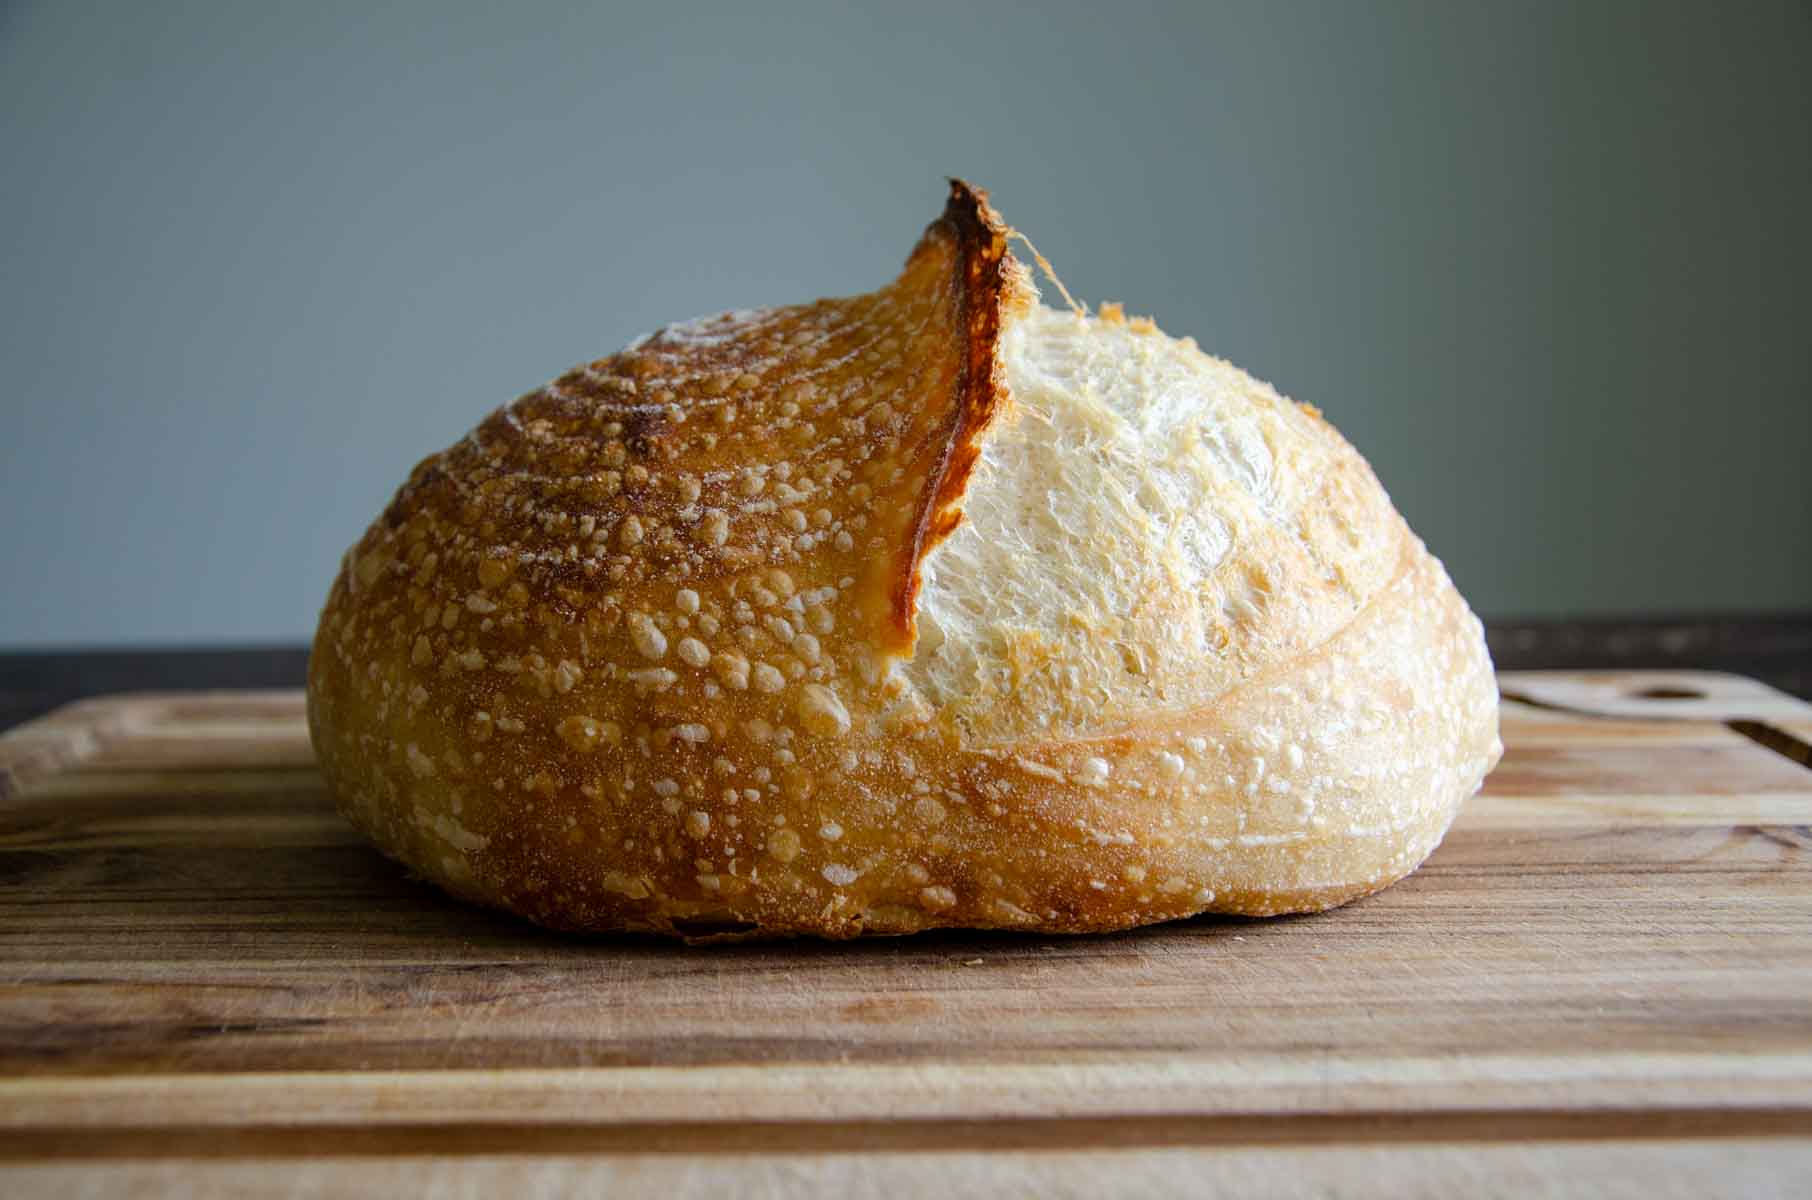
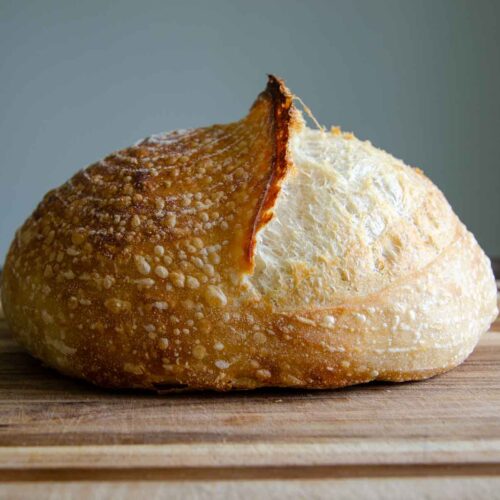
Join other beginner bakers and learn how to make the easy sourdough recipe I use to feed my family. The bread has a great crust, lovely, airy crumb, and delicious flavor. Most importantly, this easy recipe is simple enough to weave into my full schedule to make homemade bread a reality.
I love that my family is getting one less source of preservatives. This homemade sourdough bread is made with simple ingredients of flour, salt, and water. Just like it has been throughout much of history.
What is Sourdough?
What’s all the hype about with sourdough? If you rub shoulders with certain groups of people, you may have overheard sourdough chitter chatter, people talking about hydration, or swapping starters. What does it all mean?
Sourdough bread is leavened using wild yeasts and bacteria (lactic acid bacteria) that have been captured from the environment. Left alone to ferment, the bacteria create carbon dioxide, which gives the bread its rise. In addition, this long fermentation gives the bread its delicious trademark tang.
Like many cultured foods, the sourdough starter acts as “the mother” and needs regular maintenance. A portion of the starter is added to the dough, inoculating it with the yeast and bacteria. The remaining starter is kept and maintained for the next time you want to bake with it.
The starter left at room temperature digests the flour at a faster pace and needs to be fed daily, sometimes twice a day. If kept in the refrigerator, it can be maintained with weekly feedings.
This post assumes you have an established starter already, whether you made it yourself, bought one, or were gifted one from a friend. However, if you need a sourdough starter, learn how to Make a Sourdough Starter from Scratch.

Benefits of Sourdough
What sets sourdough apart from bread made with commercial yeast? The benefits are due to its unique preparation method. The long fermentation process increases the acidic conditions and helps to produce enzymes that partially break down the proteins, including gluten. While not eliminating the gluten, the fermentation lowers the overall gluten and also breaks down the phytic acid to help make the bread easier to digest.
Easy Sourdough Bread Ingredients
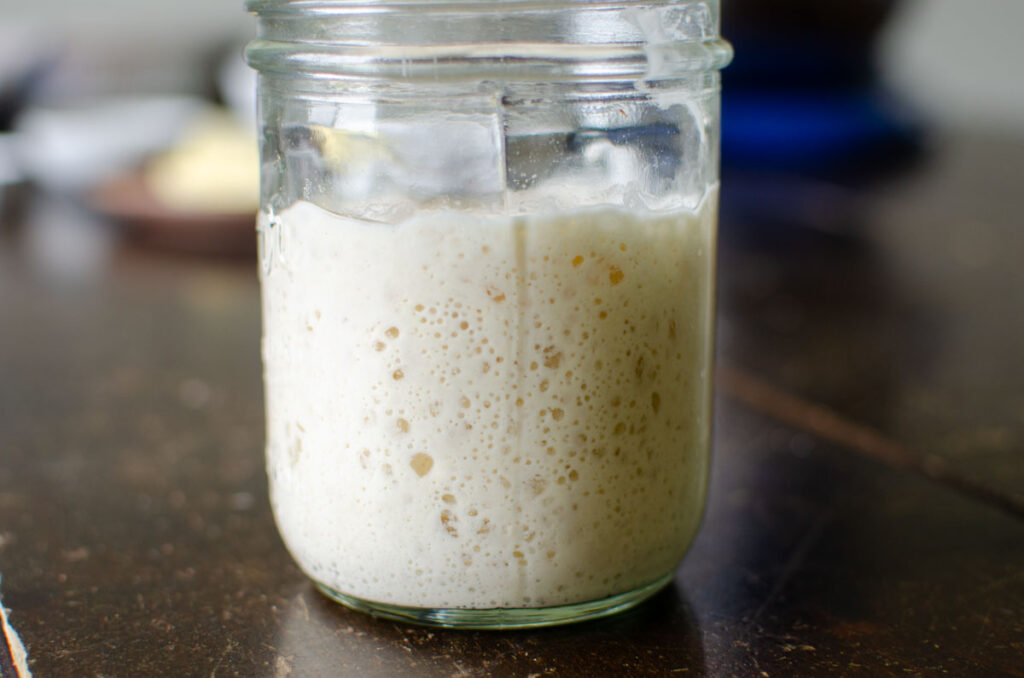
- Sourdough starter – Use a sourdough starter that’s been fed recently and shows signs of life. An active sourdough starter has plenty of bubbles, doubled in size, and a pleasant yeasty aroma.
- Flour – Bread flour has a higher protein content that lends to a taller rise and chewier crust. However, don’t let not having bread flour stop you. I have baked plenty of sourdough loaves using all-purpose flour with beautiful results.
- Water
- Salt – Salt flavors the bread, but also plays an important role in gluten development.
Tools You’ll Need for Sourdough
- Bowl
- Kitchen scale
- Danish dough whisk
- Lame
- 9″ Banneton basket
- Parchment paper or dough sling
- 7 qt Dutch oven
How to Make Sourdough Bread Instructions
The beautiful thing about this recipe is that its so flexible. I’ll admit, when I first started to make sourdough, the flexibility was frustrating because I didn’t understand the process. I wanted a predictable schedule with some hard and fast guidelines. However, the best way to gain a better understanding is to simply do. With each experience, you gain new insight. With time and practice, baking sourdough bread becomes second nature.
Feed the Starter | Mix the Levain
This sourdough bread recipe calls for a levain mixed the night before you mix the dough at a 1:1:1 ratio.
Combine equal parts active starter, warm water, and all-purpose flour in a small bowl, 42 g each. Cover and let it sit at room temperature for 8 hours.
The levain is ready when it shows signs of activity: doubles in size, has lots of bubbles, and has a slightly sour aroma.

Do you have to use a levain in this recipe?
No, but if you have a well-maintained and frequently refreshed starter, you can substitute 125g (½ cup) of active sourdough starter for the levain in the recipe.
Autolyse
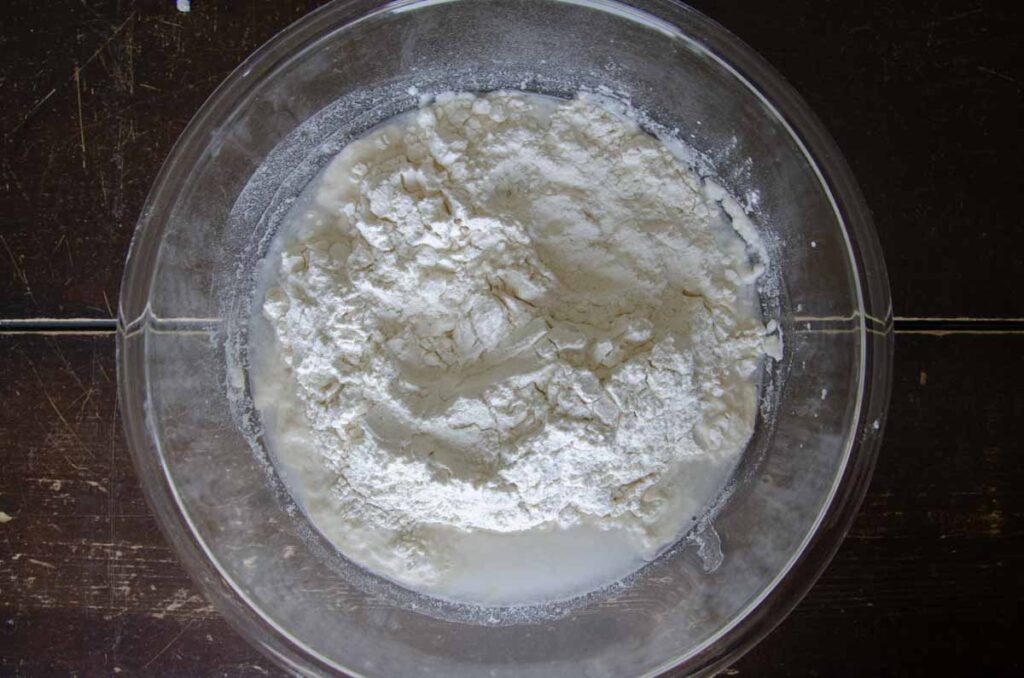
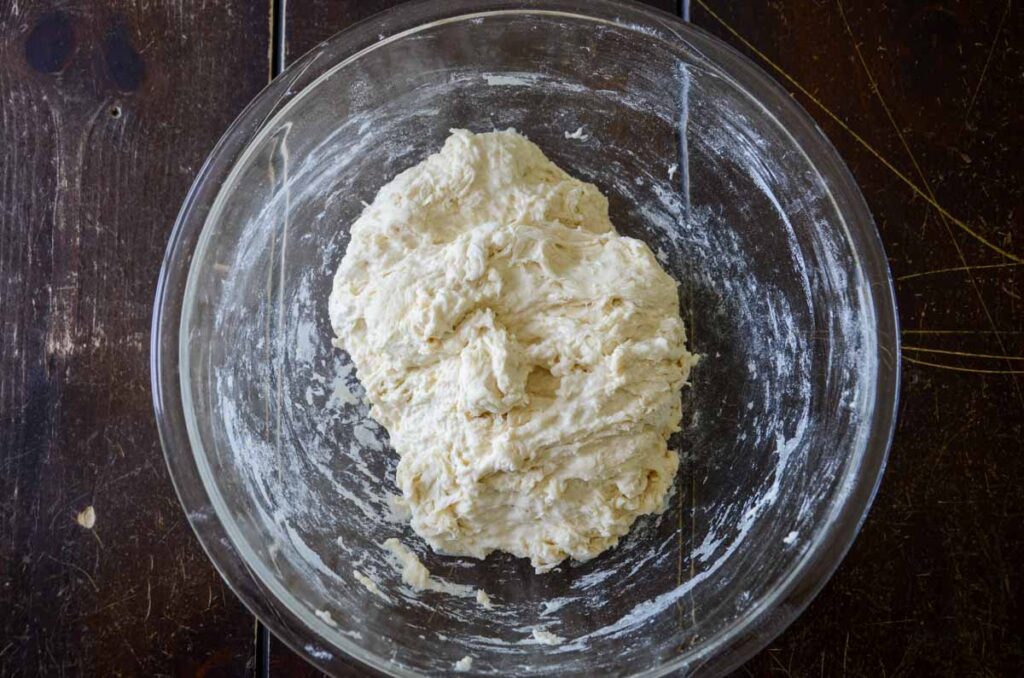
Add 325 g (1 ⅓ cups) water and 500 g (4 cups) bread flour to a large bowl and mix with a Danish dough whisk until a shaggy dough forms and all of the flour is incorporated. I found that it helped to use my hands to work the final bits of flour into the dough.
Mixing the Dough
Add 10 g (2 tsp) salt into the bowl over the dough, in addition to all of the ripe levain, and mix until fully combined. Cover the bowl and let it rest for 30 minutes.
I find that my hands are the best tool for this job. Squeeze and turn the dough until the levain and liquid are adequately distributed throughout the dough. At this point, the dough can look a bit stringy and not fully cohesive; this is ok.


Stretch and Folds | Strengthening the Gluten
Instead of kneading the dough like in traditional bread making, artisan sourdough bread dough is strengthened with a series of stretch and folds.
Grab the edge of the dough and lift it straight up before folding it over onto itself. Turn the bowl a quarter turn, and repeat, working your way around the sides of the bowl. Continue to stretch and fold the dough roughly 8-12 times, or until the dough becomes resistant. This completes one set of stretch and folds. Cover the bowl and let the dough rest for 30 minutes.


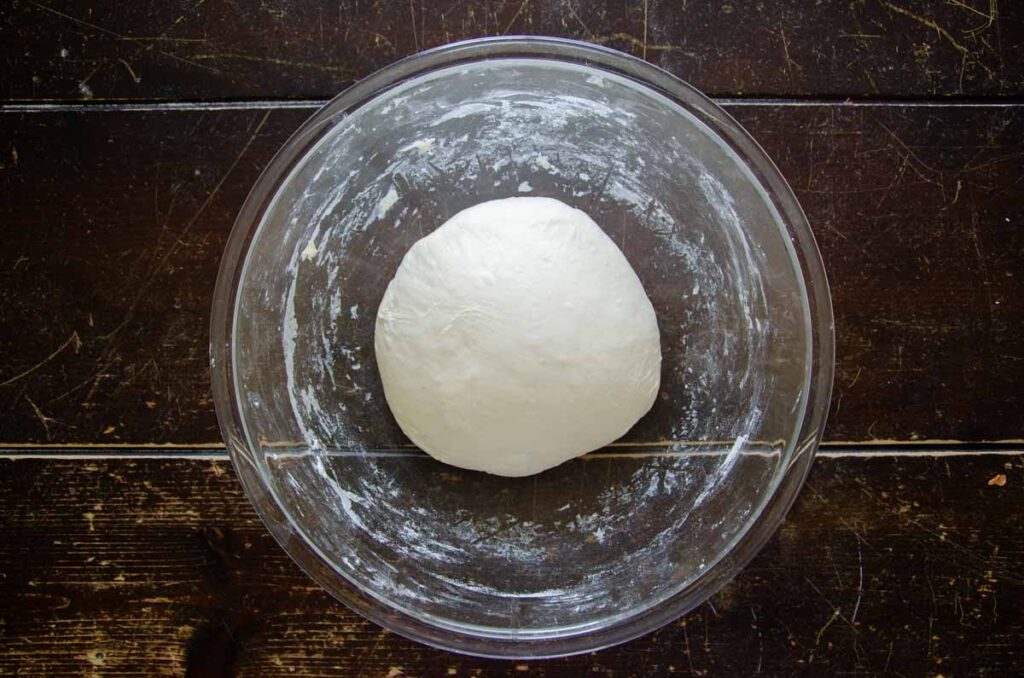
Continue stretching and folding the dough for a total of 3 sets with 30-minute intervals. By the final set of stretch and folds, the dough is smooth and stretchy.


Bulk Fermentation
After the final set of stretch and folds, cover the bowl and let it bulk ferment at room temperature.
The dough is done fermenting when the dough has risen by 50-75%, plenty of air bubbles just beneath the surface, and the edge of the dough where it meets the bowl domes down slightly.
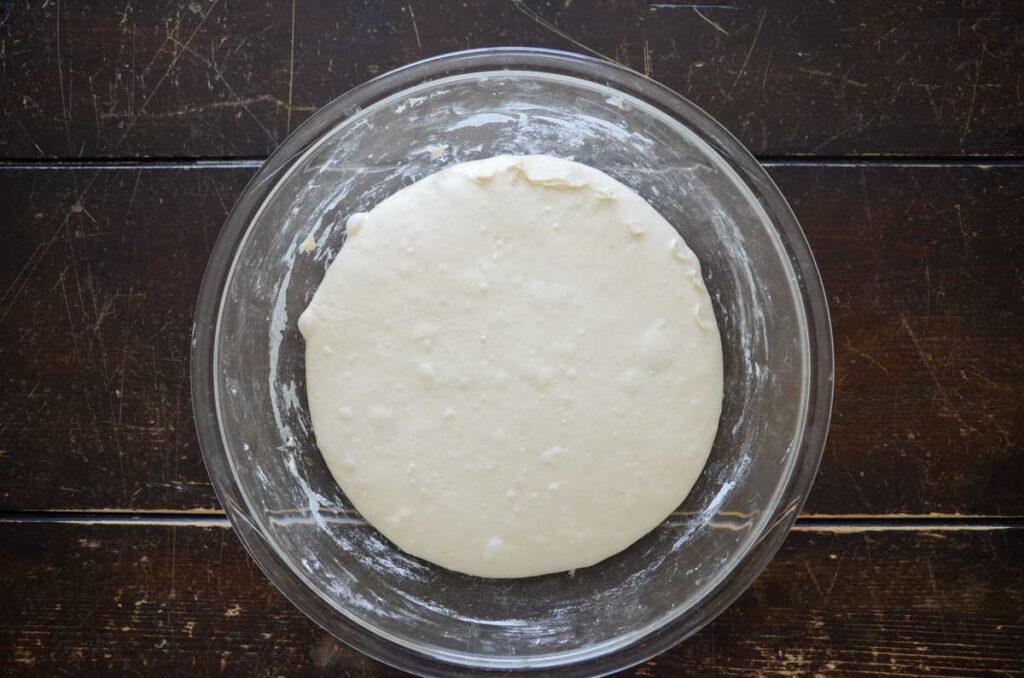
Shape the Dough
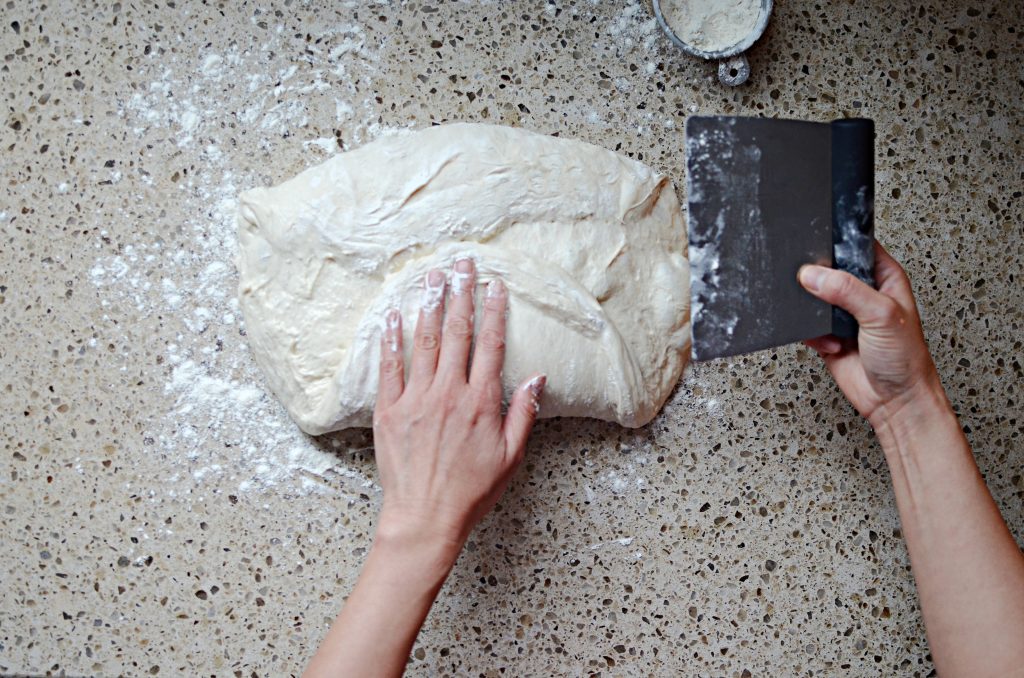
On a lightly floured work surface, scrape the dough out of the bowl with a dough scraper or rubber spatula and gently stretch roughly into a circle. With lightly dusted fingers or a bench scraper, lift the top of the dough and fold down to the middle of the dough.
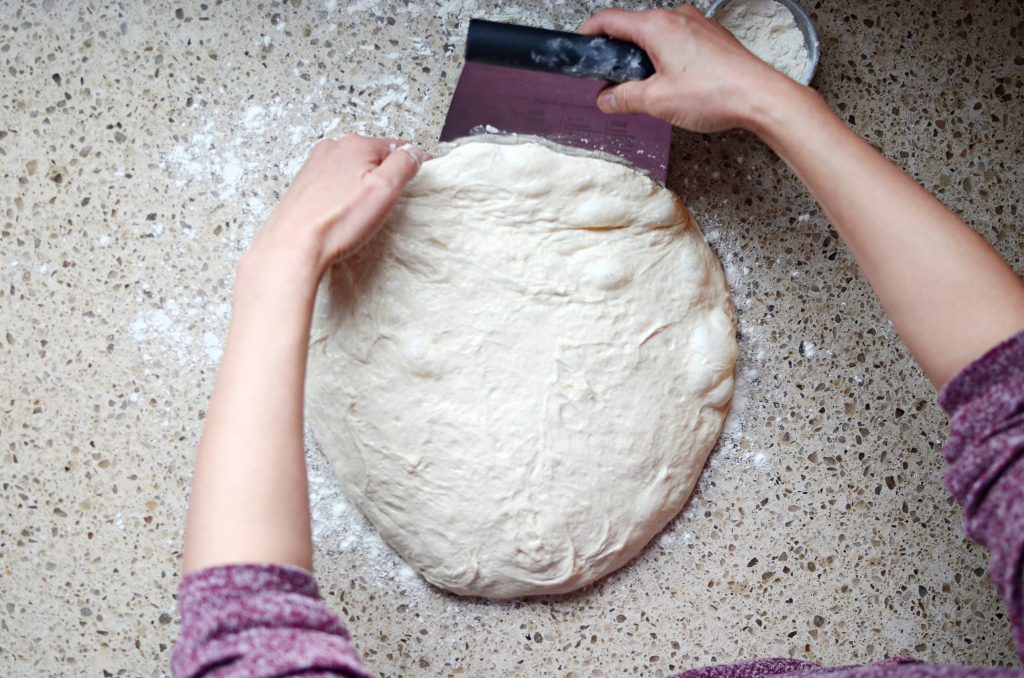

Next, grab the bottom of the dough and fold up to the middle of the dough. Repeat for each side of the dough.
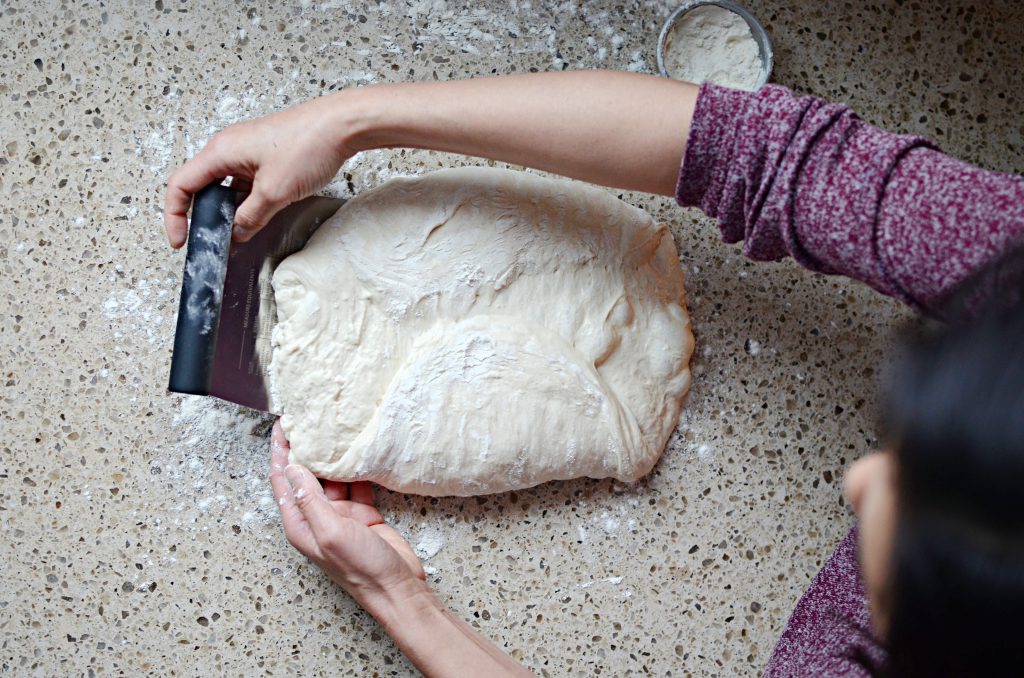
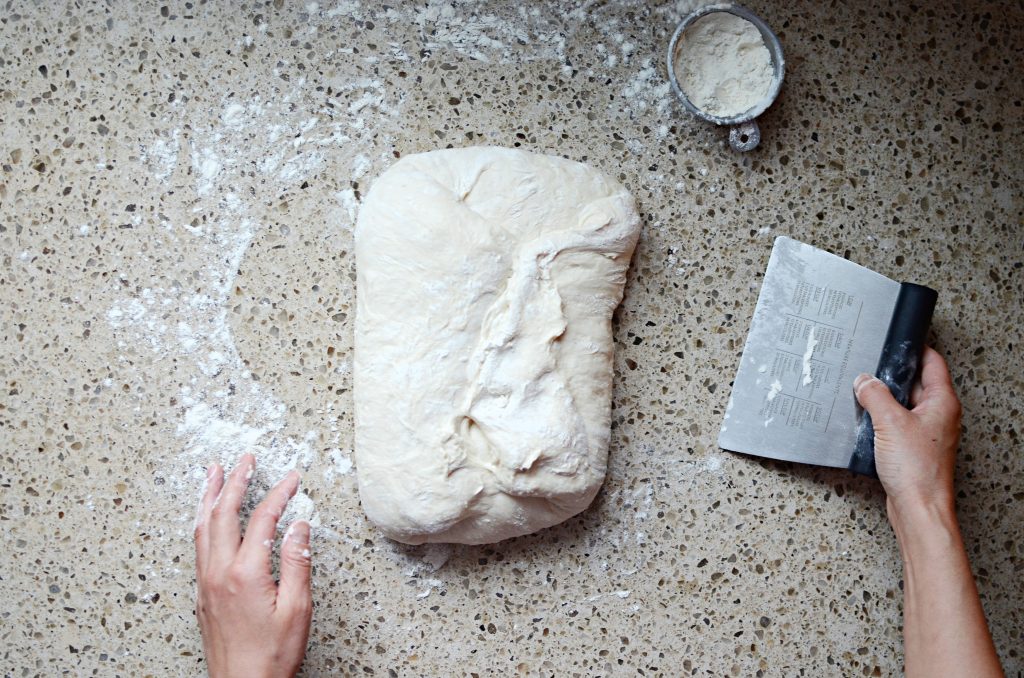
After all 4 sides of the dough are folded over to meet in the middle, using the bench scraper, gently flip the dough over so that the seams of the dough are on the bottom. To shape the loaf into a boule, using both hands, cup the loaf on the side furthest from you.
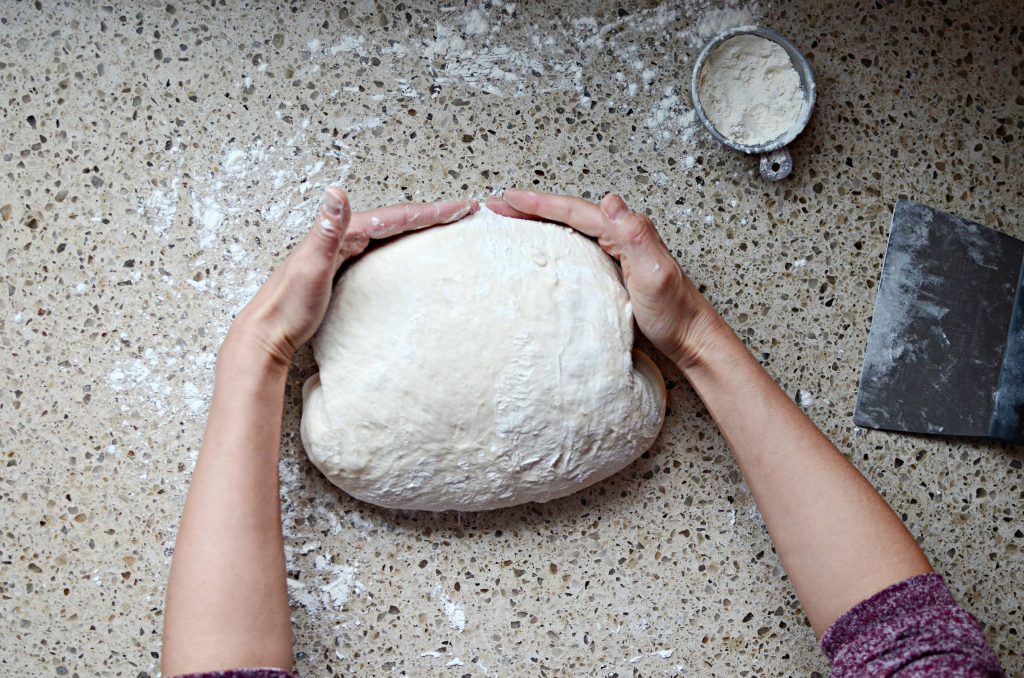
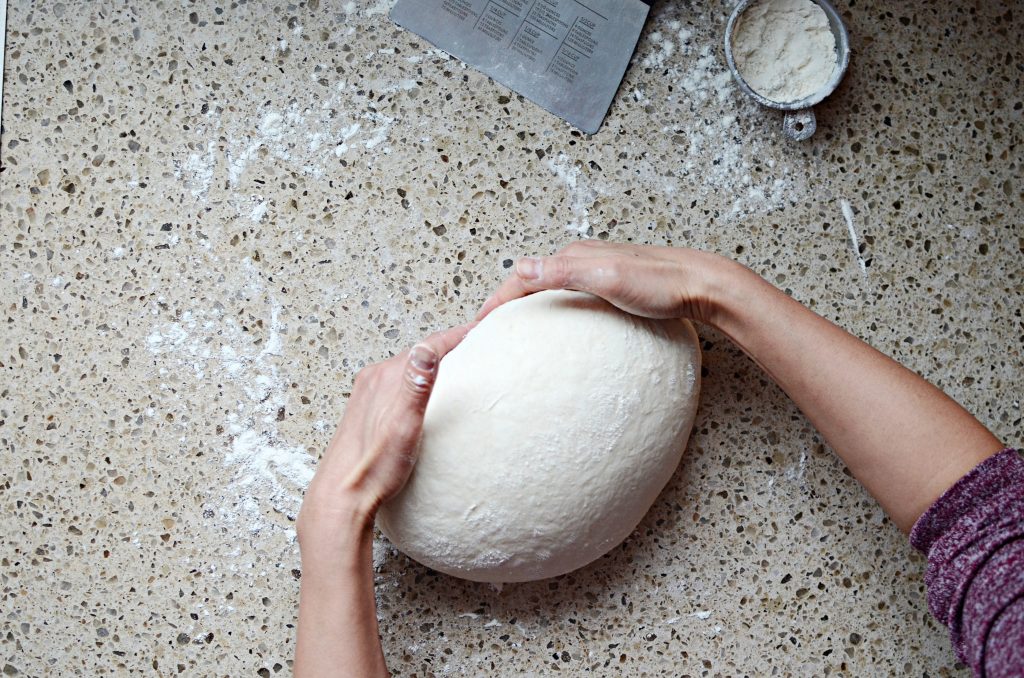
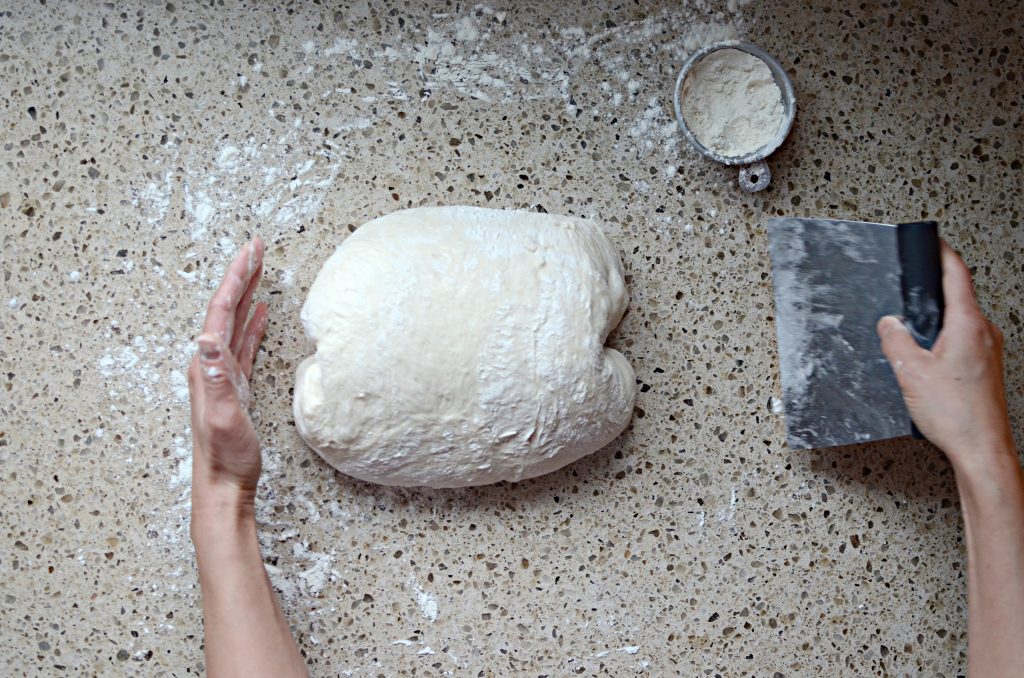
Gently drag the dough towards you with your hands, tuck the loaf under with the edge of your hands. Rotate the loaf a quarter turn and do the same process. The seam should continue to remain on the bottom of the loaf. This will create tension on the top of your loaf and help with oven spring, creating a taller baked loaf.
Cold Proof
Prep the banneton by dusting it lightly with rice flour.
Using the bench scraper, lift the dough into the banneton with the seam side up. Place the banneton into a plastic bag and refrigerate for 8- 24 hours.
If you prefer to bake the sourdough right away, skip the cold proof and instead, let it proof in the banneton at room temperature. Cover and let the dough rise for 2 -3 hours or until it’s puffy and jiggly. Preheat the oven and bake as directed.
The Poke Test
Another way to check the dough to see if it’s ready to bake is using the poke test. Using a floured finger, poke into the dough about an inch. One of three things will happen.
- The dough springs back all the way and fills the hole immediately. If this happens, then it needs more time to ferment.
- Second, the dough springs back partially, indicating it is ready to bake.
- If the dough doesn’t spring back at all, it is overproofed and will not rise much when baked. All is not lost though! The bread will still have a beautiful flavor, but will just be a bit denser. You can turn over-proofed bread into delicious croutons, breadcrumbs, or flatbread. I always enjoyed freshly baked bread, regardless of how dense it was!
Once you get into a rhythm, you will know when the dough is ready by how it looks.
What if You Don’t Have a Banneton?
While its nice to have, you don’t need a fancy proofing basket to bake good bread. After the dough is shaped, place the dough onto a piece of parchment paper with the seam side down. Then, using the parchment paper as handles, lift the dough back into the bowl. Cover the bowl and refrigerate.
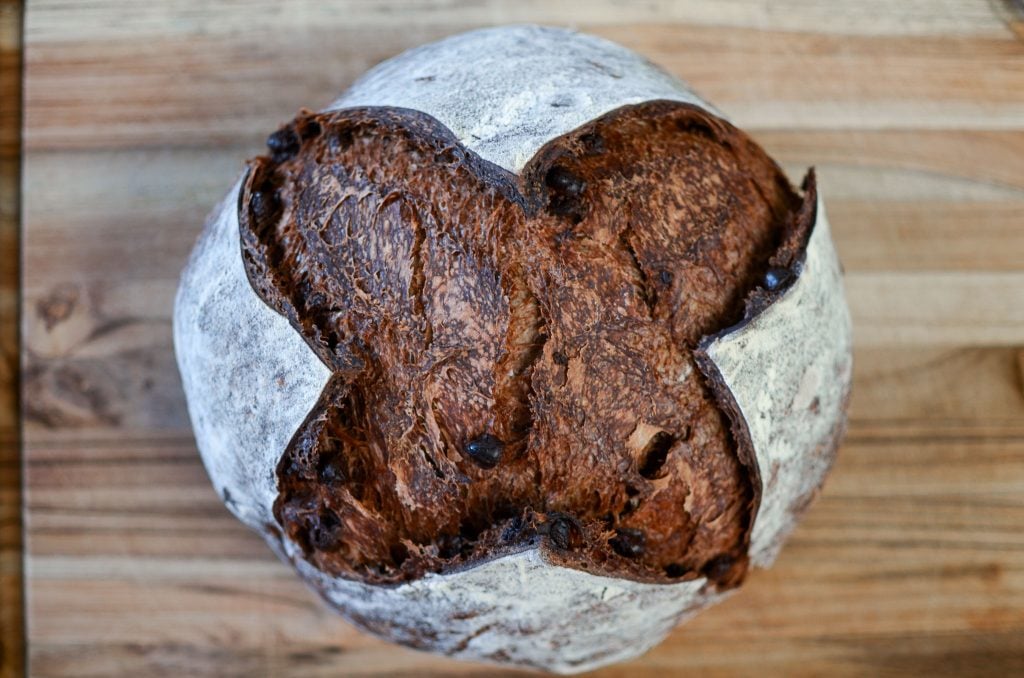
Score and Bake
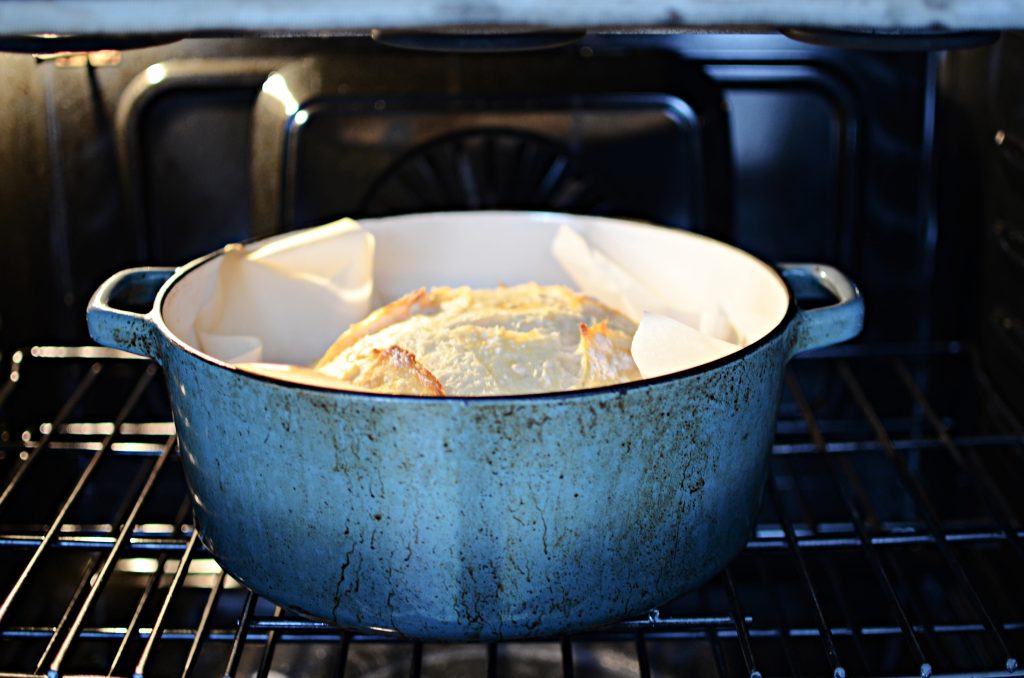
The next day, preheat the Dutch oven in the middle of the oven to 450°F/232°C for 30 minutes.
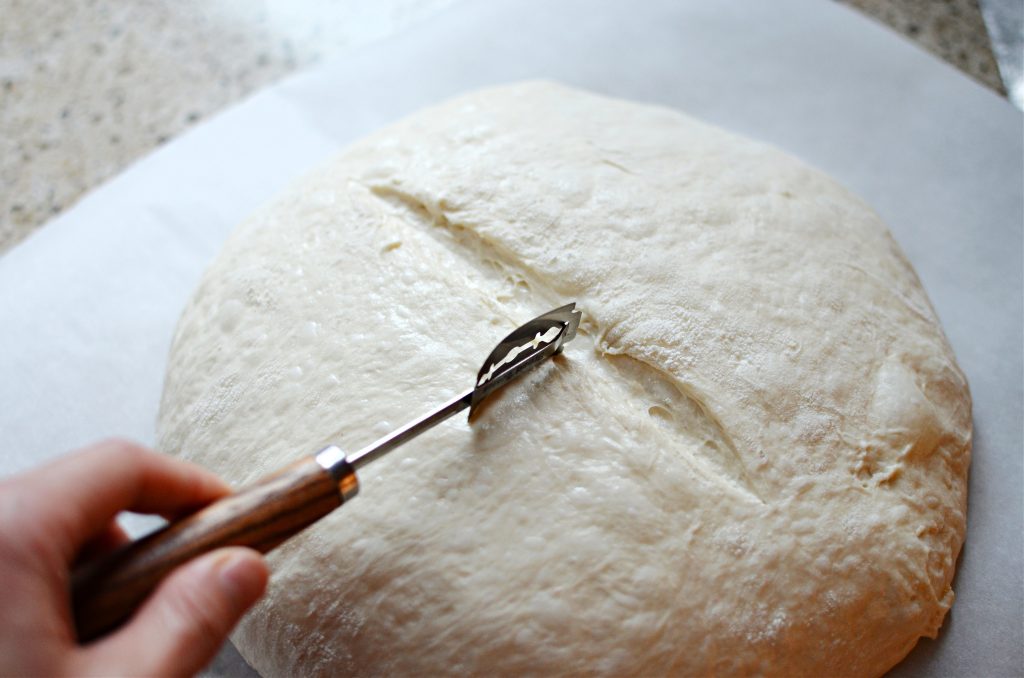
When the oven is done preheating remove the dough from the fridge. Score the top of the sourdough loaf using a lame, razor blade, or sharp knife at a 45° angle, 1 inch deep.
Remove the Dutch oven from the oven and carefully lift the dough into the hot Dutch oven. Quickly replace the lid and the Dutch oven in the oven.
Bake for 35 minutes with the lid on. Remove the lid and bake for an additional 10 minutes.
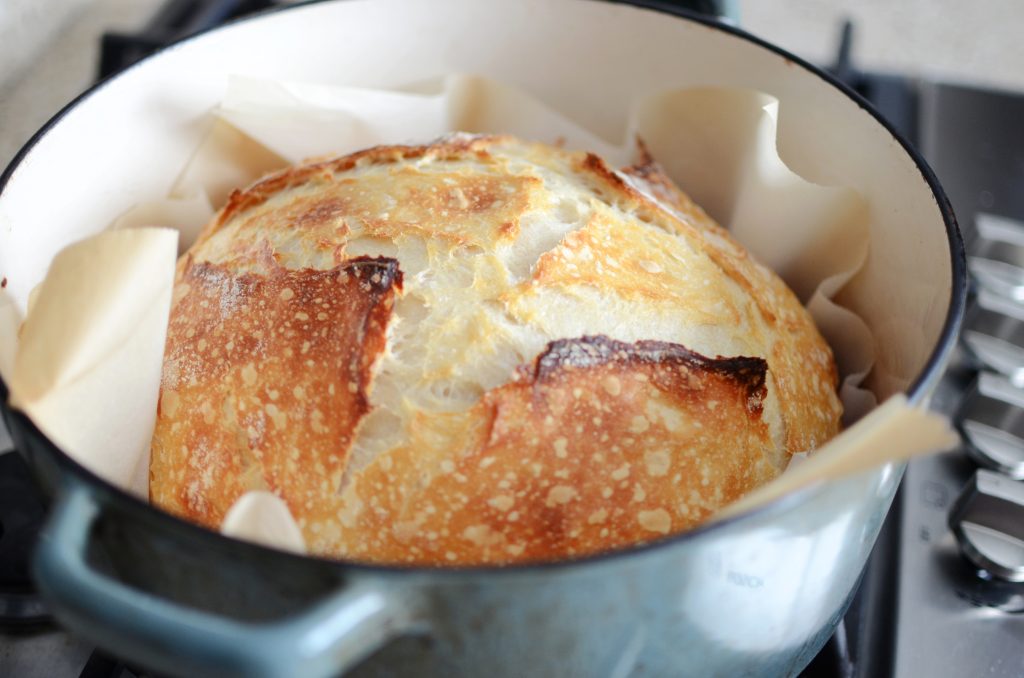
Serve
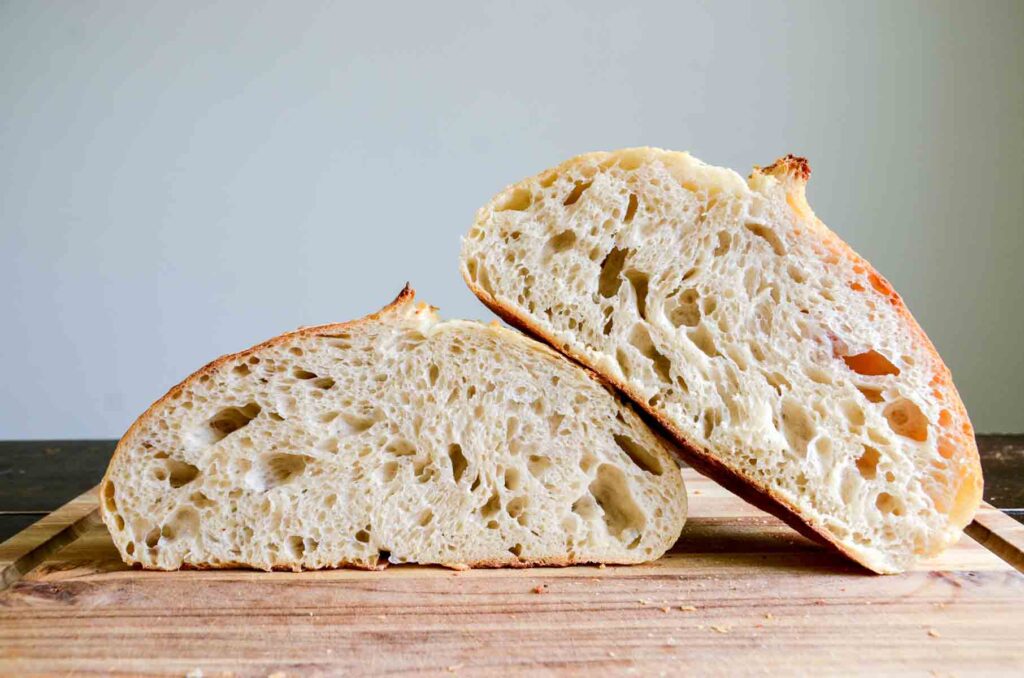
Place the freshly baked sourdough bread on a wire cooling rack to cool completely. To maintain its open crumb, avoid cutting while warm, or it’ll have a gummy texture.
Storage
Allow the bread to cool completely. Slice fresh sourdough bread and store it in an airtight container at room temperature. Best eaten within 3-4 days.
Sample Baking Schedule
| Day 1 : 10:00 pm | mix levain |
| Day 2: 7:00 am | mix flour and water |
| 7:30 am | add salt and levain, and mix |
| 8:00 am – 9:00 am | 3 sets of stretch and folds |
| 9:00 am – 3:00 pm | bulk ferment |
| 3:00 pm – 8:00 am | shape dough and cold proof |
| Day 3: 8:00 am | preheat the Dutch oven and score bread dough |
| 8:45 am | bake bread |
Helpful Sourdough Tips
- A kitchen scale will give the most accurate results and is worth investing into.
- The temperature of your kitchen directly affects the fermentation time. Placing the dough in a warm place causes the dough to ferment faster, while lower temperatures is cooler slows it down.
- Use a proofing box or an oven with the light on to ferment the dough. This creates a warm space that’s still cool enough to keep the yeast alive.
- Practice. It sounds silly, but it’s one area that’s often overlooked. No one is a master their first time doing anything, so be patient with yourself and learn to enjoy the art of baking sourdough baking. Once you get the hang of sourdough baking, it’ll become second nature. Soon, you and your family will enjoy the fruits of your labor!
FAQs on Easy Sourdough Bread Recipe
How Do You Know if the Sourdough Bread is Done?
Remove the loaf from the Dutch oven and give the loaf a gentle tap on the bottom of the loaf. It will sound hollow when it’s done. Another option to check if it’s done is to use a digital thermometer and checkthe bread’s internal temperature. The bread is done when it reaches 200°F/93°C.


I’d love to hear from you! If you made this Easy Sourdough Bread Recipe and loved it, I would love it if you gave it 5 stars! Happy Baking!
Easy Sourdough Bread Recipe
Want to Save This Recipe?
Enter your email & I’ll send it to your inbox. Plus, get great new recipes from me every week!
By submitting this form, you consent to receive emails from Lockrem Homestead
Equipment
- 1 large mixing bowl
- 1 Danish dough whisk
- 1 Dutch Oven
- 1 bread lame or razor
- digital scale
Ingredients
- 125 g sourdough starter ½ cup
- 325 g water 1⅓ cups
- 10 g salt 2 tsp
- 500 g bread flour 4 cups
Instructions
Feed the Starter | Mix the Levain
- This sourdough bread recipe calls for a levain mixed the night before you mix the dough at a 1:1:1 ratio.
- To mix the levain, combine equal parts active starter, warm water, and all-purpose flour in a small bowl, 42 g each. Cover and let it sit at room temperature for 8 hours.
- The levain is ready when it shows signs of activity: doubles in size, has lots of bubbles, and has a slightly sour aroma.
Autolyse
- Add 325 g (1⅓ cups) water and 500 g (4 cups) bread flour to a large bowl and mix with a Danish dough whisk until a shaggy dough forms and all of the flour is incorporated.
Mixing the Dough
- Add 10 g (2 tsp) salt into the bowl over the dough, in addition to all of the ripe levain, and mix until fully combined.
- Cover the bowl and let it rest for 30 minutes.
Stretch and Folds | Strengthening the Gluten
- Instead of kneading the dough like in traditional bread making, sourdough bread dough is strengthened with a series of stretch and folds.Grab the edge of the dough and lift it straight up before folding it over onto itself. Turn the bowl a quarter turn, and repeat, working your way around the sides of the bowl.
- Continue to stretch and fold the dough roughly 8-12 times, or until the dough becomes resistant. This completes one set of stretch and folds. Cover the bowl and rest for 30 minutes.
- Continue stretching and folding the dough for a total of 3 sets with 30 minute intervals.
- By the final set of stretch and folds, the dough will be smooth and stretchy.
Bulk Fermentation
- After the stretch and folds are completed, cover the bowl and let it rest at room temperature.
- The dough is done fermenting when the dough has risen by 50-75%, there’s plenty of air bubbles beneath the surface, and the edge of the dough where it meets the bowl domes down slightly.
Shape the Dough
- Turn out the dough on a lightly floured work surface. Gently stretch the dough into a circle. With lightly dusted fingers or a bench scraper, lift the top of the dough and fold it down to the middle of the dough.
- Next, grab the bottom of the dough and fold up to the middle of the dough. Repeat for each side of the dough.
- After all 4 sides of the dough are folded over to meet in the middle, using the bench scraper, gently flip the dough over so that the seams of the dough are on the bottom. To shape the loaf into a boule, using both hands, cup the loaf on the side furthest from you.
- Gently drag the dough towards you with your hands, tuck the loaf under with the edge of your hands. Rotate the loaf a quarter turn and do the same process. The seam should continue to remain on the bottom of the loaf. This will create tension on the top of your loaf and help with oven spring, creating a taller baked loaf.
Cold Proof
- Prep the banneton by dusting it lightly with rice flour.
- Using the bench scraper, lift the dough into the banneton with the seam side up. Place the banneton into a plastic bag and refrigerate for 8- 36 hours.If you prefer to bake the sourdough right away, skip the cold proof and instead, let it proof in the banneton at room temperature. Cover the dough and let it rise for 2 -3 hours or until it's puffy and jiggly. Preheat the oven and bake as directed.
The Poke Test
- Another way to check the dough to see if it's ready to bake is using the poke test. Using a floured finger, poke into the dough about an inch. One of three things will happen:-The dough springs back all the way and fills the hole immediately. If this happens, then it needs more time to ferment.-Second, the dough springs back partially, indicating it is ready to bake.-If the dough doesn't spring back at all, it is overproofed and will not rise much when baked. All is not lost though! The bread will still have a beautiful flavor but will just be a bit more dense. You can turn over-proofed bread into delicious croutons, breadcrumbs, or flatbread. I always enjoyed freshly baked bread, regardless of how dense it was!
Score and Bake
- Preheat the Dutch oven in the middle of the oven to 450°F/232°C for 30 minutes.
- When the oven is done preheating remove the dough from the fridge. Score the top of the sourdough loaf using a lame or sharp knife at a 45° angle, 1 inch deep.
- Remove the Dutch oven from the oven and carefully lift the dough into the hot Dutch oven. Quickly replace the lid and the Dutch oven in the oven.
- Bake for 35 minutes with the lid on.
- Remove the lid and bake for an additional 10 minutes.
- Move the bread to a wire rack and let it cool completely before cutting.
Store
- Allow the bread to cool completely. Slice fresh sourdough bread and store it in an airtight container at room temperature. Best eaten within 3-4 days.
Notes
- 150 g active sourdough starter
- 750g bread flour
- 488g water
- 15g salt
Love your process, your photos, and your beautiful bread my friend!
So fun to learn your way. 🤍
Thank you!
I am not seeing the temperature the oven should be at. Am I missing it completely??
I fixed the recipe card! Preheat the Dutch oven in the middle of the oven to 450°F/232°C for 30 minutes.
It looks like you recently changed the recipe. The old recipe worked so well for me! Is it possible to send me the previous recipe. It was larger quantities and the stretch and fold was only 15 mins apart.
Thanks!
Keri
Sure can!
It seems this recipe has changed a bit could you tell me what exactly changed on it? I used to make it quite a bit 🙂
Sure, I’ll adjust the recipe card!