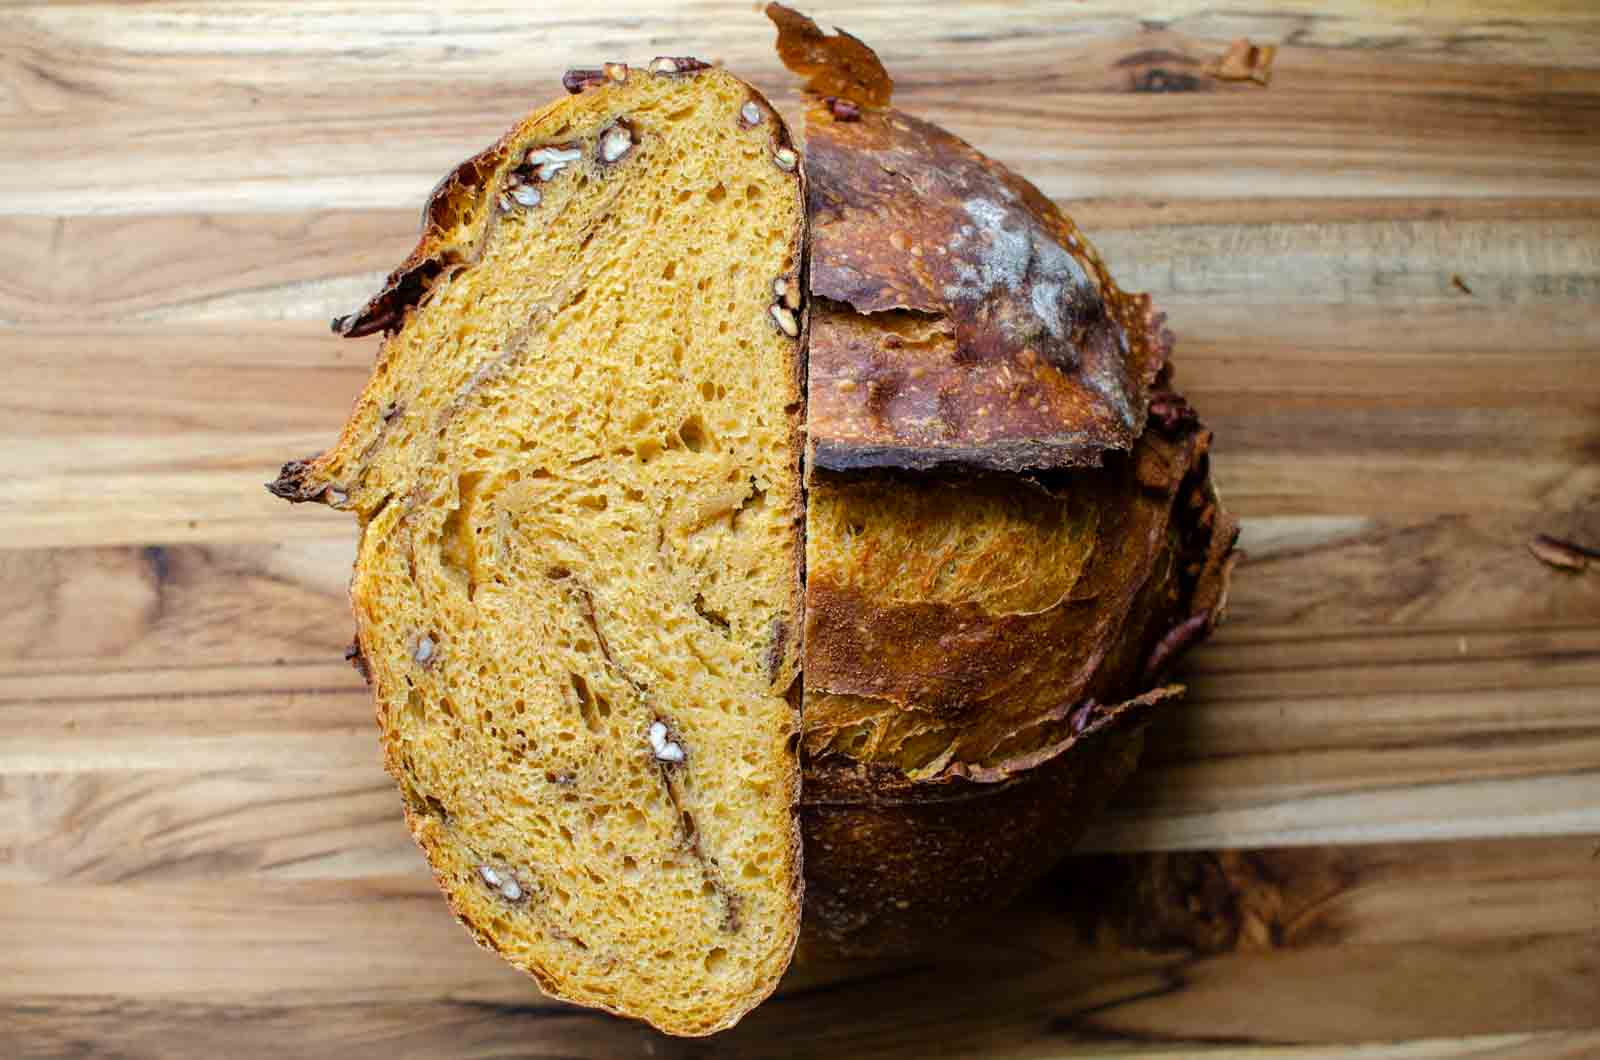
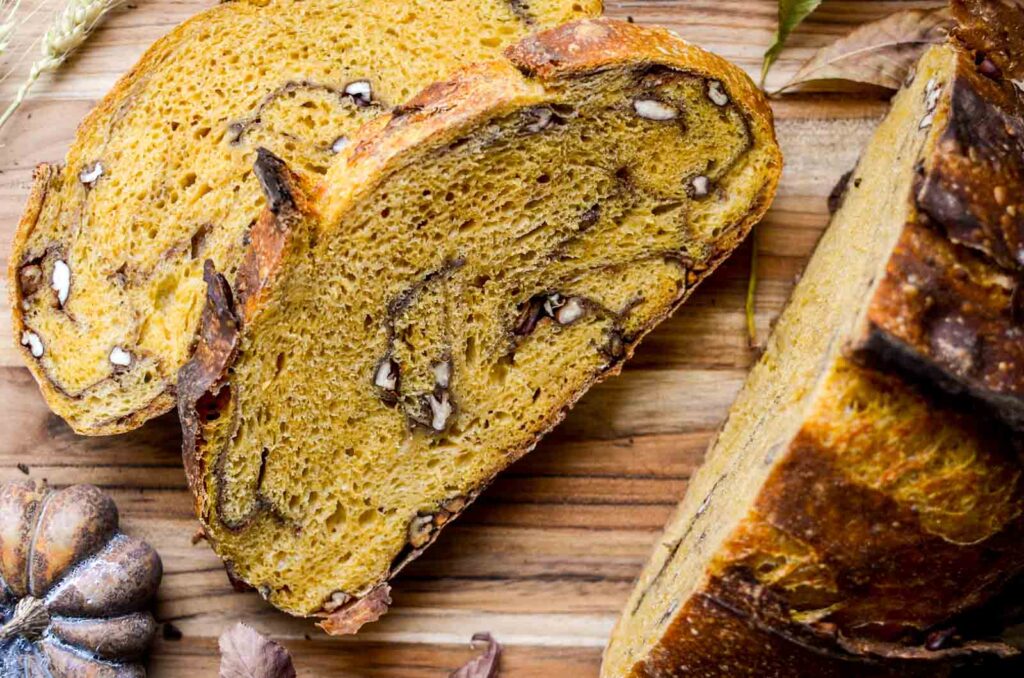
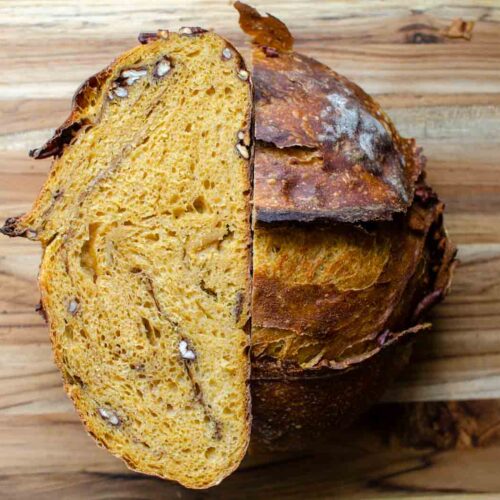
Artisan Sourdough Pumpkin and Pecan Bread
This artisan sourdough pumpkin and pecan bread is full of fall flavors and sure to please the pumpkin spice lover in you! Generous swirls of cinnamon and nutmeg, with plenty of crunchy pecans. Everyone will love the pumpkin flavor in this sourdough bread.
Save This For Later!
We’ll email this post to you so it doesn’t get lost in your open tabs!
By submitting this form, you consent to receive emails from Lockrem Homestead
New to Sourdough?
If you’re new to sourdough baking, these beginner-friendly guides will help you get started with confidence. Learn how to make a Sourdough Starter from Scratch, feed and maintain it with the Complete Sourdough Starter Guide, and bake your first loaf with this Easy Sourdough Bread Recipe. Together, these guides create a solid foundation for your sourdough journey.
Pumpkin season has arrived at our home, and I’m so excited to make all things pumpkin! Freshly harvested pumpkins from the garden will make lots of pumpkin puree. Soon, sourdough pumpkin scones, sourdough pumpkin bagels, and pumpkin quick bread will fill the kitchen.
I delight in the whole process, from growing the pumpkins to making them into delicious treats! Plus, there’s the bonus of so many pumpkin seeds to roast and snack on.
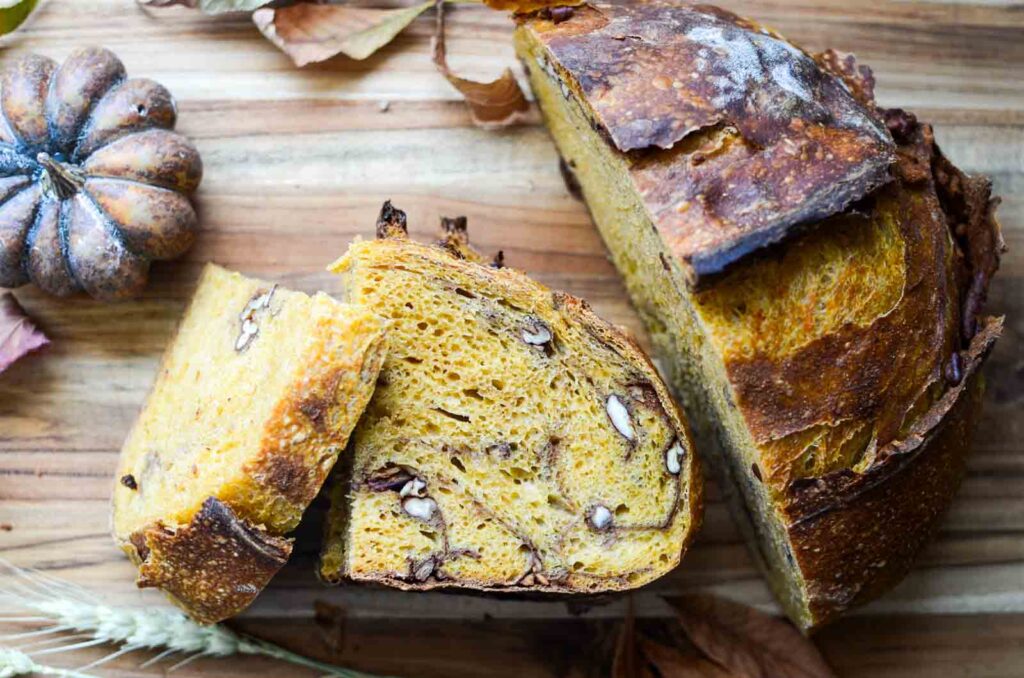
I love that sourdough pumpkin bread is simple enough to enjoy a slice toasted with a hot cup of coffee on a cold, fall morning, and yet, stunning enough to serve at your Thanksgiving table. Regardless of when you enjoy this bread, I know for certain that you’ll want to make this pumpkin bread on repeat!
Whether you make your own or use canned pumpkin puree, be sure to add making this artisan bread to your fall routine. It will quickly become a fall favorite in your home.
Why You’ll Love Pumpkin Bread Recipe
- Captures the flavors of fall in a delightful loaf of bread.
- The bread has the perfect balance! It’s slightly sweet, but not overpoweringly so.
- Inclusion breads are a fun way to learn and practice new skills. Everyone will enjoy your treats as you hone your skills.
Artisan Sourdough Pumpkin and Pecan Bread Ingredients
I’m always amazed that with just a few simple pantry ingredients and spices, a bit of sourdough starter, and patience, produces a lovely, hearty loaf of bread.
Wet Ingredients
- Sourdough starter – This bread relies on the yeast in an active starter for its rise. Use an active sourdough starter that has been fed recently with flour and water and allowed to come to its peak before mixing into the pumpkin bread dough. You’ll know the bubbly starter is ready when it’s grown up the side of the jar, having doubled and the top is full of air bubbles.
- Pumpkin – Use homemade pumpkin puree or store-bought pumpkin purée to give the bread that pumpkin flavor and added moisture. Pumpkin puree contains only cooked pumpkin and is different than pumpkin pie filling, which comes already sweetened and full of spices.
- Water – I always use warm water during cooler months to give the dough a warmer starting temperature. This helps give the bulk fermentation a head start.
- Maple syrup – Adds sweetness and additional moisture for consistent dough ratios.
Dry Ingredients
- Flour – I suggest using a strong white bread flour because of its higher protein content compared to all-purpose flour. A higher level of protein means stronger flour. Stronger flour means better gluten development, which ultimately yields a higher rise in the final bake. Read more about the difference between all-purpose flour and bread flour.
- Cinnamon and Nutmeg – Seasons the bread with traditional fall flavors.
- Salt – Ensures a well-seasoned bread that’s full of flavor. But that’s not all, the salt helps tighten the gluten strands to hold the carbon dioxide more efficiently.
- Pecans – Gives the loaf of bread added crunch for great texture. I love them, but you can leave them out if you’re not a fan of nuts.
Equipment to Make Sourdough Bread
- Bowl
- Kitchen scale – A vital tool for measuring sourdough bread dough ingredients. They’re not expensive and will help ensure accurate, consistent measurements.
- Danish dough whisk – I like how a Danish dough whisk cuts through the dough to incorporate the ingredients. A great tool if you plan to bake sourdough bread regularly.
- Lame – A special scoring tool that holds a sharp razor. You can also use a sharp knife, but a lame makes it easy for small, intricate scoring.
- 9″ Banneton basket – A banneton is a proofing basket that provides support for the bread dough as it proofs. Dust with a little bit of rice flour to prevent the dough from sticking.
- Parchment paper or a dough sling.
- 7 qt Dutch oven or larger – Using a Dutch oven is the best way for home bakers to create an artisan loaf of bread with a beautiful crust. The enclosed baking environment traps steam, allowing the crust to stay moist and expand.
- Digital thermometer – Use to read the bread’s internal temperature to know when the bread is done baking. Great for beginner bakers as they improve their bread-baking skills.
- Cooling rack
How To Make Pumpkin and Pecan Sourdough Bread Overview
The full instructions are in the recipe card below.
Step 1: Mix The Dough
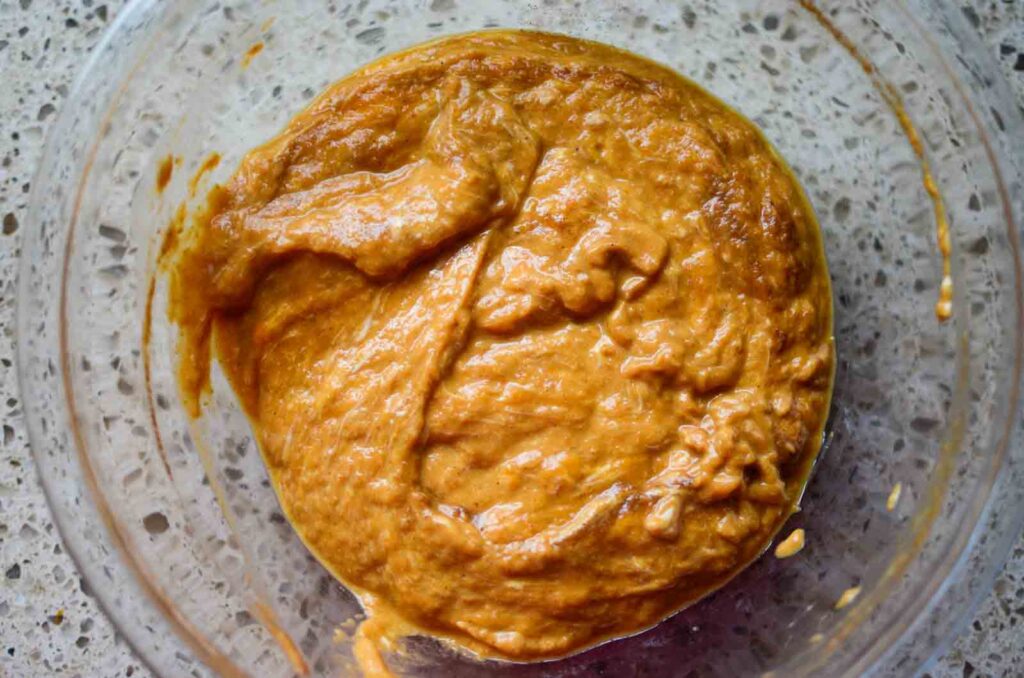
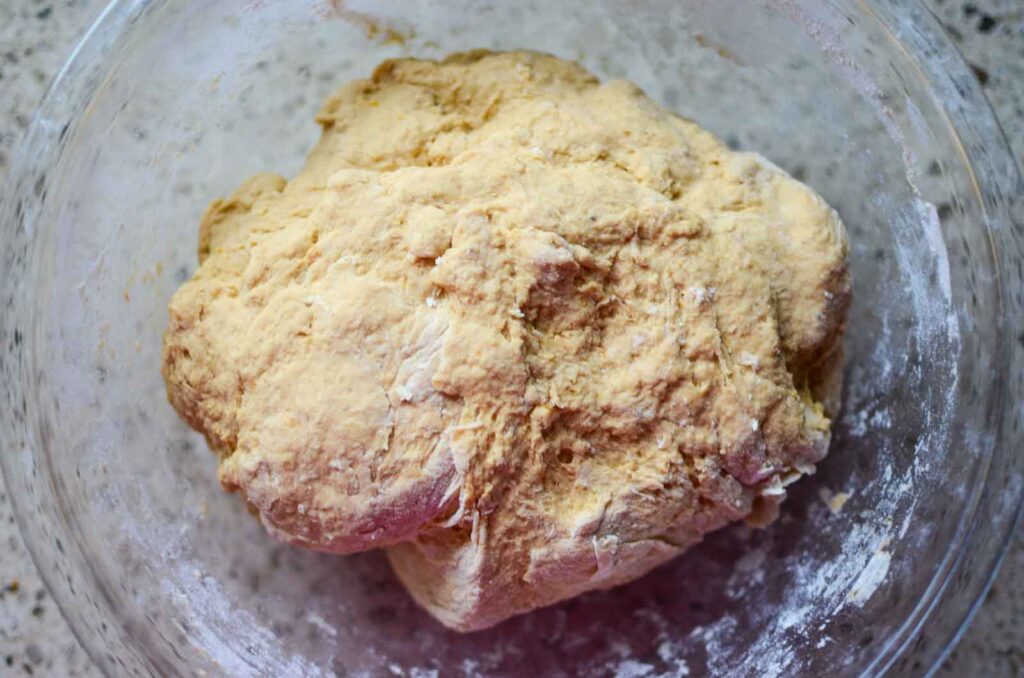
Combine the sourdough starter, pumpkin puree, warm water, and maple syrup in a large bowl.
Then, add the bread flour and ½ tsp cinnamon to the bowl and combine. Cover and let rest for 30 minutes.
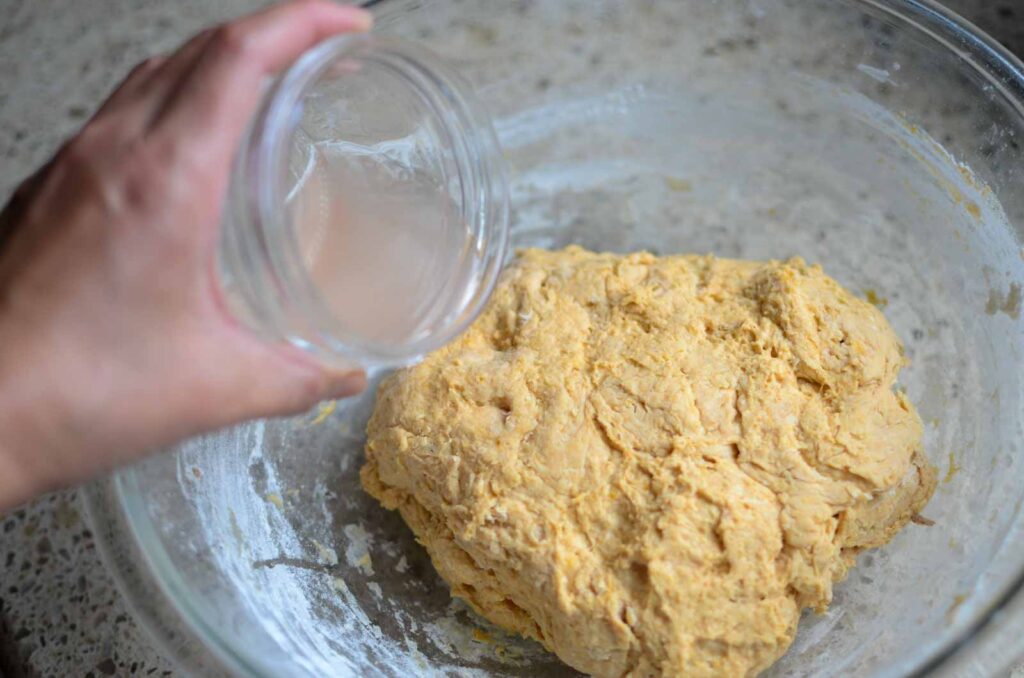
After 30 minutes, combine the water and salt in a small bowl and stir dissolve. Pour the salty water over the bread dough and mix it in using the stretch and folds method.
Step 2: Stretch And Folds | Strengthen the Gluten
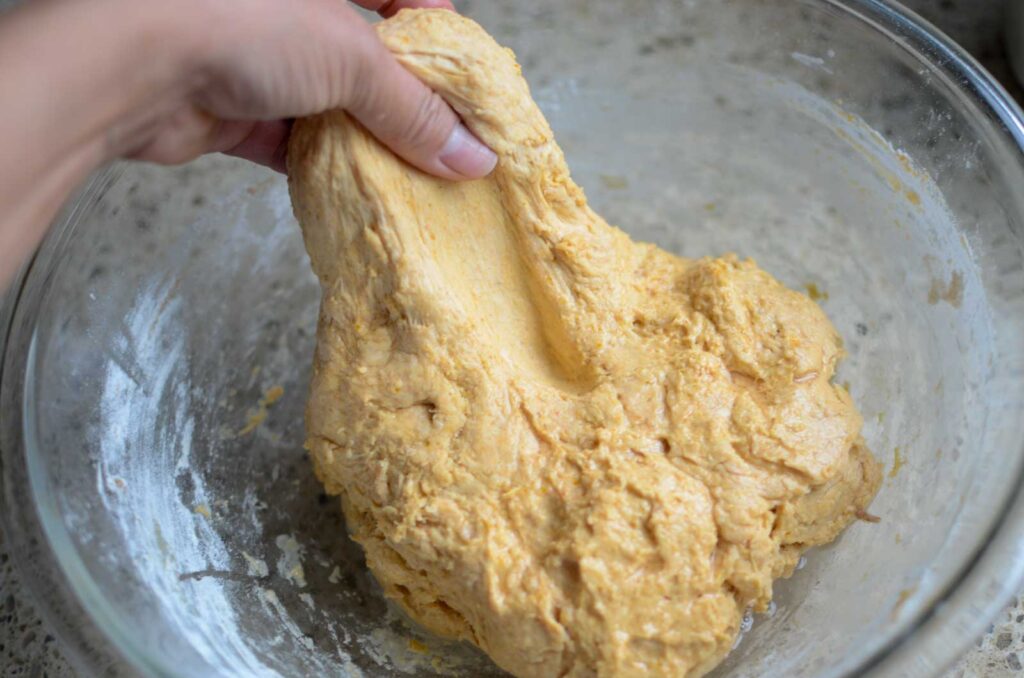
Grab the sides of the dough and lift straight up, stretching the dough. Then fold it over onto itself, pressing it into the middle of the dough. Let the dough rest for 30 minutes. This completes one set of stretch and folds.
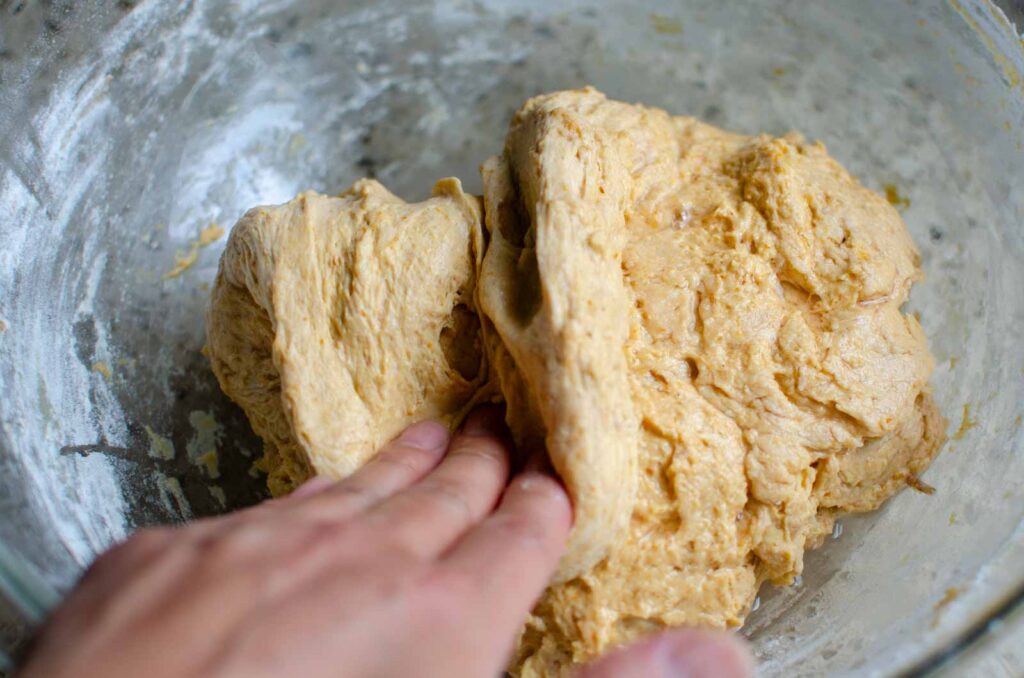
Do a total of 3 sets of stretch and folds at 30-minute intervals.
Step 3: Bulk Ferment | First Proof
Cover the bowl and place it in a warm place in the kitchen for 8-12 hours or until the dough has doubled its starting size.
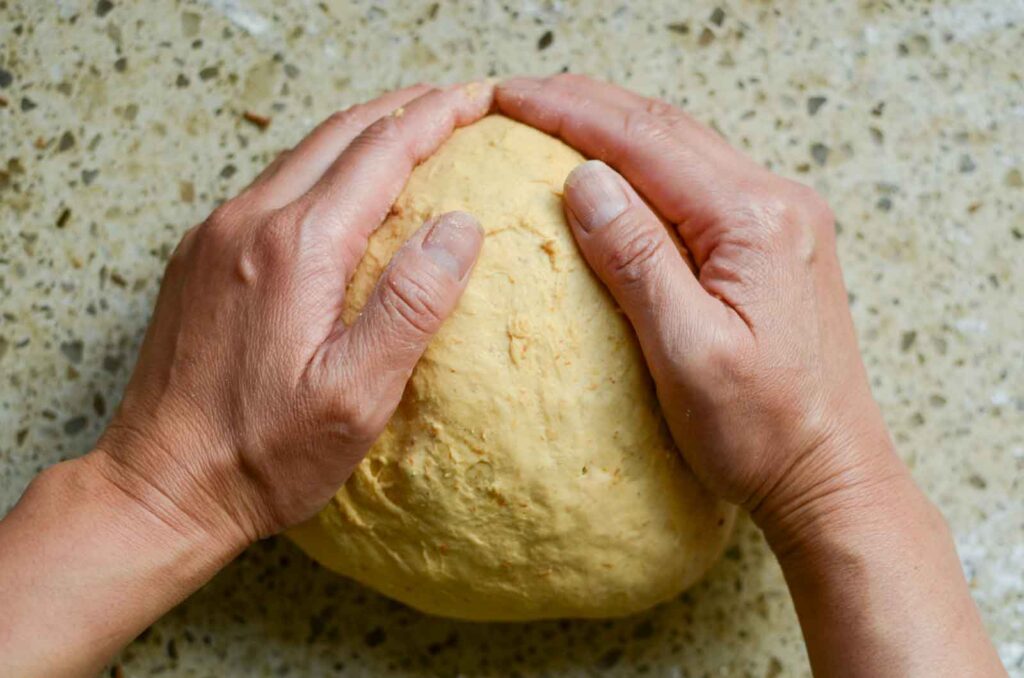
Step 4: Shape the Dough
The next morning, roughly chop the pecans and combine with cinnamon and nutmeg in a small bowl.
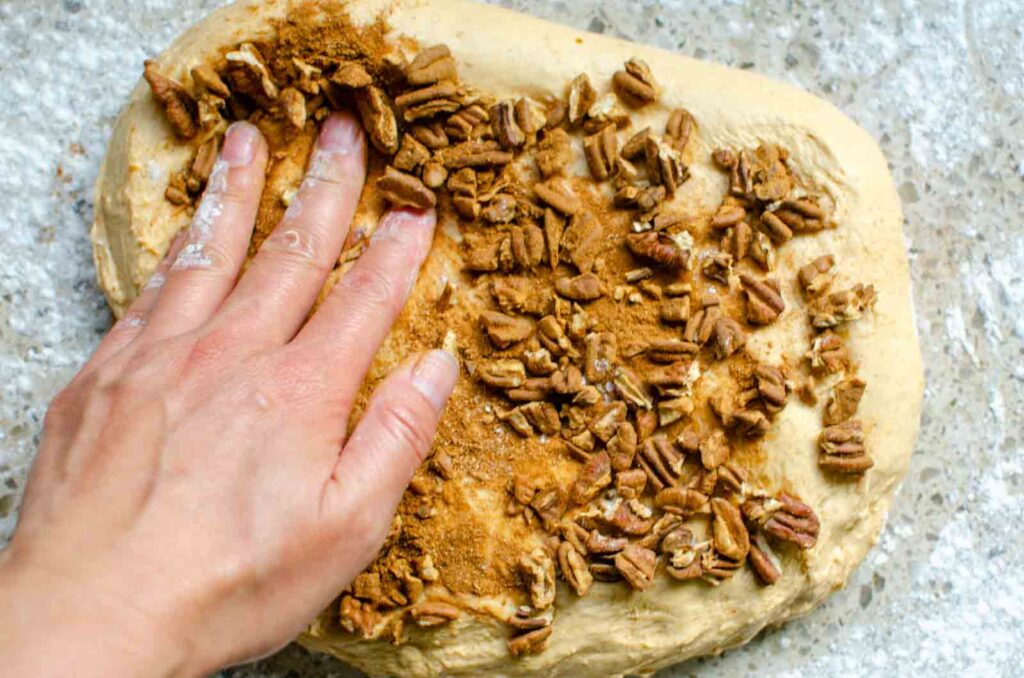
Next, turn the dough out onto the counter dusted with a little bit of flour. Gently stretch the sides of the dough into a round shape.
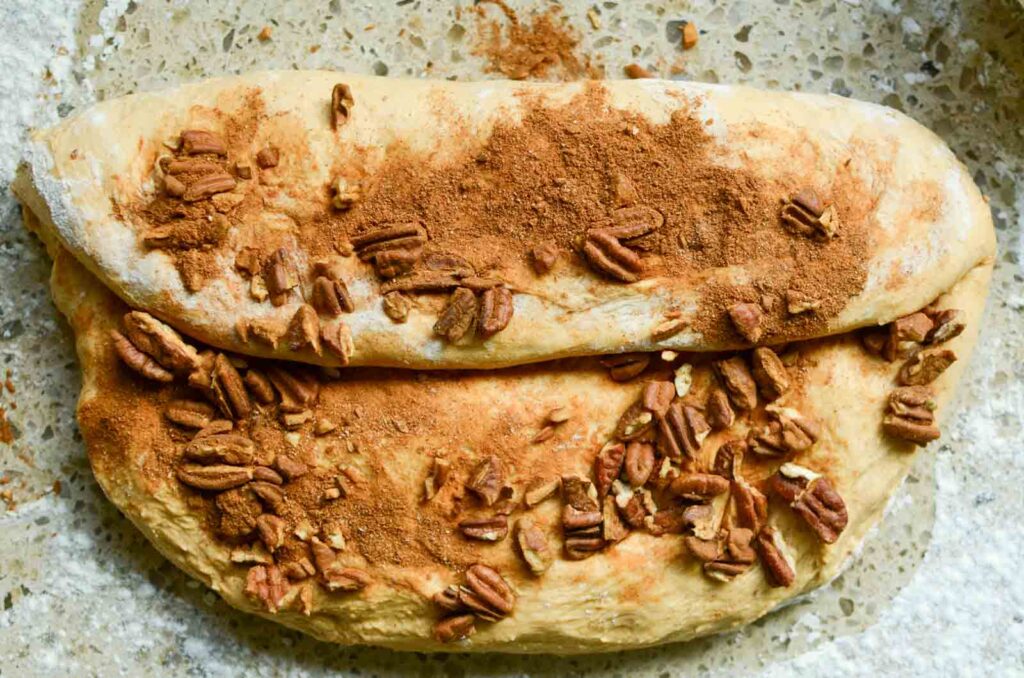
Sprinkle half of the pecans over the dough. Fold the top of the dough ⅔ of the way down and sprinkle with half of the pecan mixture. Then, fold the bottom of the dough up to cover the folded portion and add the remaining pecans over the dough.
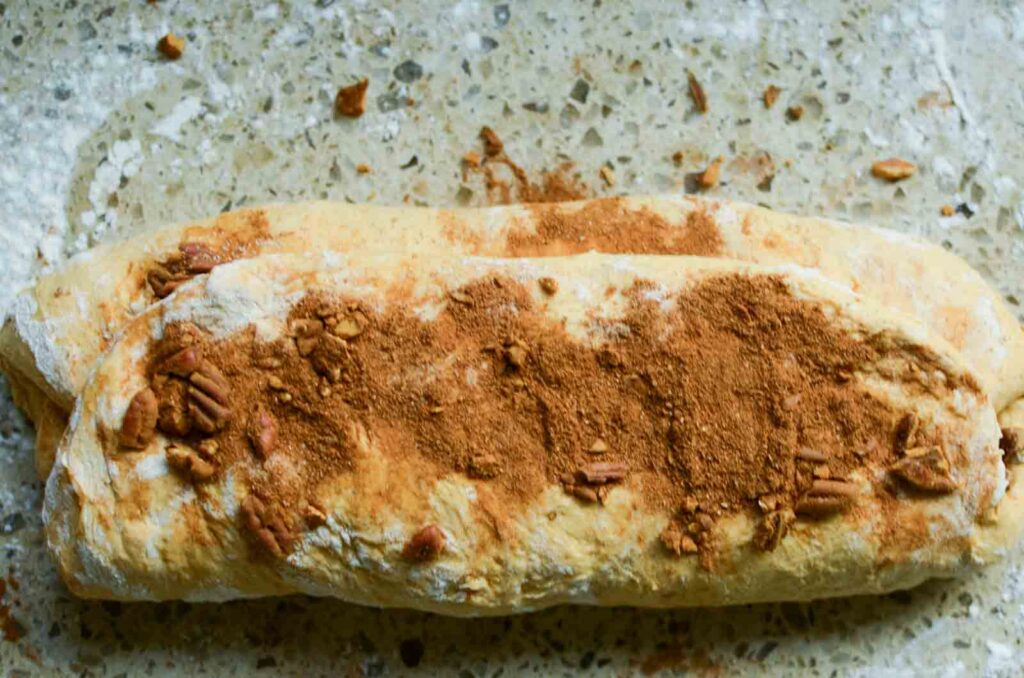
Roll up the dough and position it so that the seams are facing downward.
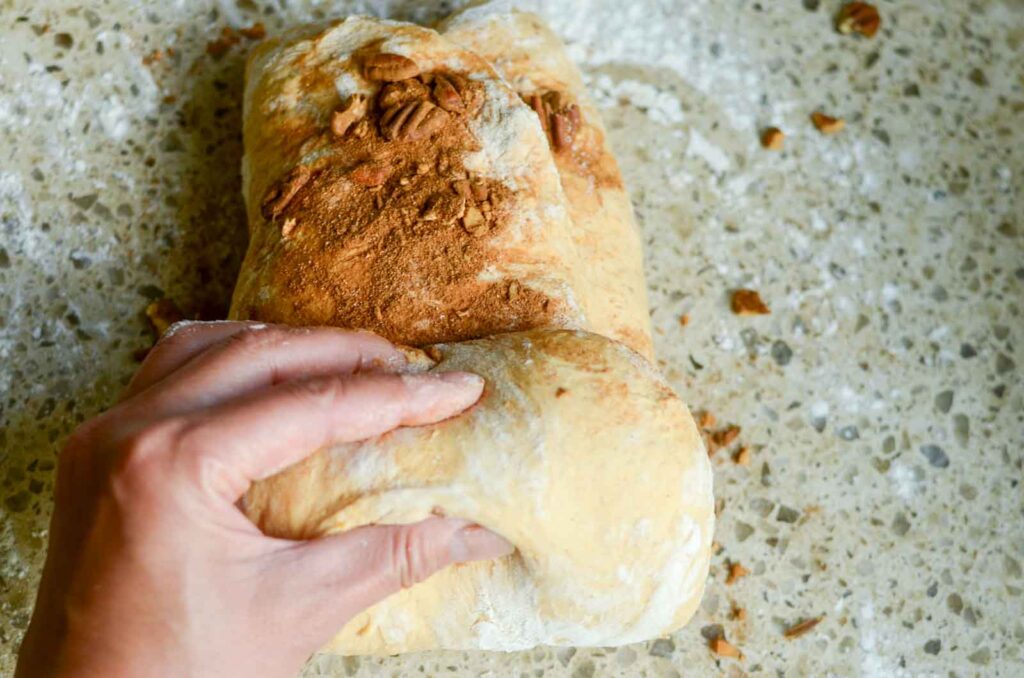
Cupping your hands on the far end of the dough, gently pull it towards you, pressing it under as you pull it.
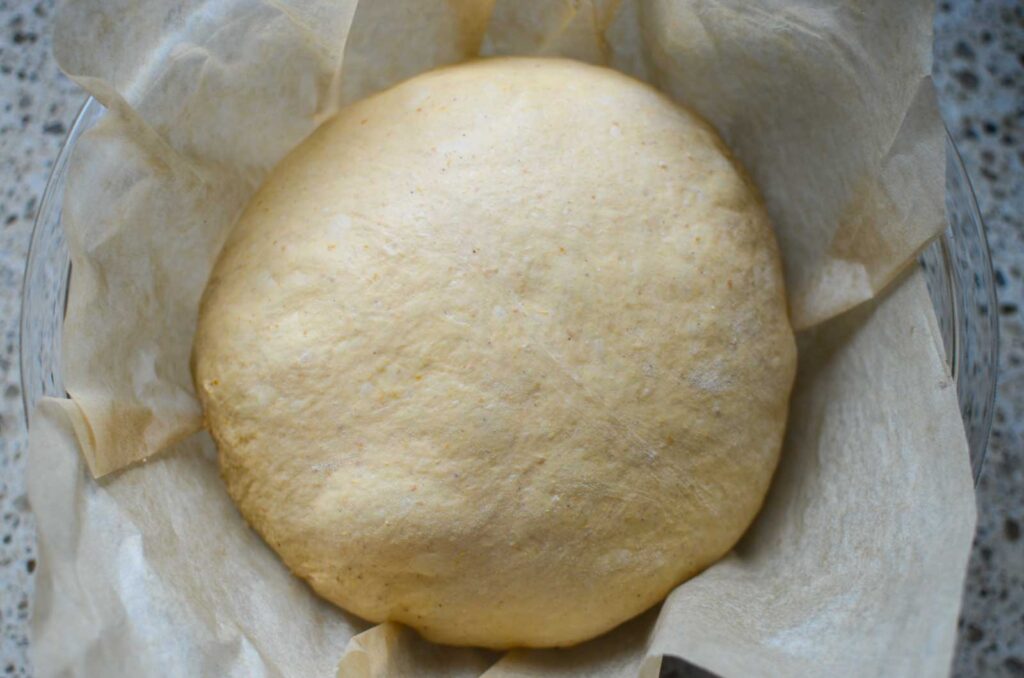
Using a bench knife, lift the dough into a floured banneton basket, seam side up, and cover.
What if You Don’t Have a Banneton?
While its nice to have, you don’t need a fancy proofing basket to bake good bread. After the dough is shaped, place the dough onto a piece of parchment paper with the seam side down. Then, using the parchment paper as handles, lift the dough back into the bowl. Cover the bowl and refrigerate.
Step 5: Final Proof
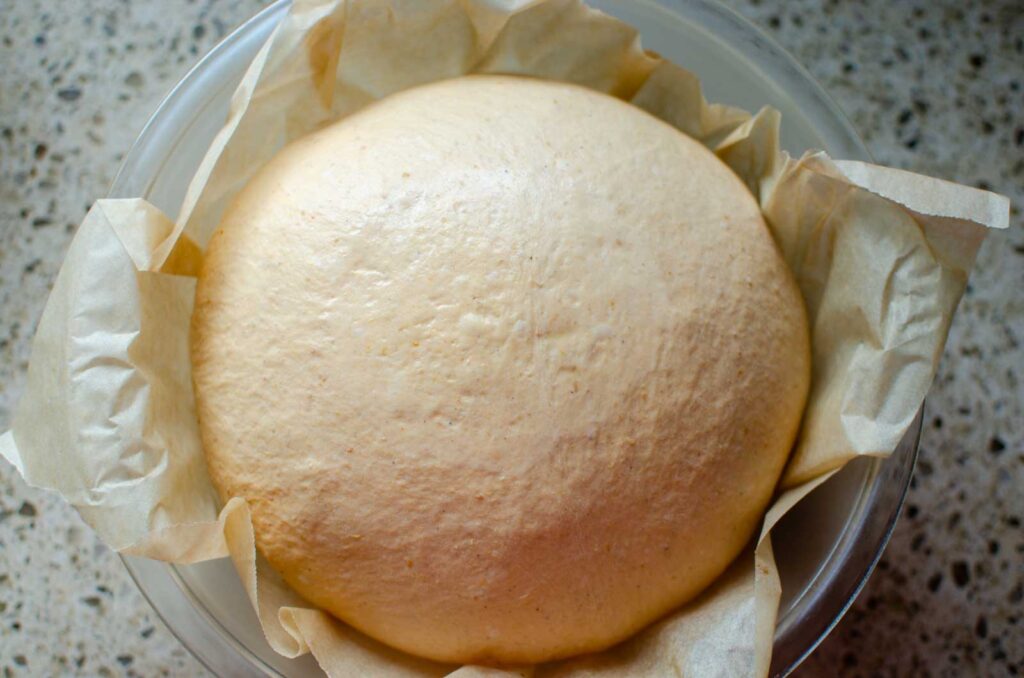
Let the dough rest in the bowl or banneton to proof for one to three hours.
The exact time will depend on the temperature of your kitchen. The dough will have risen a bit and look puffy. You may or may not see tiny pockets of air in the dough.
Retarding The Dough (Optional)
Cold proofing, also known as retarding the dough, is when the dough is placed into the refrigerator to proof at a cold temperature for many hours, typically overnight.
Place the banneton in a plastic bag to keep the dough from drying out, and into the fridge for as little as 4 hours, up to 16 hours.
Keep in mind that the dough will continue to proof in the fridge, although at a slower rate.
Step 6: Bake
Preheat a Dutch oven at 450℉/232℃ for 30 minutes.
Score the top of the dough with a lame or sharp knife. Lift the pumpkin dough into the hot Dutch oven. Bake for 35 minutes with the lid on. Remove the lid and bake for another 25 minutes.
The bread is done when the top of the loaf is golden brown, and the internal temperature reads 200℉/94℃ on a digital thermometer.
Step 7: Cool
Transfer the bread from the Dutch oven to a wire rack and allow to cool to room temperature before slicing.
How To Store Pumpkin Sourdough Bread
Allow the bread to cool completely before moving to an airtight container. Store at room temperature up to 3 days for best flavor.
Helpful Tips
- The additional resting time during a cold proof gives the bacteria and yeast in the dough a chance to ferment the grains and develop the dough’s flavor and structure.
- Gently pulling the dough as you shape it stretches the top of the dough to create some surface tension and helps with oven spring for a taller loaf.
- Be sure to use pumpkin puree. Do not use pumpkin pie filling, which contains spices and additional sweeteners.
What To Eat With Pumpkin Sourdough Bread?
- I love sourdough pumpkin bread toasted with butter and pumpkin butter.
- Use in French toast casserole or French toast for a fall inspired breakfast.
- Pair with brie cheese, cream cheese, or another soft cheese.
Sourdough Pumpkin and Pecan Sample Schedule
Baking with sourdough can be a bit intimidating at first since so many variables are involved. But once you understand the process, it’s quite simple and highly flexible to accommodate your schedule. Here is a sample baking schedule.
| 8:00 am | Mix the dough and rest |
| 8:30 am | Add salt during first set of stretch and folds |
| 8:30 am – 9:30 am | Continue with the 3 sets of stretch and folds with 30-minute intervals |
| 9:30 – 5:00 pm | Bulk ferment at room temperature |
| 5:00 pm | Shape the dough and place into a proofing basket |
| 5:10 – 7:10 pm | Proof the dough |
| 6:40 pm | Preheat Dutch oven |
| 7:10 pm | Score and bake the bread dough |
Pumpkin Sourdough Bread FAQs
Do I Need to Use a Kitchen Scale?
I know that buying a kitchen scale seems like one more thing, however, measuring by weight instead of volume ensures consistent sourdough bread doughs. Investing in an inexpensive scale is a great idea if you plan to bake sourdough bread regularly.
How Do I Keep the Bottom of My Sourdough From Burning?
Sometimes the bottom of the sourdough bread gets too hot in the oven and burns. If this happens, preheat the Dutch oven with a baking sheet on the rack beneath it. This will help shield the heat and prevent the bottom from getting too dark.
Can I Skip Retarding The Dough?
Yes, you can skip this step and move right to baking the bread after its final proof. However, retarding the dough does a couple of things to improve the bread.
- Cold bread dough is easier to score for a beautifully scored design.
- Retarding the dough creates a more complex flavor in the final bake.
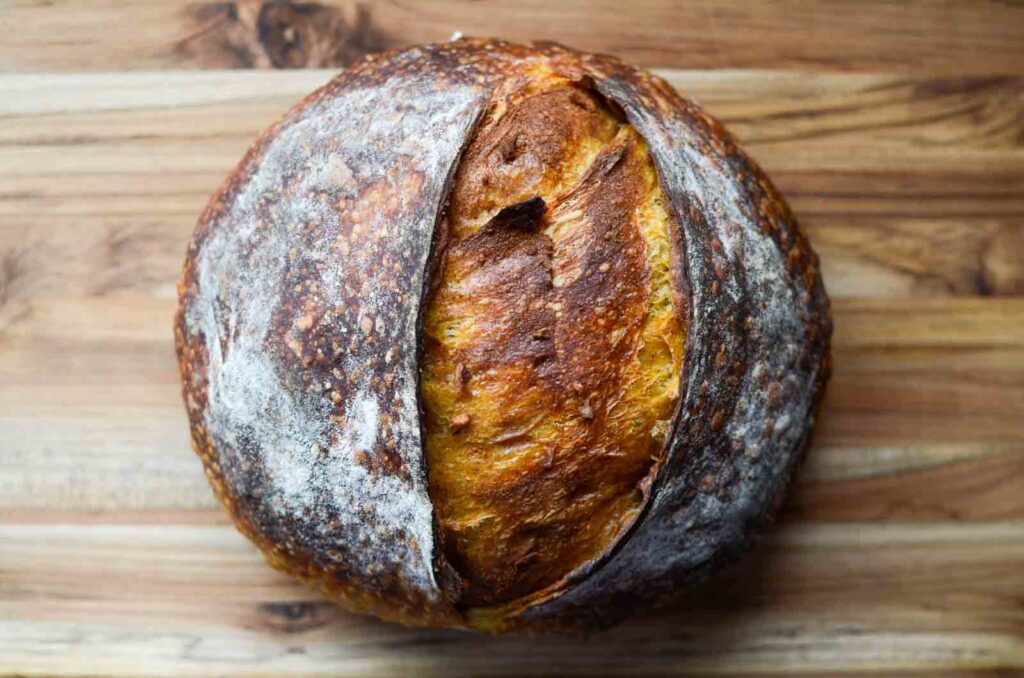
- Cold-proofing results in a blistered crust as seen above. The extended time to proof allows little pockets of carbon dioxide to rise to the surface. The high heat captures these to create the blistered skin. While we enjoy this look stateside, other parts of the world look down upon it.
How Do I Make My Sourdough Pumpkin And Pecan Bread Taste More Sour?
Bread dough that is allowed to proof at room temperature is ready to bake in a shorter amount of time than bread dough allowed to retard in the fridge. If you want that distinct sourdough flavor, you will need to extend the time before the bread dough goes into the oven. Cooling the temperature of the bread dough buys you this time without the dough overproofing. Read more about increasing the classic sourdough tang.
Why Do I Need To Wait To Slice The Bread?
While it’s tempting to slice into the bread before it’s cool, the loaf of bread needs this cool-down time to retain its moisture. Once you slice into a warm loaf of bread, the steam rushes out all at once, resulting in a drier loaf of bread.

I’d love to hear from you! If you made this Artisan Sourdough Pumpkin and Pecan Bread recipe and loved it, I would love it if you gave it 5 stars! Happy Baking!
Artisan Sourdough Pumpkin and Pecan Bread
Want to Save This Recipe?
Enter your email & I’ll send it to your inbox. Plus, get great new recipes from me every week!
By submitting this form, you consent to receive emails from Lockrem Homestead
Equipment
- 1 Dutch Oven
- 1 large bowl
- 1 banneton
- 1 lame or sharp knife
Ingredients
Wet Ingredients
- 125 g active sourdough starter ½ cup
- 250 g pumpkin puree 2¼ cups
- 150 g warm water ⅔ cup
- 40 g maple syrup 2 tbsp
Dry Ingredients
- 500 g bread flour 4 cups
- ½ tsp cinnamon
Salt Water
- 36 g warm water 3 tbsp
- 10 g salt 2 tsp
Pecan Swirl
- 60 g pecans ¾ cup
- 1 tbsp cinnamon
- ½ tsp nutmeg
Instructions
Mix The Dough
- Combine 125 g (½ cup) active sourdough starter, 250 g (2 ¼ cups) pumpkin puree, 150 g (⅔ cup) warm water, and 40 g (2 tbsp) maple syrup in a large bowl.
- Then, add 500 g (4 cups) bread flour and ½ tsp cinnamon combine it with a dough whisk, making sure to mix the flour at the bottom of the bowl. Cover and let rest for 30 minutes. This allows the flour time to absorb the water.
- After 30 minutes, combine 36 g (3 tbsp) water and 10 g (2 tsp) salt in a small bowl, stirring until the salt dissolves. Pour the salty water over the bread dough and mix it in using the stretch and folds method.
Stretch And Folds
- Grab the sides of the dough and lift straight up, stretching the dough. Then fold it over onto itself, pressing it into the middle of the dough.
- Let the dough rest for 30 minutes. This completes one set of stretch and folds.
- Do a total of 3 sets of stretch and folds at 30-minute intervals. You'll notice the dough change from a shaggy, sticky dough that breaks easily as you stretch it, to a smooth, elastic dough with much less stickiness by the last fold.
Bulk Ferment or First Proof
- Cover the bowl and place it in a warm place in the kitchen for 8-12 hours or until the dough is double its starting size. The exact amount of time it takes for the dough to reach this point will depend on a few variables, but largely on how warm the dough is.
Shape
- The next morning, roughly chop 60 g (¾ cup) pecans and combine them with 1 tbsp cinnamon and ½ tsp nutmeg in a small bowl.
- Next, turn the dough out onto the counter dusted with a little bit of flour. Gently stretch the sides of the dough into a round shape.
- Sprinkle half of the pecans over the dough. Fold the top of the dough ⅔ of the way down and sprinkle with half of the pecan mixture. Then, fold the bottom of the dough up to cover the folded portion and add the remaining pecans over the dough.
- Starting at one end of the dough, roll up the dough. Position the dough so that the seams are facing downward.
- Cupping your hands on the far end of the dough, gently pull it towards you, pressing it under as you pull it. This stretches the top of the dough to create some surface tension, which helps with oven spring and a taller loaf.
- Using a bench knife, lift the dough with into a parchment-lined bowl, bottom side down, or a floured banneton basket, bottom side up and cover.
Final Proof
- Let the dough rest in the bowl or banneton for one to three hours to proof, depending on the temperature of your kitchen. The dough will have risen a bit and look puffy. You may or may not see tiny pockets of air in the dough. The dough is ready to bake when it passes the finger poke test.
Retarding The Dough (Optional)
- Cover the bowl with a piece of plastic wrap or a plate or cutting board. If you are using a banneton, place it into a plastic bag to keep the dough from drying out.
- Place the dough into the fridge for as little as 4 hours, up to 16 hours.
Bake
- When you're ready to bake, preheat a Dutch oven at 450℉/232℃ for 30 minutes.
- Remove the dough from the fridge, score the top of the dough with a lame or sharp knife, and place it into the hot Dutch oven. Quickly replace the lid and return the Dutch oven to the oven. Bake for 35 minutes. Remove the lid and bake for another 25 minutes.
- The bread is done when the top of the loaf is golden brown and the internal temperature reads 200℉/94℃.
Cool
- Transfer the bread from the Dutch oven to a wire rack and allow to cool to room temperature before slicing.
Fall is everything warm and spiced, and this nutty bread is an effortless “yes!” come October. Slathered in butter (is anything not lovely slathered in butter?), it’s a perfect Thanksgiving side dish! Please feel free to leave any comments or questions below. Happy baking!
500g bread flour
1/2 tsp cinnamon
You never mentioned in the recipe to put the cinnamon with the bread flour at all. I read the instructions a few time, so you just said add the flour no mention of the cinnamon, so I assume you add the cinnamon along with the bread flour as that is what I am going to do. I just thought I would point this out so you don’t get bombarded with where do I put the cinnamon. Probably everyone will just do what I am going to do, add it along with the bread flour in the instructions.
Thanks for catching that! I corrected the recipe card and instructions.