
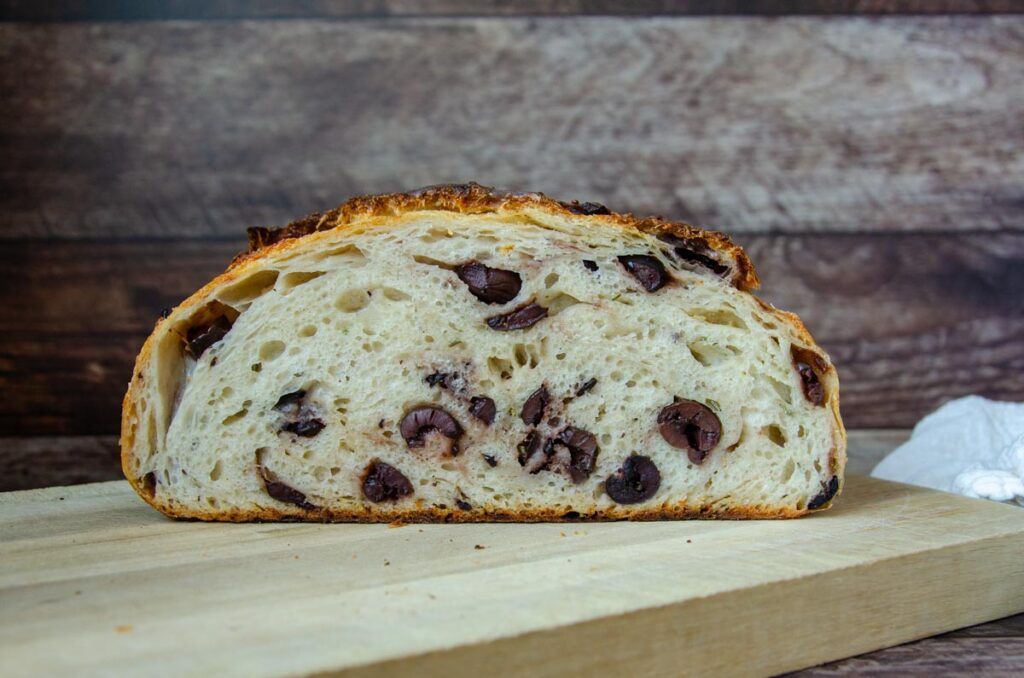
Rosemary Olive Parmesan Sourdough Bread
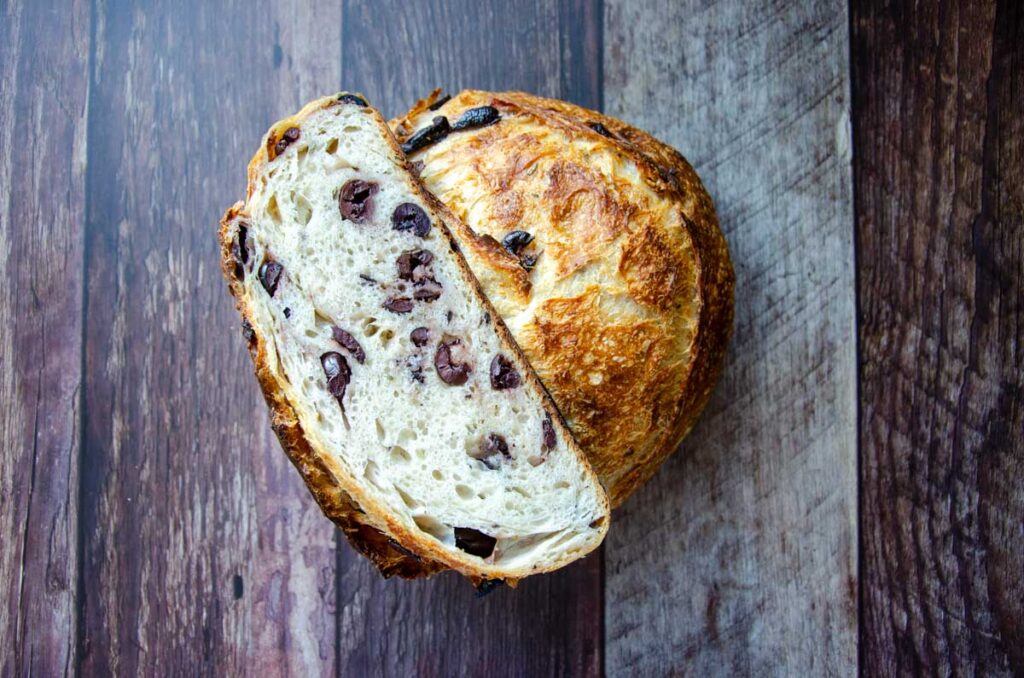
Sourdough olive bread recipe is perfect for olive lovers. Olive sourdough bread has a crispy, chewy crust and soft inside that’s full of kalamata olive, rosemary, garlic, and parmesan cheese. Serve this flavorful bread at your next dinner party or on a cheese and charcuterie board.
Save This For Later!
We’ll email this post to you so it doesn’t get lost in your open tabs!
By submitting this form, you consent to receive emails from Lockrem Homestead
Learning how to make sourdough olive bread couldn’t be easier. Briny olives are folded with parmesan cheese, garlic powder, and dried rosemary into sourdough for a savory bread that is packed with flavor.
With so many types of olives, how do you know which type to choose? Technically, there are no green olive trees. Green olives are unripe olives that ripen into black olives, with a spectrum of hues between the two. This olive sourdough bread recipe uses kalamata olives, but it would look stunning if half of the olives were green olives, like castelvetrano olives.
New to Sourdough?
If you’re new to sourdough baking, these beginner-friendly guides will help you get started with confidence. Learn how to make a Sourdough Starter from Scratch, feed and maintain it with the Complete Sourdough Starter Guide, and bake your first loaf with this Easy Sourdough Bread Recipe. Together, these guides create a solid foundation for your sourdough journey.
For the Love of Sourdough
If you’ve been around for a bit, you know that I love to bake using my sourdough starter. In fact, I use it every time I make homemade bread.
It all started years ago when I made my own sourdough starter using a bit of flour, water, and some patience. In no time, I had a bubbly, mature starter. Even after years of baking, it never ceases to amaze me how 4 simple sourdough bread ingredients can produce such a lovely loaf of bread.
But that’s not all! Aside from making homemade bread, I use my starter to make focaccia bread, thicken bechamel sauce, and homemade granola.
Why You’ll Love Sourdough Rosemary Olive Parmesan Bread Recipe
- Flavor – Adding different types of inclusions to a good sourdough bread allows you to have fun mixing and matching to create any kind of flavor profile you wish! This one does not disappoint! Savory herbs and briny olives pair perfectly with Parmesan cheese and the subtle sourdough tang.
- Fermented Goodness – I like to incorporate fermented food into my family’s diet any chance I can get for its health benefits. Allowing the grains to ferment helps break down the phytic acid found in the grains, making it easier to digest.
Olive Sourdough Bread Ingredients
- Sourdough starter – This recipe calls for an active sourdough starter. Feed it and allow it to come to its peak. The starter is ready when it doubles in size, has plenty of air bubbles, and has a domed top.
- Olives – Be sure to
- Flour – A strong bread flour will provide the structure to hold the olives and produce a chewy loaf. You can use all-purpose flour, but the loaf may not have as tall of a rise.
- Water – Use filtered water or allow tap water to sit at room temperature for 12-24 hours to allow the chlorine to evaporate out.
- Salt – Flavors the bread, but also helps strengthen the gluten structure.
- Garlic powder – Garlic powder is an easy way to add flavor without the need for an additional step of roasting garlic cloves.
- Parmesan – Buy a block of parmesan and grate it yourself instead of buying the grated stuff in the green canisters. Although grating yourself is an extra step, it’s worth it because it has a better flavor and doesn’t have added anticaking agents.
- Rosemary – Dried rosemary makes it easy to pack a punch of flavor.
Equipment to Make Sourdough Parmesan Olive Bread
- Bowl
- Kitchen scale – A vital tool for measuring sourdough bread dough ingredients. They’re not expensive and will help ensure accurate, consistent measurements.
- Danish dough whisk – I like how a Danish dough whisk cuts through the dough to incorporate the ingredients. A great tool if you plan to bake sourdough bread regularly.
- Lame – A special scoring tool that holds a sharp razor. You can also use a sharp knife, but a lame makes it easy for small, intricate scoring.
- 9″ Banneton basket – A banneton is a proofing basket that provides support for the bread dough as it proofs. Dust with a little bit of rice flour to prevent the dough from sticking.
- Parchment paper or dough sling
- 7 qt Dutch oven or larger – Using a Dutch oven is the best way for home bakers to create an artisan loaf of bread with a beautiful crust. The enclosed baking environment traps steam, allowing the crust to stay moist and expand.
- Digital thermometer – Use to read the bread’s internal temperature to know when the bread is done baking. Great for beginner bakers as they improve their bread-baking skills.
- Cooling rack
How To Make Rosemary Olive Sourdough Bread
Rosemary parmesan kalamata olive sourdough bread is a flavorful, easy bread to make for any occasion.
Prep
Measure 165 g (1 cup) olives and place in a strainer. Then rinse them under warm water to remove as much of the salty brine as you can. Place olives on a paper towel and press with a second paper towel to dry the olives the best you can. Give the olives a rough chop on a cutting board with a sharp knife.
Feed your sourdough starter 4-6 hours before you plan to mix your dough. I like to feed my starter a ratio of 1:1:1.
Mix the Dough
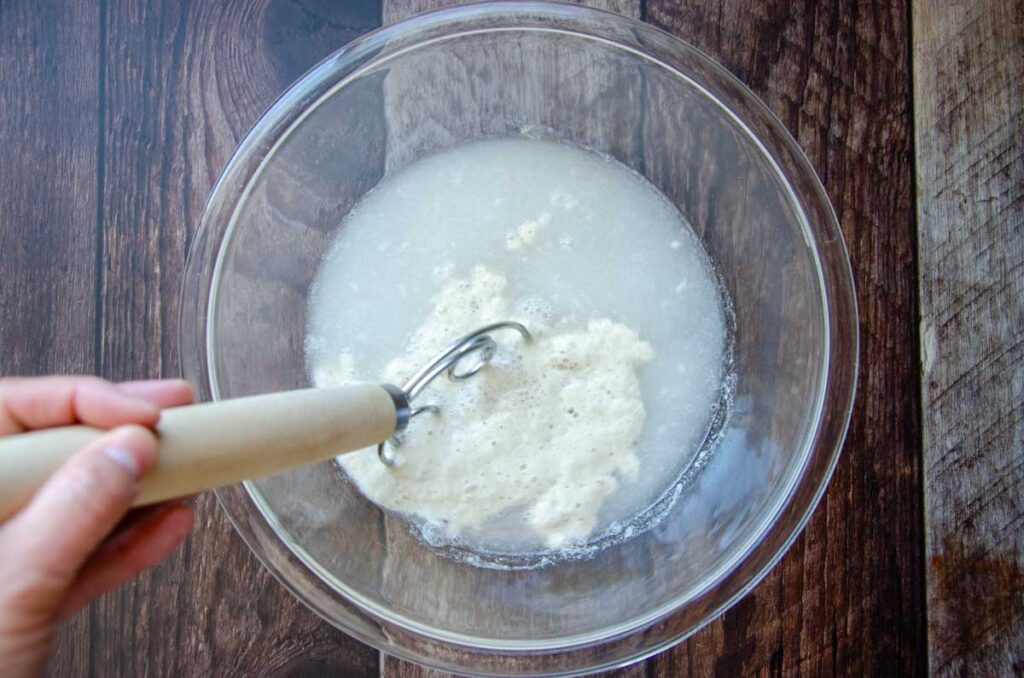
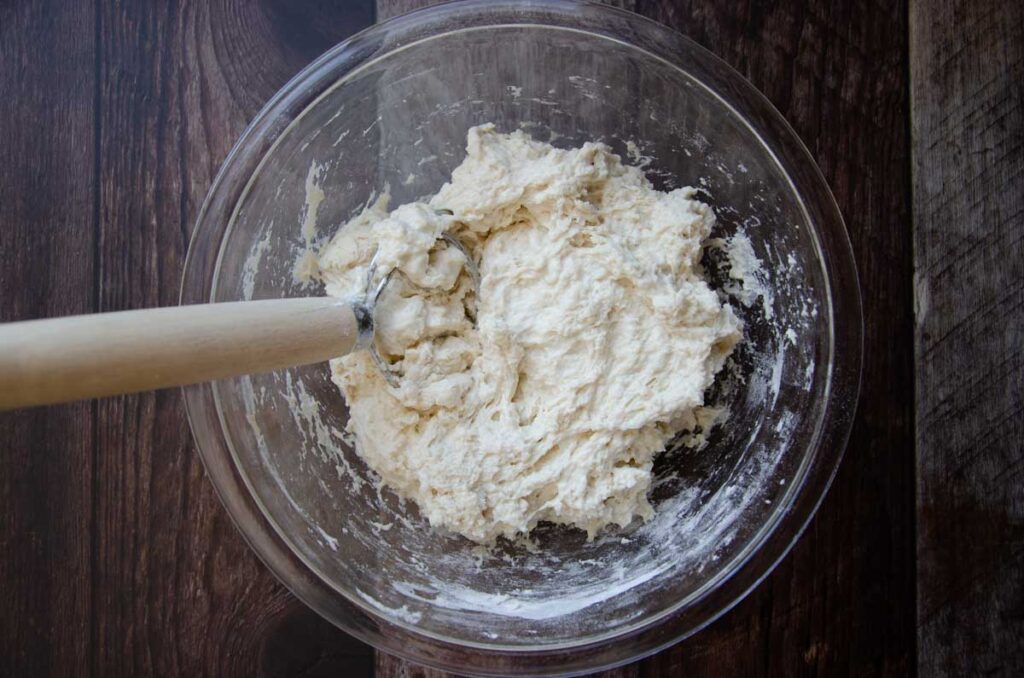
Combine 125 g (1/2 cup) sourdough starter, 375 g (1 1/2 cup) water, and 2 tsp salt, in a large bowl using a Danish dough whisk. Next, add 500 g (4 cups) bread flour and mix it in until all of the flour is incorporated with the wet ingredients until a shaggy dough forms.
Cover the bowl and let the dough rest for 30 minutes. This gives the flour a chance to properly hydrate.
Stretch and Folds
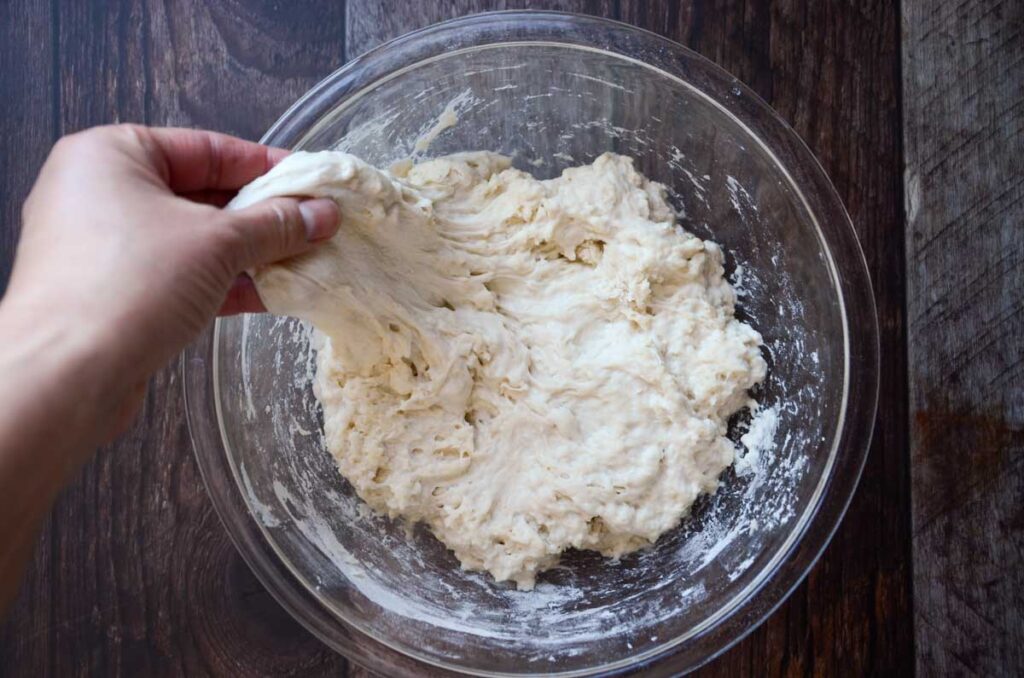
Do a series of stretch and folds to strengthen the gluten in the dough. Grab the side of the dough and lift it straight up and then fold it over onto itself in the middle of the dough. Rotate the bowl a quarter turn and repeat. Continue stretching and folding the dough until it starts to feel resistant, generally 6-8 folds. Cover the bowl and let rest for 10 minutes. This completes your first stretch and fold set.
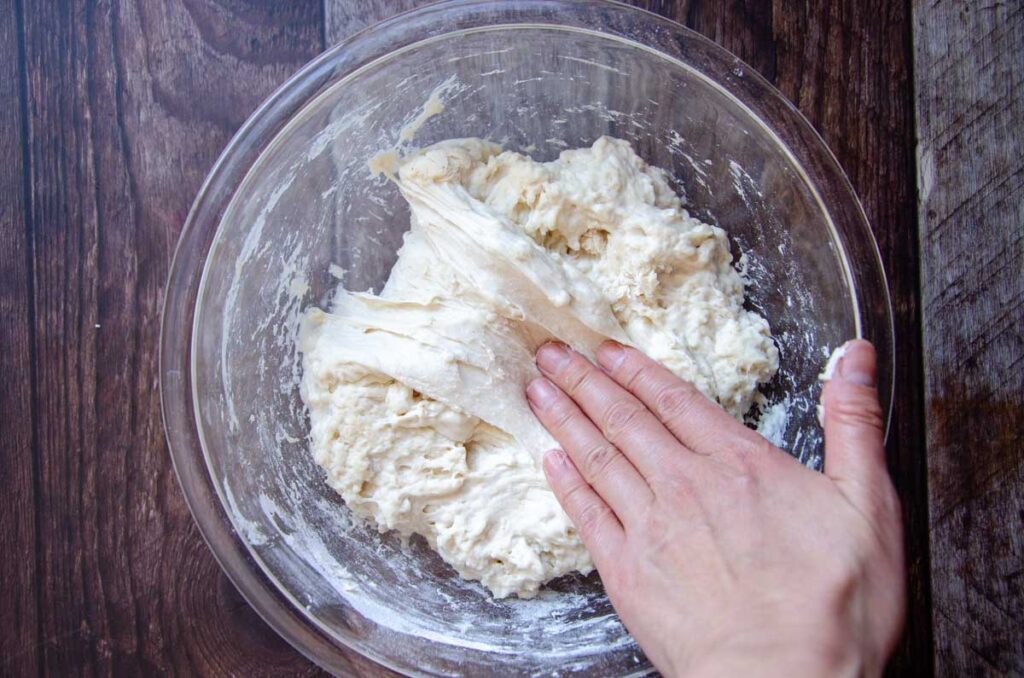
Use wet hands if you find the dough sticks too much to your hands when you do your stretch and folds.
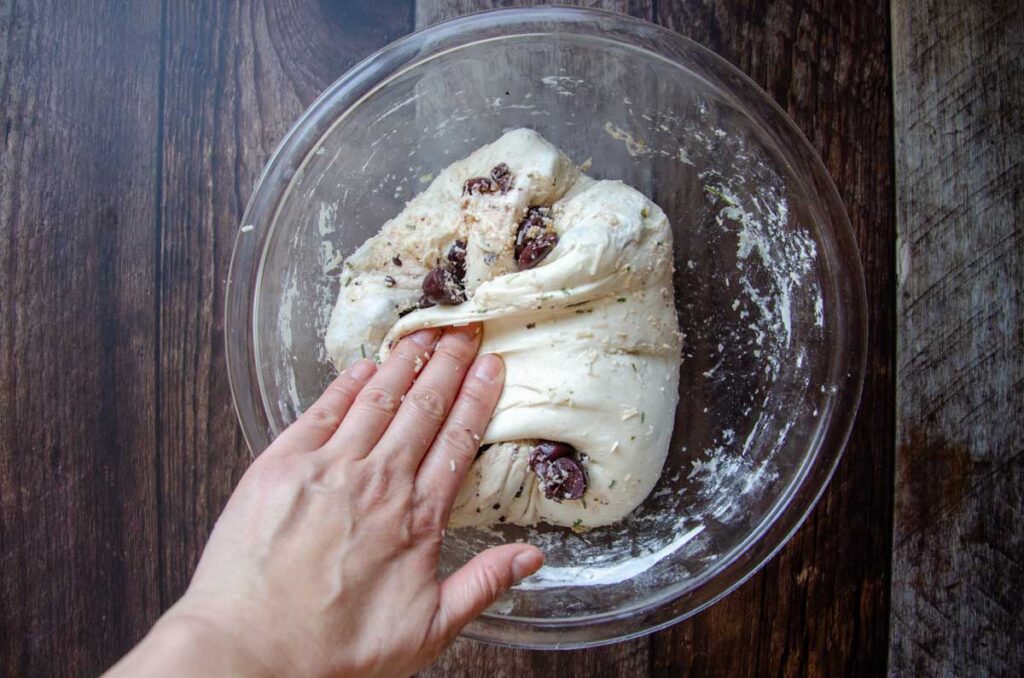
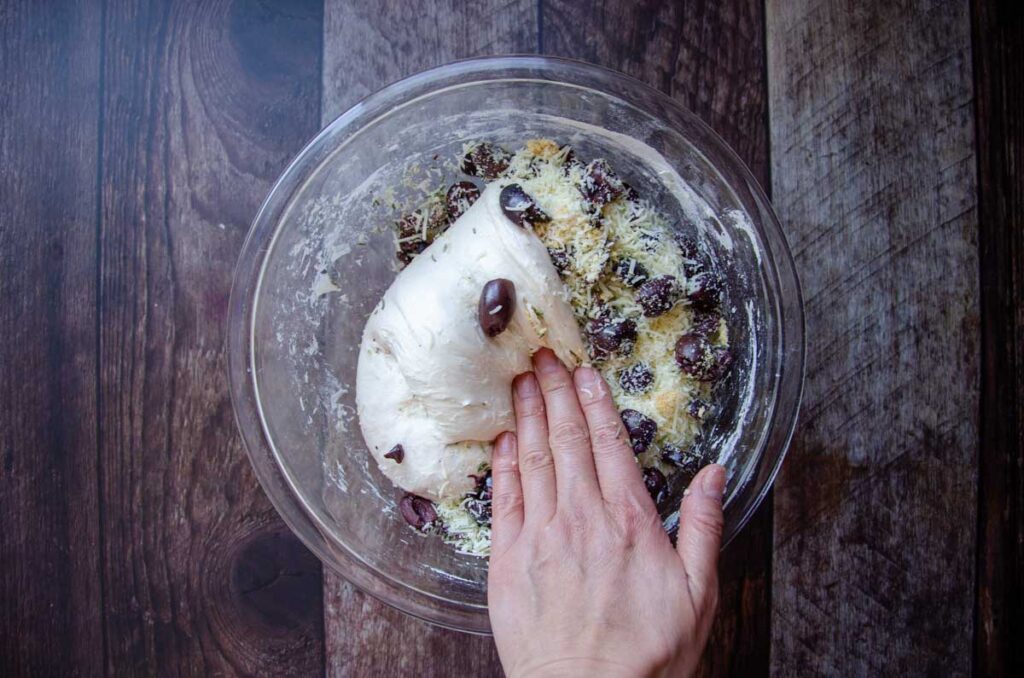
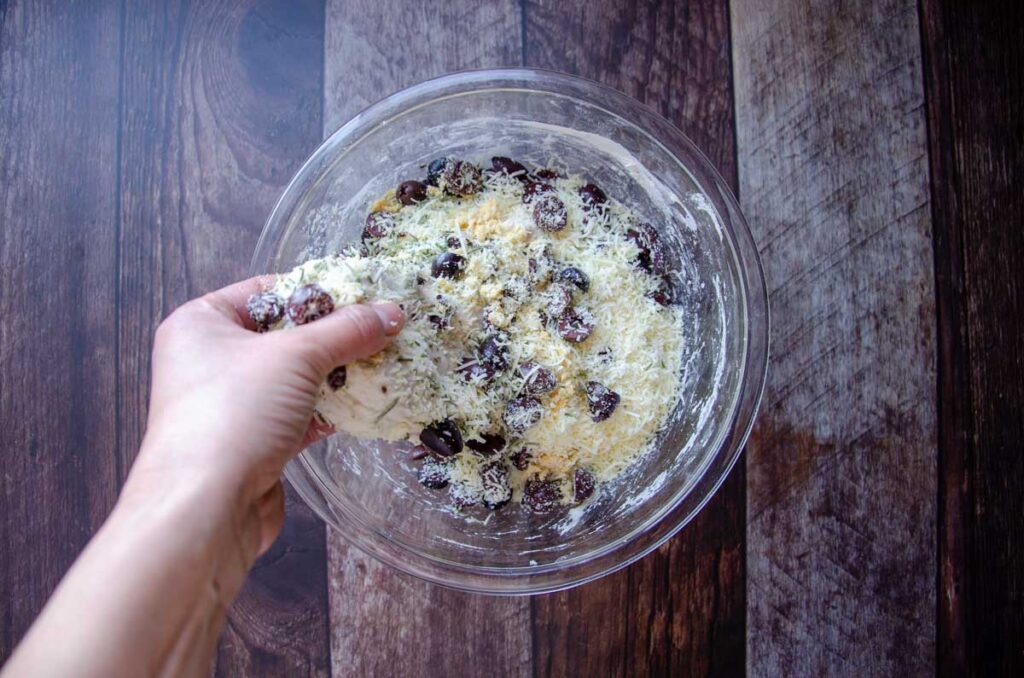
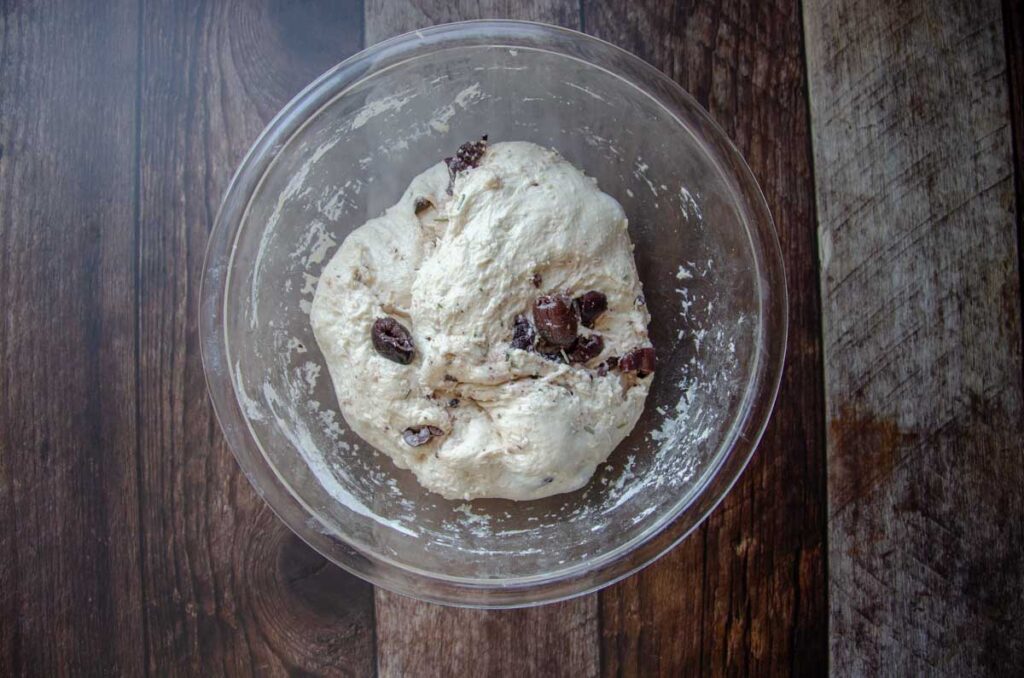
Continue stretching and folding the dough until you have completed 5 sets of stretch and folds. At the 4th set of stretch and folds, add the olives, 2 tsp dried rosemary, 1 tsp garlic powder, and 75 g (3/4 cups) grated parmesan cheese before you stretch and fold the dough. The add-ins will distribute throughout the dough as you fold it.
Bulk Ferment
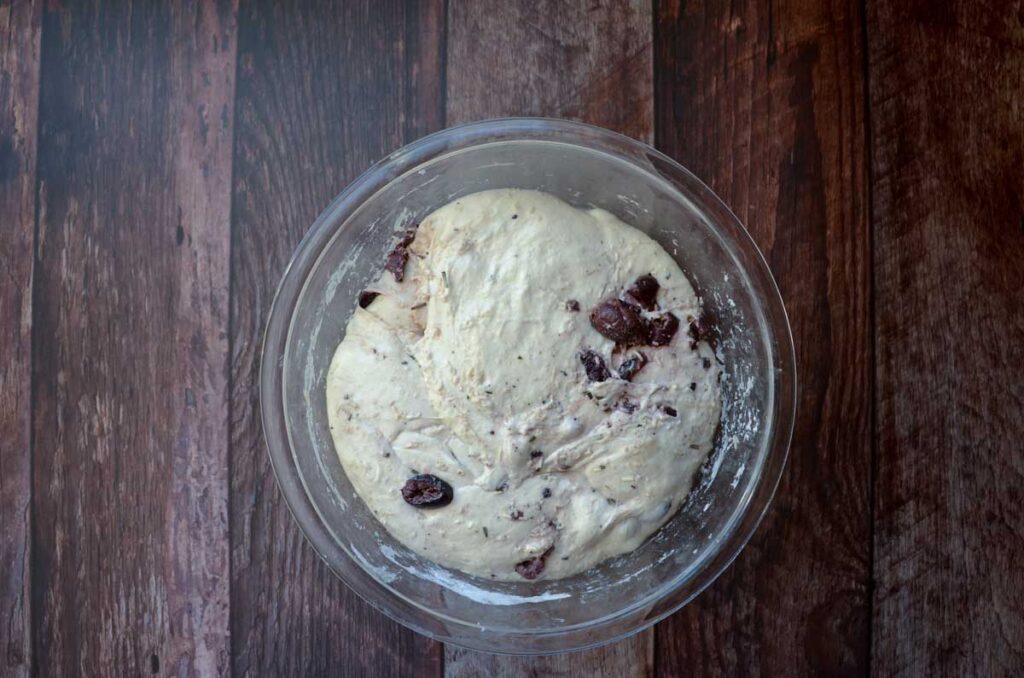
After the stretch and folds are done, cover the bowl and place in a warm spot in the kitchen to let the dough rise. The bulk fermentation time will take 8-12 hours, but the time largely depends on the temperature of your kitchen. The dough is ready to be shaped when it has passed the finger poke test, or has almost doubled in size. (the picture left is at the beginning of the bulk ferment. The picture right is after the bulk ferment) I like to do this step overnight.
Shape
The next day turn the bread dough out onto a lightly floured surface. Fold the top of the dough halfway down until it reaches the center of the dough. Next, fold the bottom of the dough up to meet the middle of the dough.


Do the same with each side of the dough, folding inward to the center of the dough. Using a bench scraper helps to lift the dough from the work surface.


Flip the dough over so that the folds are facing downward. With your hands cupped on the far side of the dough ball, gently pull the loaf towards you, with your pinkie fingers gently pushing the dough under itself. Readjust your hands and repeat, pull the dough towards you until the dough is in the shape of a ball.

Lift the shaped dough into a banneton dusted with rice flour with the seam side up. If you don’t own a proofing basket, lift the dough onto a piece of parchment paper with the seams facing down, and then lift the dough using the parchment paper into a bowl and cover.
Pinch the sides of the dough together. Cup the far end with both hands and gently pull it toward yourself. Adjust your hands and continue pulling until the dough forms a smooth, round ball. Be careful not to pull too much, as this may cause the top of the dough to rip open.
What if You Don’t Have a Banneton?
While its nice to have, you don’t need a fancy proofing basket to bake good bread. After the dough is shaped, place the dough onto a piece of parchment paper with the seam side down. Then, using the parchment paper as handles, lift the dough back into the bowl. Cover the bowl and refrigerate.
Proof | Cold Proof
Proof the olive bread dough on the counter at room temperature for 2 hours, or until the dough looks puffy and light. Alternatively, you can refrigerate the dough to cold proof for up to 48 hours. Place the banneton in a plastic bag so the dough doesn’t dry out.
Bake
Preheat the Dutch oven at 450°F/230°C for 45 minutes.
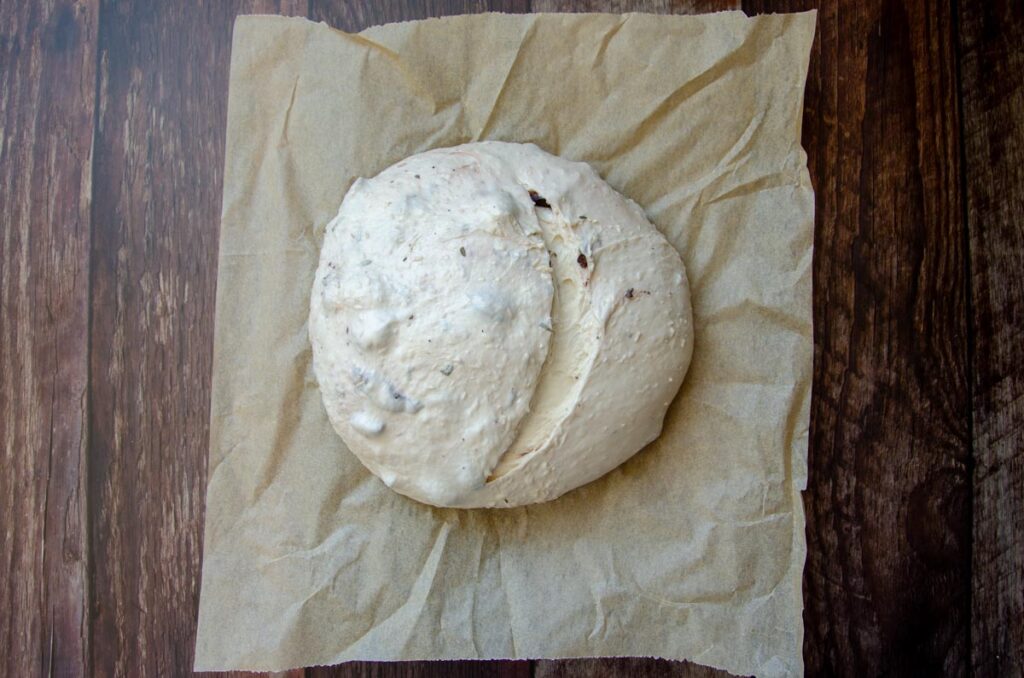
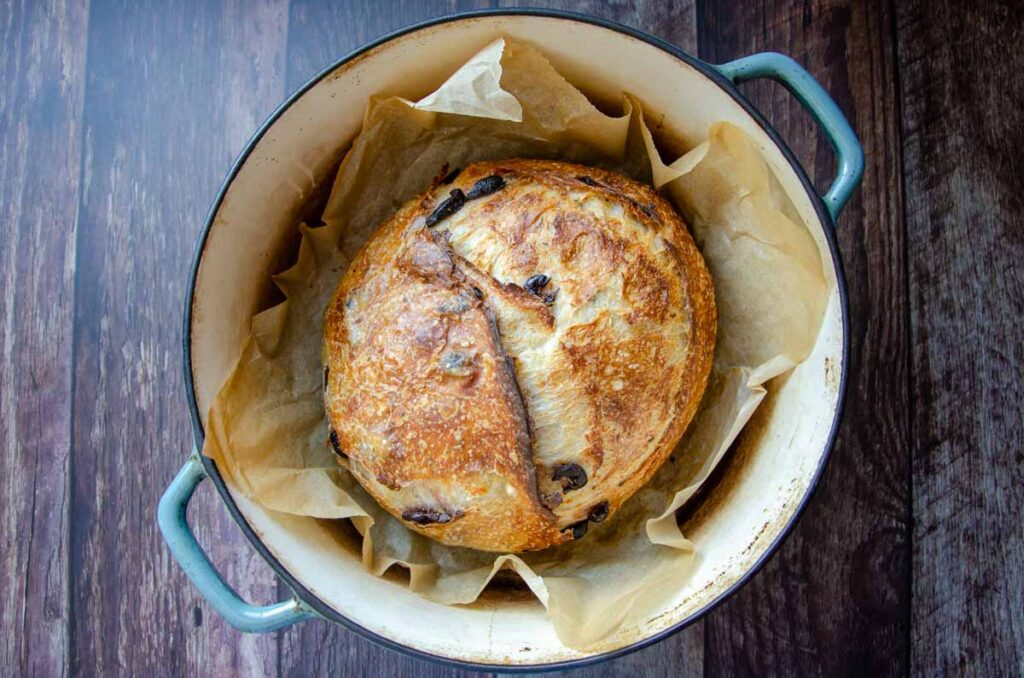
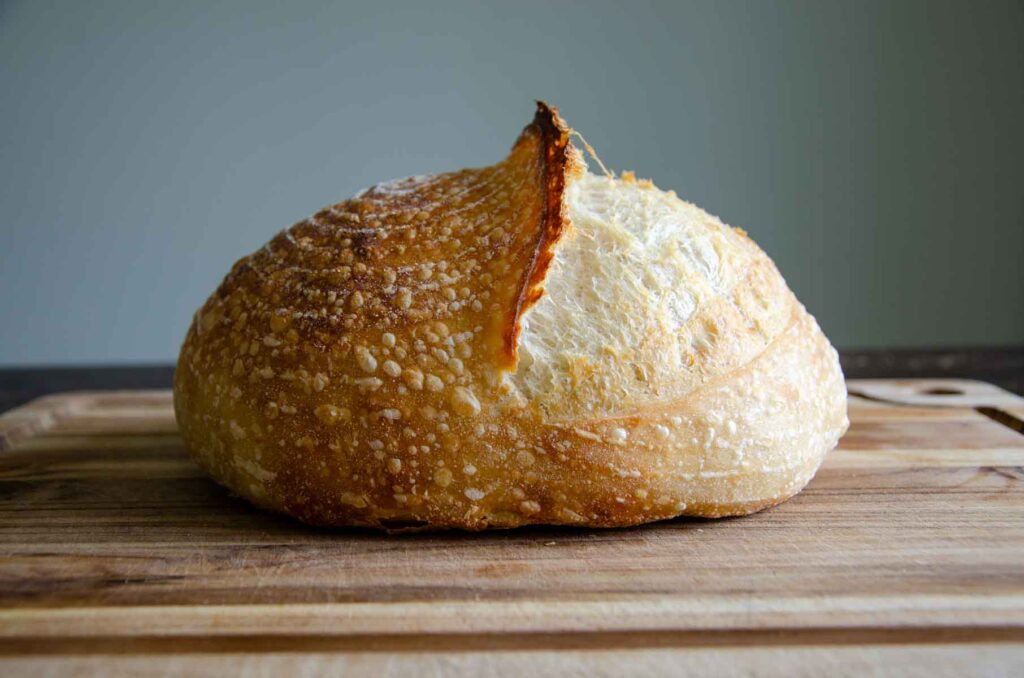
Score the surface of the dough with a lame or a sharp knife and place in the hot Dutch oven. Bake for 30 minutes with the lid, and then an additional 15 minutes without the lid. The bread is done when the internal temperature reaches 200°F/95°C.
Storage
Place the olive bread on a wire rack to cool completely before slicing the bread. Store bread in an airtight container at room temperature for up to 3 days.
To freeze, allow the bread to cool completely before wrapping tightly in a few layers of plastic wrap. Label with the date and name, and freeze. To thaw, remove and warm on the counter for a few hours. For the best flavor, enjoy within 3 months.
Tips for Olive Sourdough Bread
- Use a kitchen scale for the most consistent results.
- Be sure to rinse and dry the olives before adding to the dough.
- Be gentle when folding the olives in to keep their shape intact.
- For best results, try to keep the olives inside the dough when shaping.
What To Eat With Olive Sourdough Bread?
- Here are some serving ideas now that you know how to make olive sourdough bread.
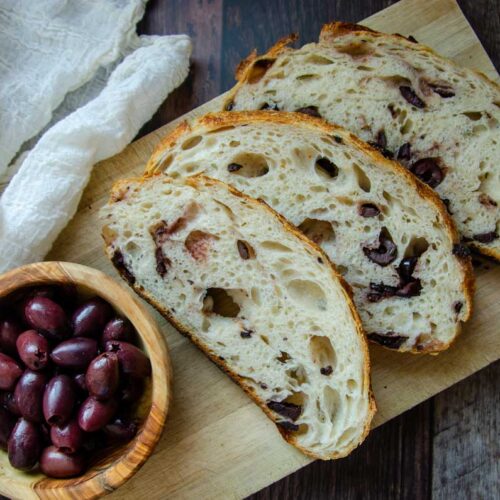
- Add slices of olive sourdough bread with your cheese or charcuterie board at your next gathering.
- Serve with a Greek Salad.
- Dip into an olive oil dipping oil.
- Use olive sour dough bread for an amped up grilled cheese sandwich.
Sourdough Bread Sample Baking Schedule
Baking with sourdough can be a bit intimidating at first since so many variables are involved. But once you understand the process, it’s quite simple and highly flexible to accommodate your schedule. Here is a sample baking schedule.
| Day 1: 8:00 am | Mix the dough and rest for 30 minutes/prep raisins |
| 8:30- 9:20 am | 5 sets of stretch and folds with 10-minute intervals/add inclusions on the 4th set of folds |
| 9:20 am – 5:00 pm | Bulk ferment at room temperature |
| 5:00 pm | Shape the dough and place into a proofing basket |
| 5:10 pm – 8:00 am | Cold proof |
| Day 2: 8:00 am | Preheat Dutch oven |
| 8:45 am | Score and bake the bread dough |
| 9:35 am | Place bread on a cooling rack |
Sourdough Olive and Cheese Bread FAQs
Do I Need to Use a Kitchen Scale?
I know that buying a kitchen scale seems like one more thing, however, measuring by weight instead of volume ensures consistent sourdough bread doughs. Investing in an inexpensive scale is a great idea if you plan to bake sourdough bread regularly.
How Do I Keep the Bottom of My Sourdough From Burning?
Sometimes the bottom of the sourdough bread gets too hot in the oven and burns. If this happens, preheat the Dutch oven with a baking sheet on the rack beneath it. This will help shield the heat and prevent the bottom from getting too dark.
Can I Change the Type of Olives I Use?
Of course! Use what you like to eat. Just be sure to rinse and pat dry before adding them to the dough.


I’d love to hear from you! If you made this Olive Sourdough Bread Recipe and loved it, I would love it if you gave it 5 stars! Happy Baking!
Rosemary Olive Parmesan Sourdough Bread
Want to Save This Recipe?
Enter your email & I’ll send it to your inbox. Plus, get great new recipes from me every week!
By submitting this form, you consent to receive emails from Lockrem Homestead
Equipment
- 6 qt Dutch oven
- kitchen scale
- Danish dough whisk
- lame
- parchment paper
Ingredients
- 375 g water 1½ cups
- 125 g active sourdough starter ½ cup
- 2 tsp salt
- 500 g bread flour 4 cups
- 165 g kalamata olives 1 cup
- 1 tsp garlic powder
- 2 tsp rosemary
- 75 g parmesan cheese ¾ cup
Instructions
Prep
- Measure 165 g (1 cup) olives and place in a strainer. Then rinse them under warm water to remove as much of the salty brine as you can. Place olives on a paper towel and press with a second paper towel to dry the olives the best you can. Give the olives a rough chop on a cutting board with a sharp knife.
- Feed your sourdough starter 4-6 hours before you plan to mix your dough. I like to feed my starter a ratio of 1:1:1.
Mix
- Combine 125 g (1/2 cup) sourdough starter, 375 g (1 1/2 cup) water, and 2 tsp salt, in a large bowl using a Danish dough whisk. Next, add 500 g (4 cups) bread flour and mix it in until all of the flour is incorporated with the wet ingredients until a shaggy dough forms.
- Cover the bowl and let the dough rest for 30 minutes. This gives the flour a chance to properly hydrate.
Stretch and Folds
- Do a series of stretch and folds to strengthen the gluten in the dough. Grab the side of the dough and lift it straight up and then fold it over onto itself in the middle of the dough. Rotate the bowl a quarter turn and repeat. Continue stretching and folding the dough until it starts to feel resistant, generally 6-8 folds. Cover the bowl and let rest for 10 minutes. This completes your first stretch and fold set.
- Use wet hands if you find the dough sticks too much to your hands when you do your stretch and folds.
- Continue stretching and folding the dough until you have completed 5 sets of stretch and folds. At the 4th set of stretch and folds, add the olives, 2 tsp dried rosemary, 1 tsp garlic powder, and 75 g (3/4 cups) grated parmesan cheese before you stretch and fold the dough. The add-ins will distribute throughout the dough as you fold it.
Bulk Ferment
- After the stretch and folds are done, cover the bowl and place in a warm spot in the kitchen to let the dough rise. The bulk fermentation time will take 8-12 hours, but the time largely depends on the temperature of your kitchen. The dough is ready to be shaped when it has passed the finger poke test, or has almost doubled in size. I like to do this step overnight.
- With a floured finger, poke the dough. If the dough springs back completely, it needs more time to ferment. If the dough springs back, partially filling in the indentation, then it’s ready to bake. If the hole doesn’t spring back at all, it’s likely over proofed. You can continue baking over proofed bread, but it will likely be dense with minimal rise. Otherwise you can make it into fry bread. Divide and flatten the dough and fry it in a hot pan until it’s done.
Shape
- The next day turn the bread dough out onto a lightly floured surface. Fold the top of the dough halfway down until it reaches the center of the dough. Next, fold the bottom of the dough up to meet the middle of the dough. Do the same with each side of the dough, folding inward to the center of the dough. Using a bench scraper helps to lift the dough from the work surface.
- Flip the dough over so that the folds are facing downward. With your hands cupped on the far side of the dough ball, gently pull the loaf towards you, with your pinkie fingers gently pushing the dough under itself. Readjust your hands and repeat, pull the dough towards you until the dough is in the shape of a ball.
- Lift the shaped dough into a banneton dusted with rice flour with the seam side up. If you don’t own a proofing basket, lift the dough onto a piece of parchment paper with the seams facing down, and then lift the dough using the parchment paper into a bowl and cover.
Proof
- Proof the olive bread dough on the counter at room temperature for 2 hours, or until the dough looks puffy and light. Alternatively, you can refrigerate the dough to cold proof for up to 48 hours. Place the banneton in a plastic bag so the dough doesn’t dry out.
Bake
- Preheat the Dutch oven at 450°F/230°C for 45 minutes.
- Score the surface of the dough with a lame or a sharp knife and place in the hot Dutch oven. Bake for 30 minutes with the lid, and then an additional 15 minutes without the lid. The bread is done when the internal temperature reaches 200°F/95°C.
Store
- Place the olive bread on a wire rack to cool completely before slicing the bread. Store bread in an airtight container at room temperature for up to 3 days.
Notes
Tips
-
- Use a kitchen scale for the most consistent results.
- Be sure to rinse and dry the olives before adding to the dough.
- Be gentle when folding the olives in to keep their shape intact.
- For best results, try to keep the olives inside the dough when shaping.
I like to eat this hot and fresh with a slab of butter, but this bread makes an even better sandwich! Leave your comments and questions here, and enjoy this lovely loaf!