
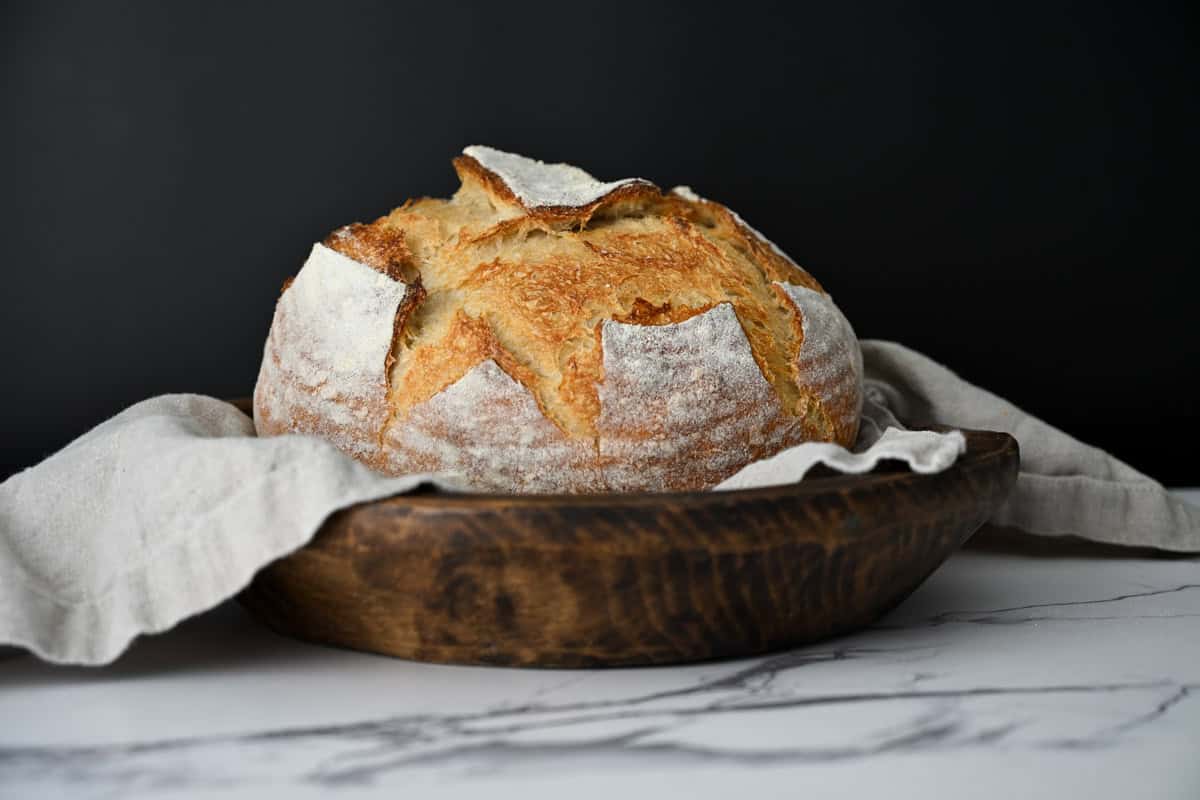
Same Day Sourdough Bread Recipe
Same day sourdough bread recipe that can be mixed, fermented, shaped, and baked in one day. One of the biggest hurdles to learning how to bake sourdough bread is the time commitment. This same day sourdough bread recipe with starter is made in a fraction of the time, making it easy to enjoy homemade sourdough bread.
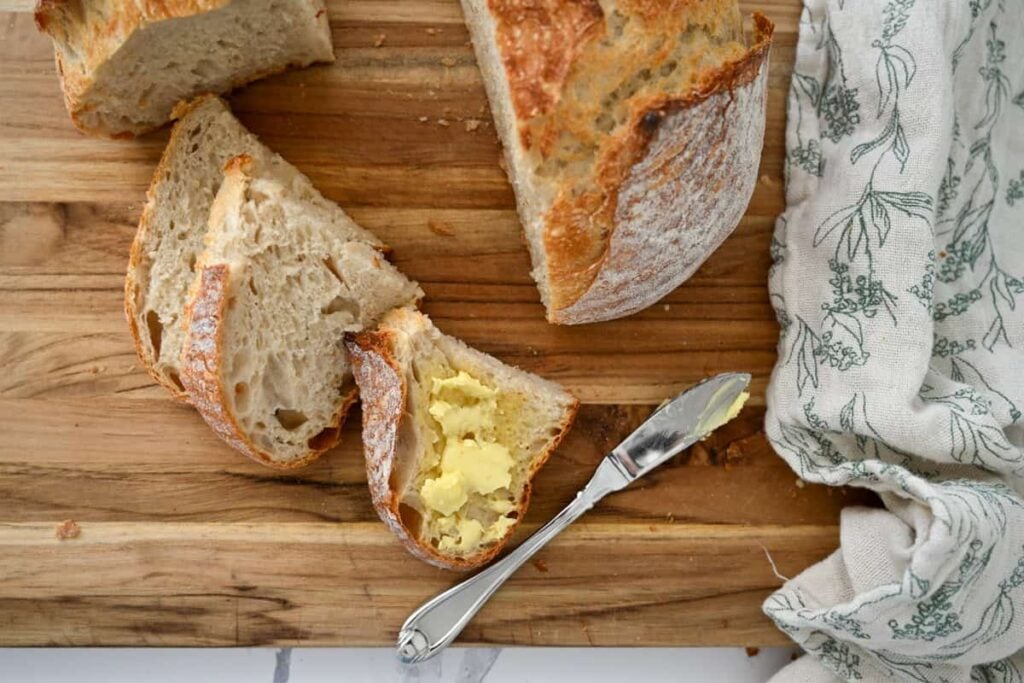
Save This For Later!
We’ll email this post to you so it doesn’t get lost in your open tabs!
By submitting this form, you consent to receive emails from Lockrem Homestead
New to Sourdough?
If you’re new to sourdough baking, these beginner-friendly guides will help you get started with confidence. Learn how to make a Sourdough Starter from Scratch, feed and maintain it with the Complete Sourdough Starter Guide, and bake your first loaf with this Easy Sourdough Bread Recipe. Together, these guides create a solid foundation for your sourdough journey.
Life is busy! And yet, finding time to feed my family with whole foods is at the top of my list. Over the years, I’ve found a few ways to make from-scratch cooking fit into our busy lives.
There are multiple ways to make same-day sourdough bread. One option is to to make sourdough discard bread that uses sourdough discard for flavor and a bit of commercial yeast to accelerate the whole process.
But what about traditional sourdough? Is it possible to make a true sourdough that’s been able to fully ferment and proof using only a sourdough starter and wild yeast, all in one day?
Yes!
Adjusting the amount of starter and creating the right environment means baking sourdough bread in one day has never been easier. With its shortened timeline, recipes like this one make it possible to feed your family with homemade food in a fraction of the time.
Why You’ll Love Same Day Sourdough Bread
- Real Sourdough in One Day – Making homemade sourdough doesn’t have to be complicated. By increasing the amount of sourdough starter, this same day sourdough recipe makes it easy to have a fresh loaf of bread ready in time for dinner.
- Busy Schedules – I love spending all day in the kitchen, but sometimes life doesn’t allow it. By using this same day sourdough recipe, I’m able to fit its shortened baking schedule in amid carpools and laundry. There’s no need to sacrifice homemade bread when life gets full.
- Great for a Beginner Baker – This is an easy recipe for beginner bakers with its abreveated timeline and simple ingredients. Who doesn’t love fresh bread made in one day?
- No Kneading – You will do 3-4 sets of stretch and folds to build the gluten, but no kneading or stand mixer required.
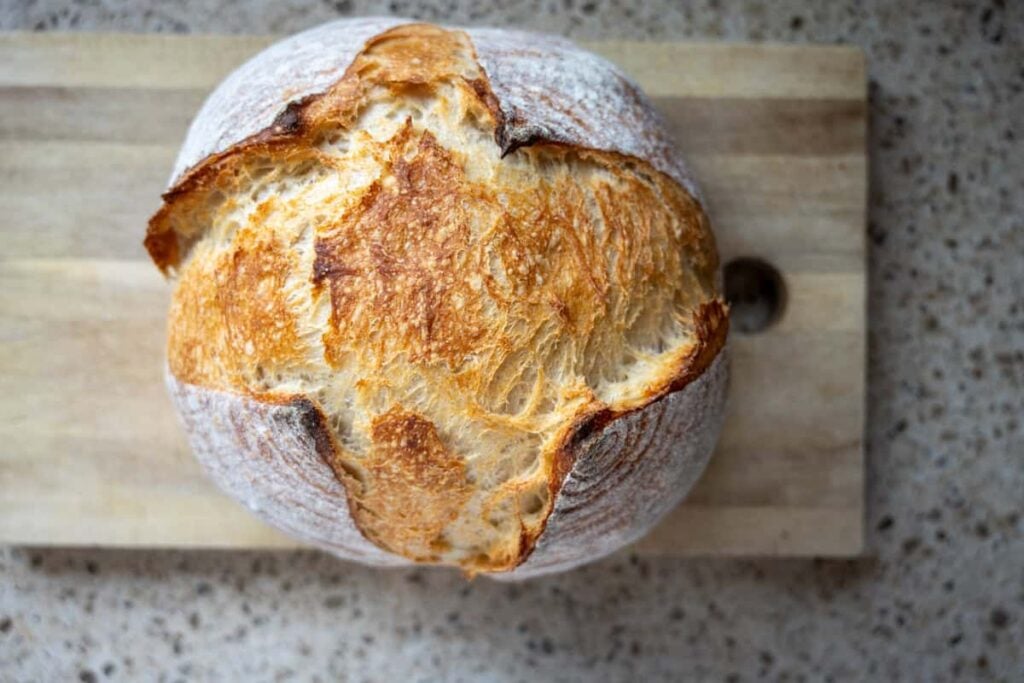
Tools You’ll Need
- 9″ Banneton basket
- Large bowl
- Kitchen scale
- Dough whisk
- Lame
- 7 qt Dutch oven
Ingredients
Exact measurements and instructions are in the recipe card.
- Sourdough Starter – Use active sourdough starter that’s been fed and allowed to come to its peak. It should be full of air bubbles and have a pleasant yeasty aroma, similar to beer.
- Water – Use warm water to encourage fermentation, especially during the cold winter months. Aim for 80°F/26°C to 95°F/35°C.
- Salt
- Flour – I use a combination of bread flour and whole wheat flour to encourage faster fermentation. You can use all-purpose flour, but reduce the water by 20-30 grams since its lower protein content absorbs less water.
Why this Recipe Works
- Amount of Starter – This recipe uses a larger amount of starter than my Easy Sourdough Bread Recipe. Rather than using 125g of starter, this recipe calls for a whopping 250 g of starter to speed up bulk fermentation time. The increased amount of starter reduces the overall fermentation time, resulting in a decreased sour flavor.
- Whole Wheat Flour – Adding a touch of whole wheat flour with its bran and added nutrients encourages fermentation.
- Temperature – Rather than fermenting at room temperature, use a proofing box or oven with the light on to accelerate fermentation. This is important if you’re baking in cooler temperatures, like wintertime. Increasing the amount of starter and letting the dough rest in a warm place gives you the best chances for same-day sourdough baking.
How to Make Sourdough Bread in One Day
Feed the Starter
Ideally, you want the starter to be ready first thing in the morning. I like to feed my starter the night before as follows for this recipe: 40g starter: 160g flour: 160g water (so 1:4:4). This sourdough starter ratio gives me plenty of active sourdough starter so its ready at its peak in the morning.
However, you can feed the starter and make the bread all in one day. To shorten when the starter comes to peak, I suggest a feeding ratio of 1:1:1, 120 g of starter, flour, and water.
Cover and let it rest at 77°F/25°C – 80°F/26°C until its bubbly and doubled in size.
Skip this step if your starter is already activated and ready to bake with.
Mix the Dough
Add active starter, warm water, salt, whole wheat flour, and bread flour in a large mixing bowl. Mix with a fork until all of the flour is incorporated. Cover with a plate or a piece of plastic wrap so the dough doesn’t dry out, and allow to rest in a warm spot for 30 minutes to give the flour a chance to fully hydrate.

Stretch and Folds
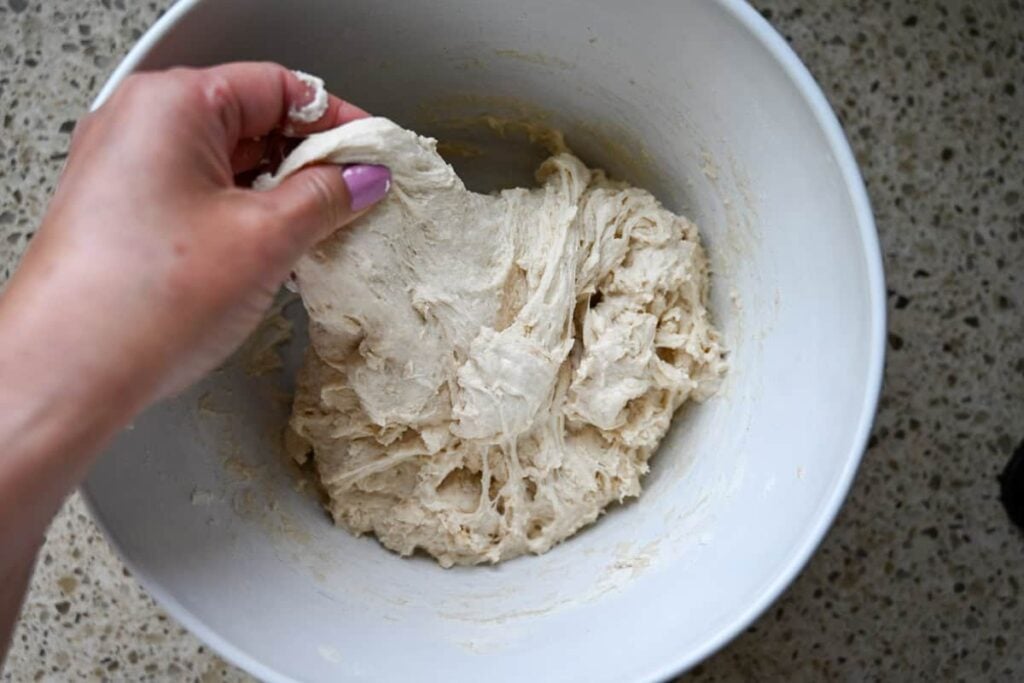
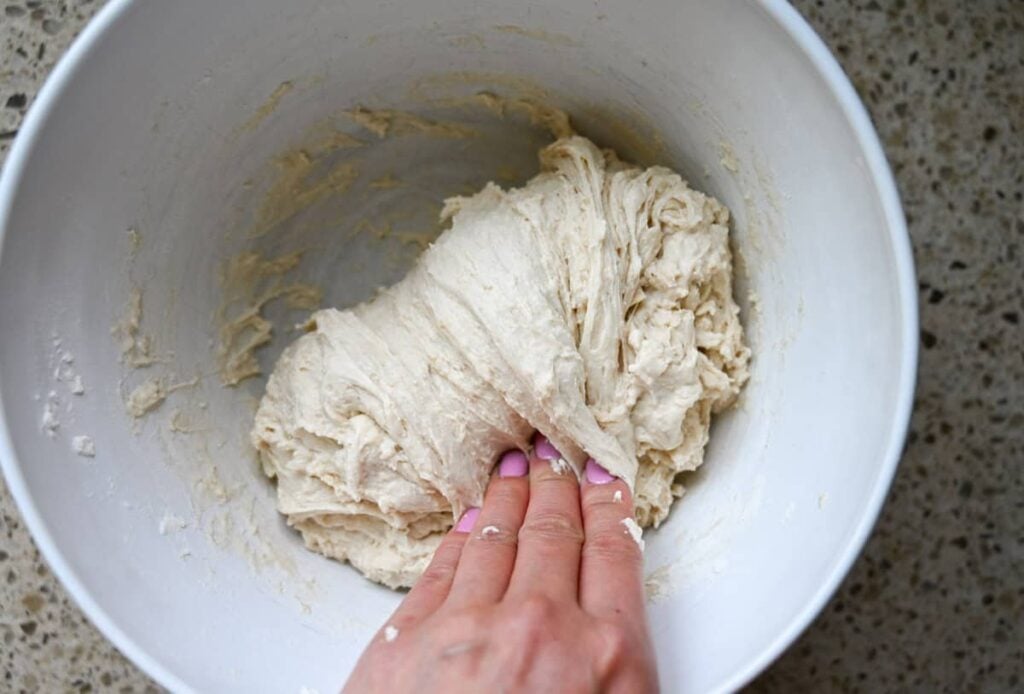
Over the next 90 minutes, perform a series of stretch and folds to build the gluten and strengthen the dough.
Pull the edge of the dough straight up before folding it over itself to the middle of the bowl. Rotate the bowl 90 degrees, and repeat, working your way around the sides of the bowl. Stretch and fold the dough 10-15 times, or until you feel it start to become tight and resistant. During the first stretch and folds, the dough is shaggy and breaks easily. Remember to keep the dough warm during the stretch and folds.
Cover the bowl and allow it to rest before the next set of stretch and folds. Perform 3-4 sets of stretch and folds with 30-minute intervals. You’ll notice the dough becomes soft and elastic by the last set of stretches.
Perform the windowpane test to see if the gluten is developed. Stretch the dough thinly, and if it holds without breaking, it’s ready to bulk ferment. If the dough breaks, it needs another set of stretch and folds. Once the dough passes the windowpane test, its ready to bulk ferment.
Bulk Ferment
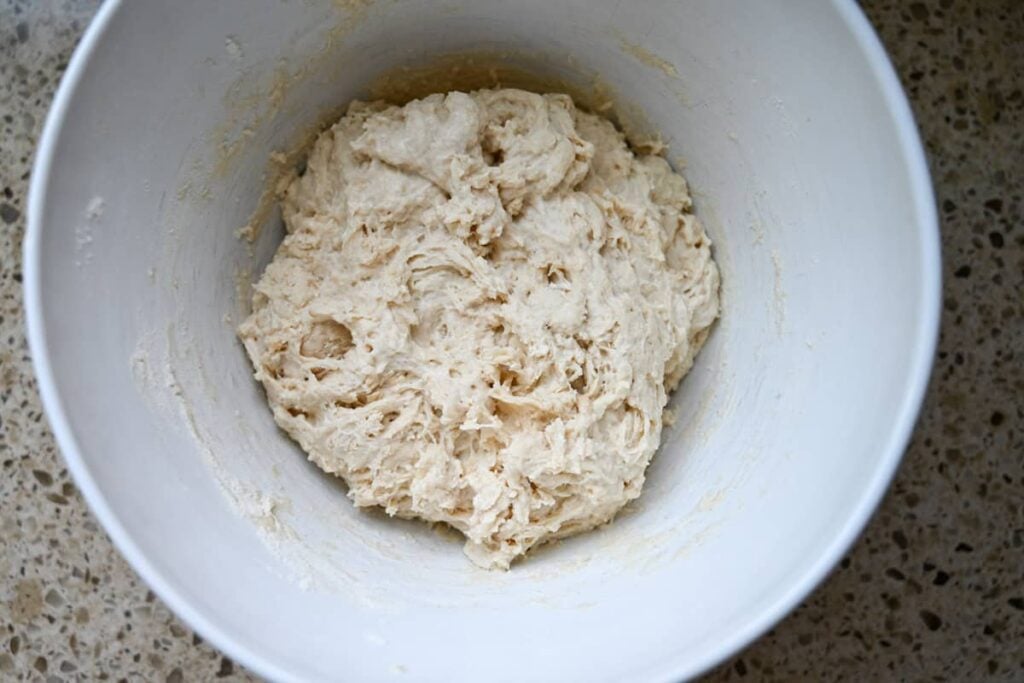
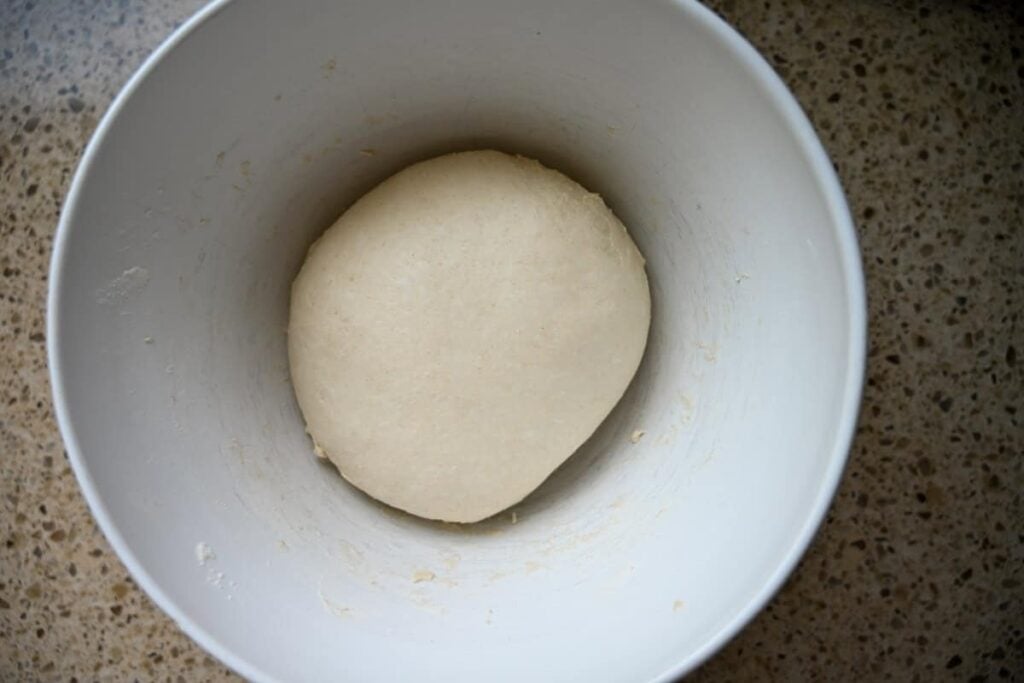
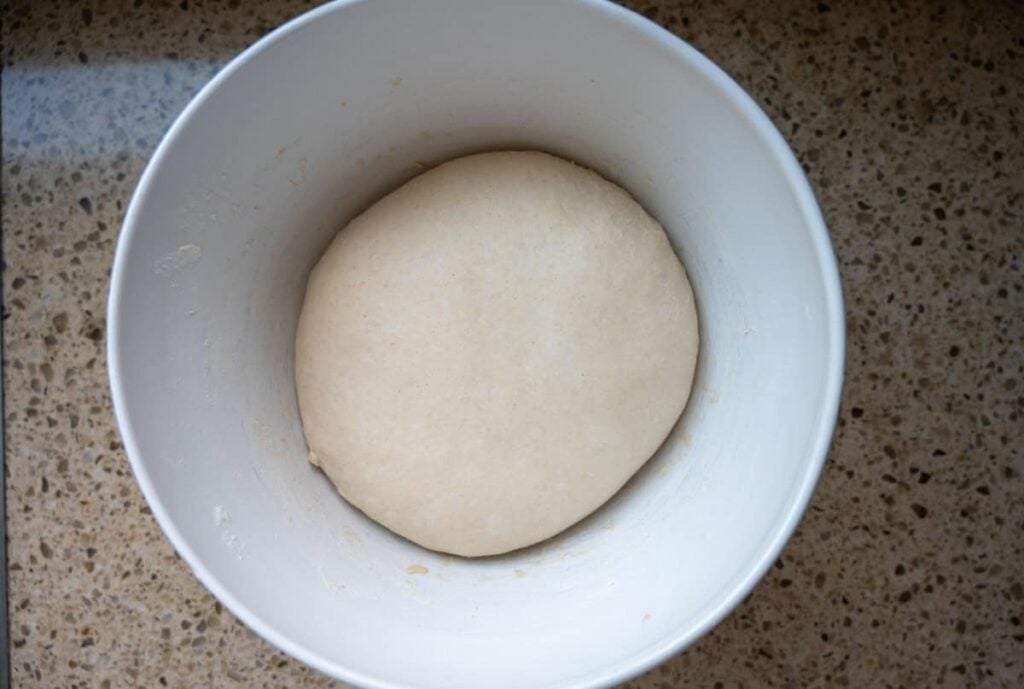
Cover the bowl and allow to rest in a warm place. If your kitchen is cool, find a warm place like an oven with the light on or a proofing box. The dough is ready when it’s risen by 40-50%. Though its difficult to see in the picture, there are small air bubbles beginning to form right under the surface of the dough and the dough looks puffy.
If it does not show these signs, continue to let the dough rise, to finish bulk fermentation. At a dough temperature of 75°F/24°C, the dough is ready in 3 hours from the time it is mixed.
Shape and Proof
Use a bowl scraper and turn out the dough onto a clean work surface dusted with a bit of flour.
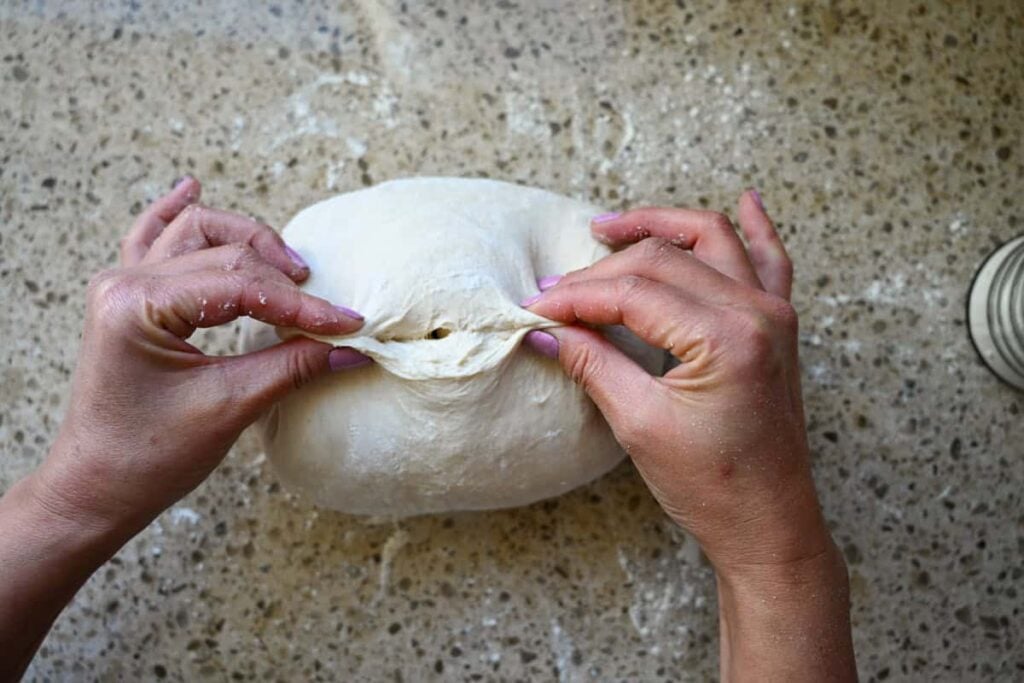
Shape the dough. I like to use the caddy clasp method. Its simple and easy for beginners.
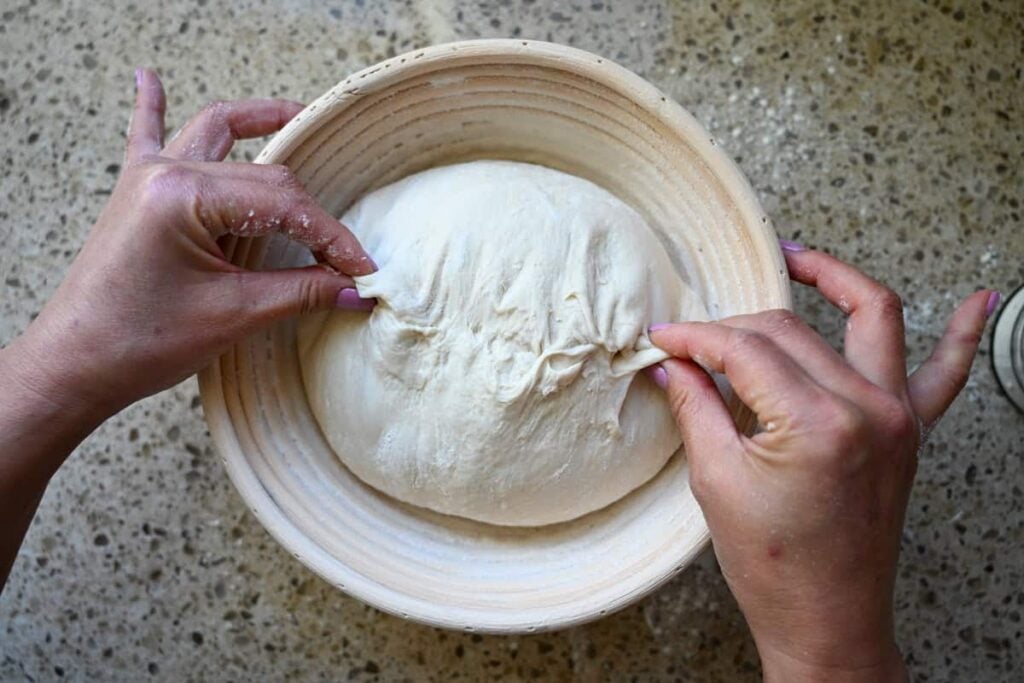
Position your hands under sides of the dough and fold together. Pinch the seams close. Reposition your hands so they’re under the top and bottom of the dough and fold together.
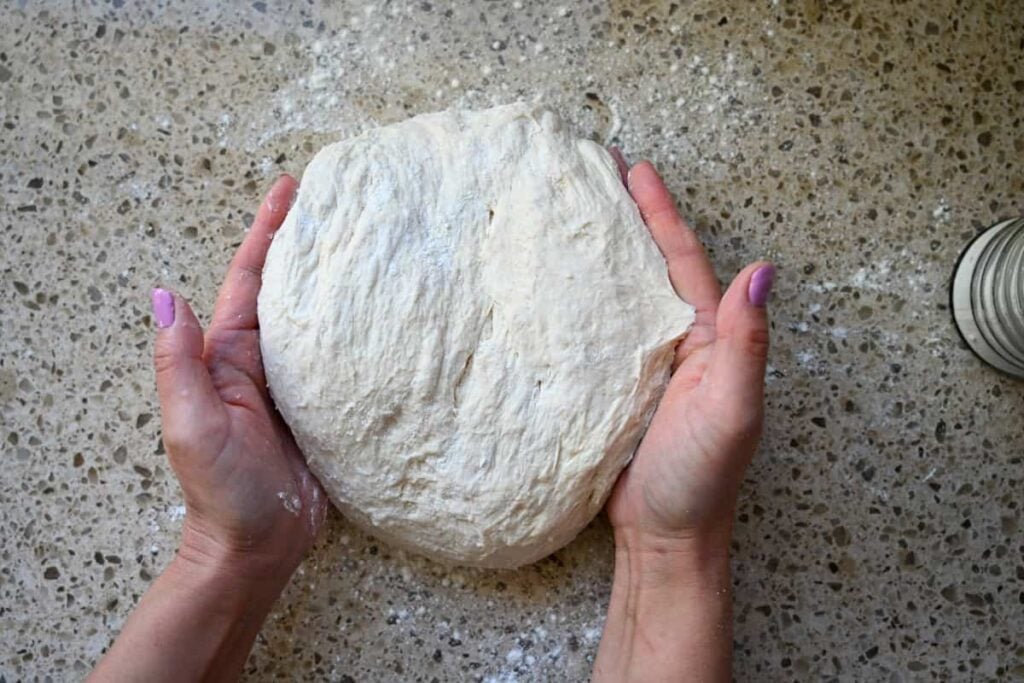
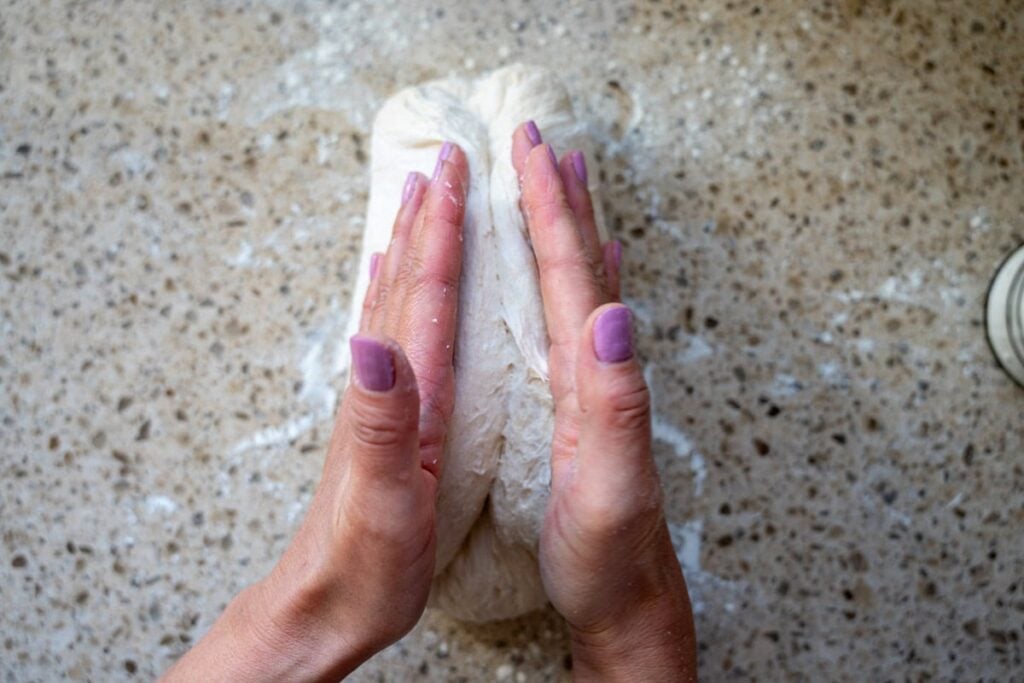
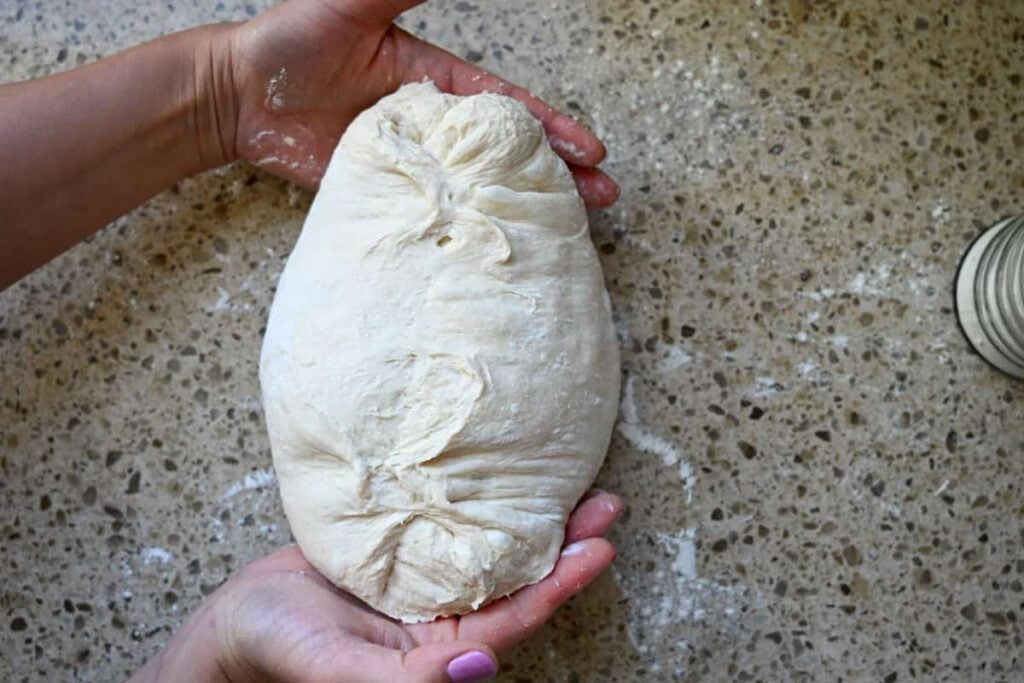
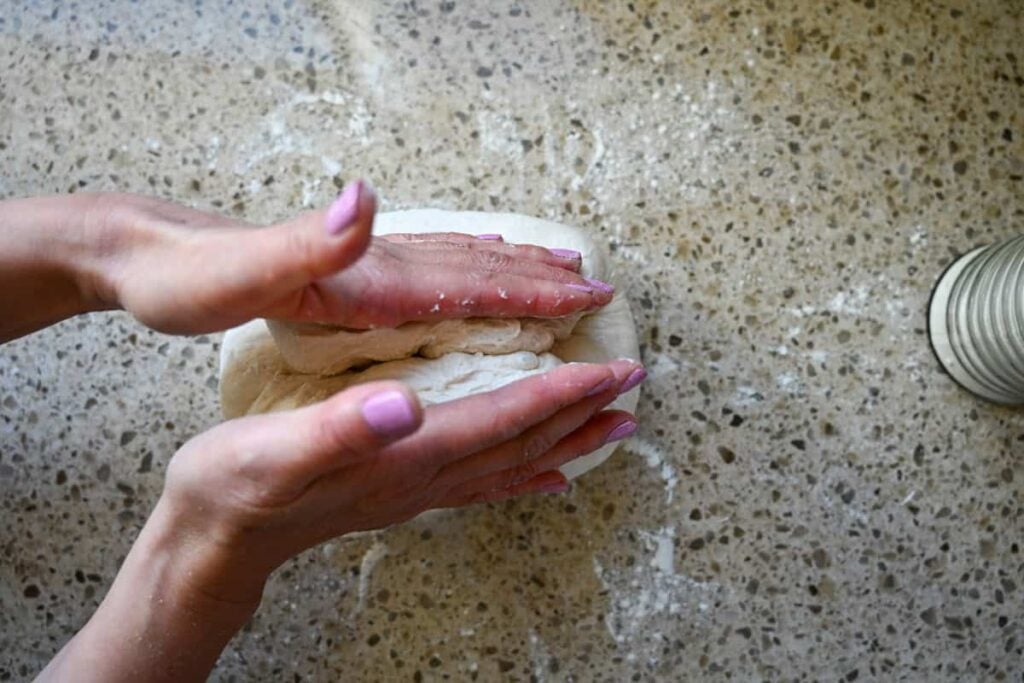
Using a bench scraper, lift the dough, seam side up, into a proofing basket dusted with a bit of rice flour. Stitch the seams close if needed.
Cover the dough and let it rest for its second rise.
Preheat the Dutch oven at 450°F/230°C.
The dough is done proofing when it’s light and puffy-looking. I like to do the poke test. Gently poke your finger into the dough. If it springs back fully, it needs more time. If it fills in partway, it’s ready to bake.
Bake
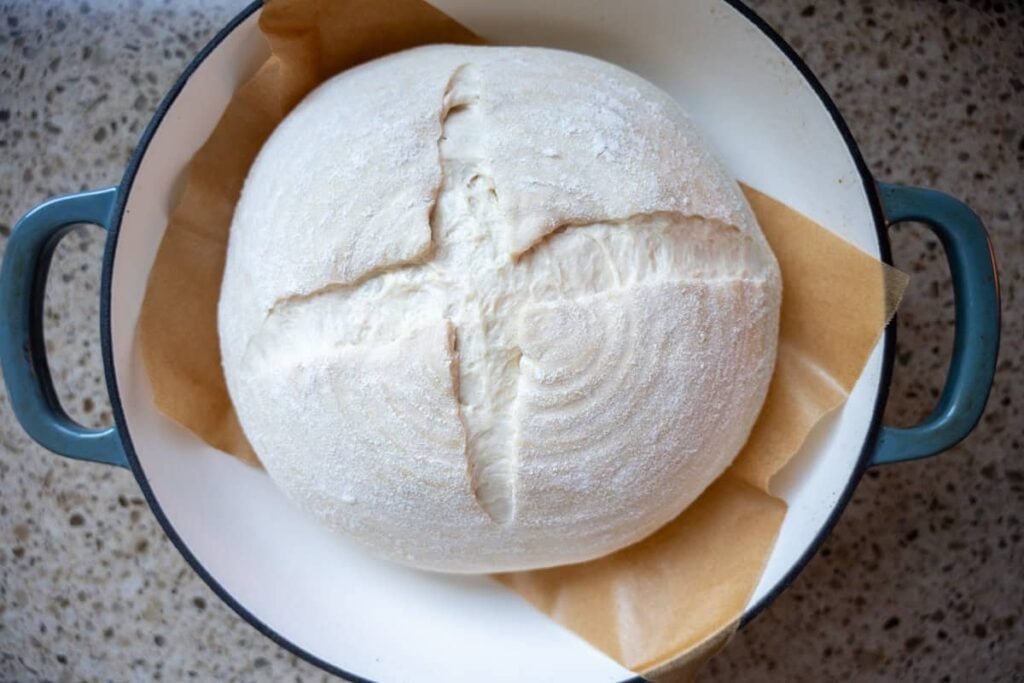
Place a piece of parchment paper over the top of the banneton and flip so the dough is resting on the parchment paper.
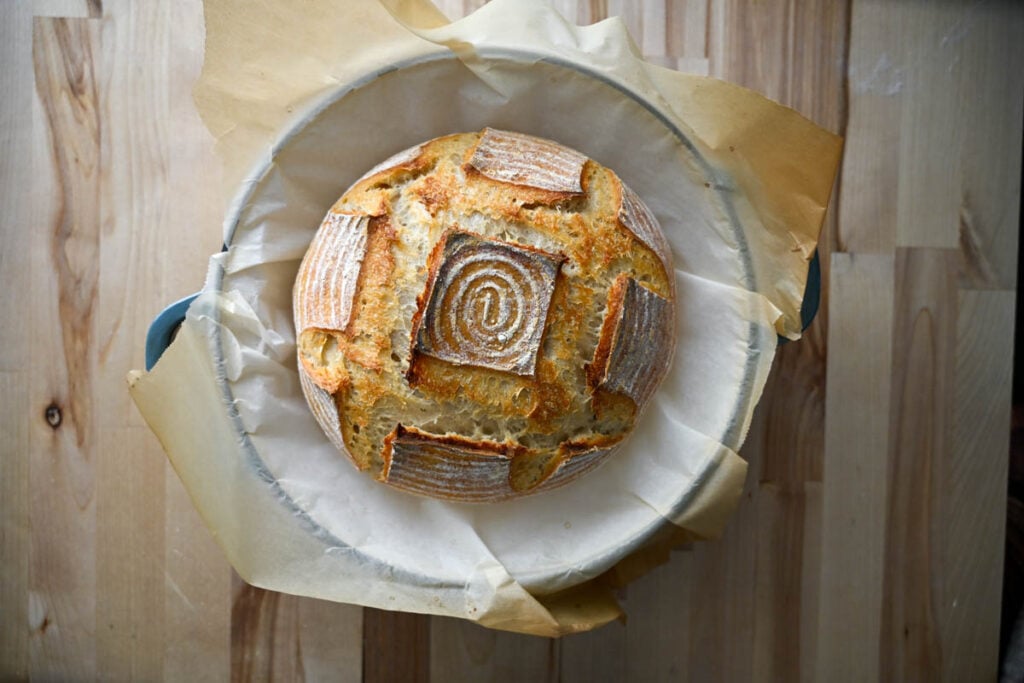
Score the top of the dough with a lame, clean razor blade, or sharp knife, and carefully place it in the hot Dutch oven. Replace the lid, place in the hot oven, and bake for 30 minutes.
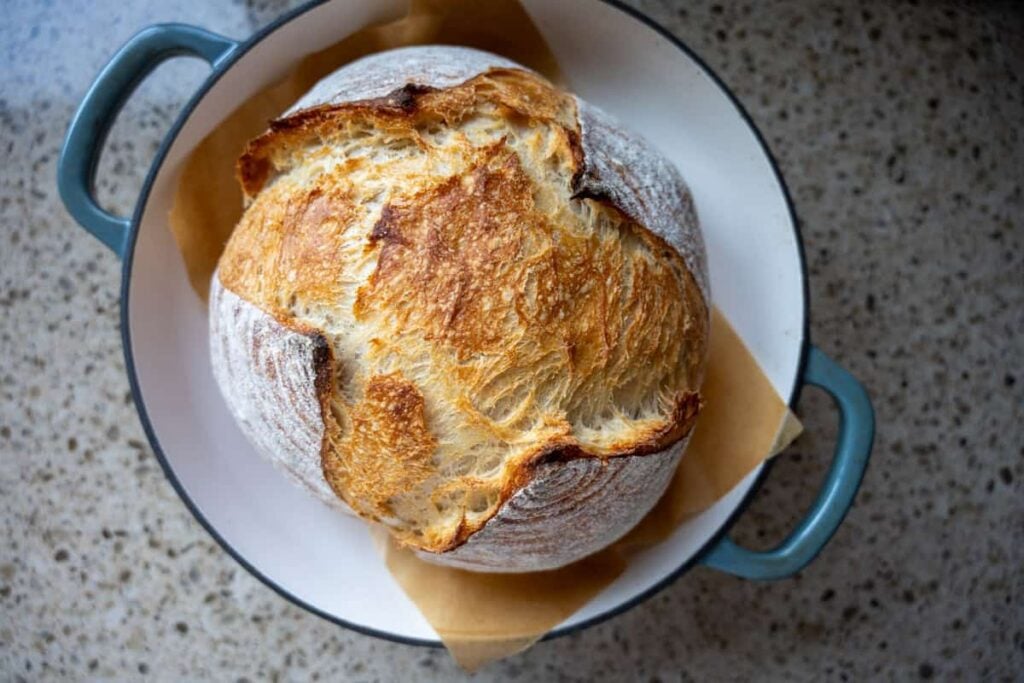
Remove the lid and bake for an additional 10 minutes or until the top of the bread is golden brown.
The bread is done when the internal temperature reaches 200°F/94°C with a digital thermometer. If you don’t have a thermometer, use the thump test. Invert the bread and tap the bottom of the loaf. If the bread sounds hollow, then its baked through. If it sounds dull and heavy, there’s still moisture in the dough and its not done baking.
Remove the bread from the Dutch oven and place the bread on a cooling rack.
Wait for the bread to cool to room temperature before slicing.
Storing Same Day Sourdough Bread
- Room Temperature – Place the bread in an airtight container and store at room temperature for up to 4 days. Over time, the bread will become soft and dry out. To revive, preheat the oven to 450°F/C. Run the loaf under water for 2 seconds and then place in the oven for 10 minutes until the crust is crispy.
- Freeze – Place a whole loaf into a freezer safe bag and remove as much air as possible, or wrap tightly in plastic wrap. Alternatively, preslice the loaf before freezing. To thaw, let the bread warm up on the counter for a few hours. Presliced pieces can be toasted individually right from the freezer.
Helpful Tips for Sourdough Same Day Bread
- Mature Starter – For the best results, be sure your starter is healthy and well established.
- Kitchen Scale – I recommend using a kitchen scale and weighing your ingredients rather than using volume. The amount of flour can vary so much depending how you add it to the measuring cup. A kitchen scale gives you consistent amounts so you can have dependable results.
- Cool the Dough – Pop the banneton into the freezer while the oven preheats so the bread doesn’t overproof. If you have the time, refrigerate the dough for a few hours for a short cold ferment. Cold dough is easier to score and can help with oven spring.
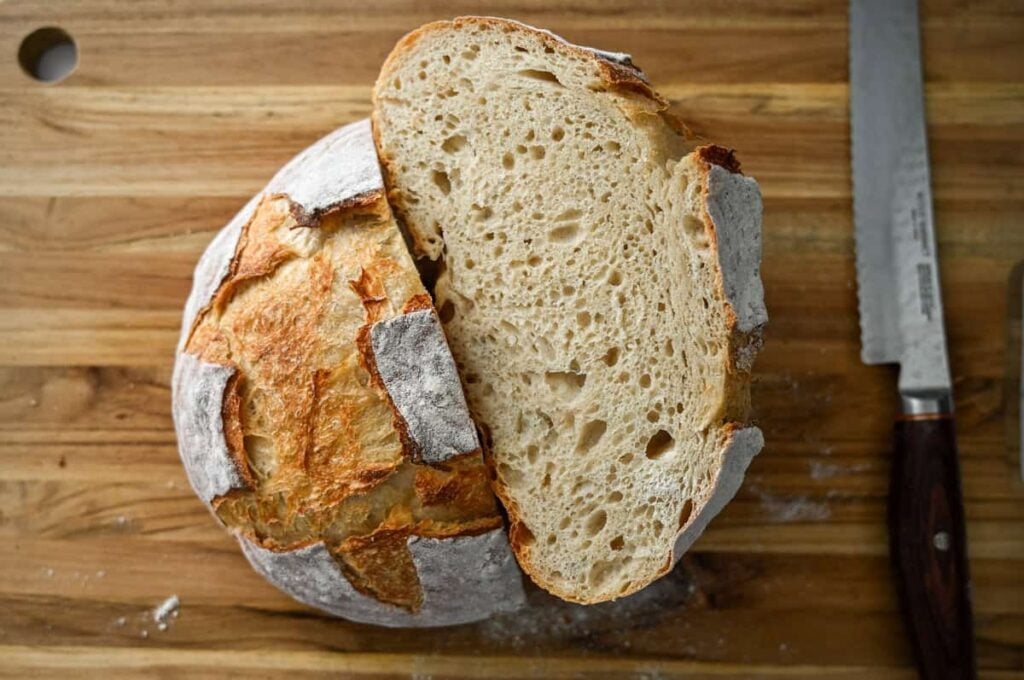
Sample Baking Schedule
This schedule is based on a dough temperature of 75°F/24°C.
| 7:00 am | feed the starter |
| 10:00 am | mix the bread dough |
| 10:30 am | stretch and folds |
| 12:00 pm | bulk ferment |
| 2:00 pm | shape and place in a banneton |
| 4:00 pm | preheat the Dutch oven & short cold proof |
| 4:45 pm | score bread dough |
| 4:50 pm | bake bread |
Variations of Same Day Sourdough Bread
- Flour – Omit the whole wheat flour and use all bread flour. This is nice if you only have bread flour, but may lengthen your fermenting times.
- Add-ins – Fold in your favorite add-ins during the second set of stretch and folds. If adding seeds or nuts, add them when you mix the dough for even distribution.
- Loaf pan – If you over proof the bread dough, all is not lost. Shape the dough into a roll and place into a bread loaf pan. The tall sides help the bread to rise upward compared to baking in a Dutch oven.
FAQs About Same Day Sourdough Bread
How to bake sourdough bread quickly in one day?
Baking sourdough bread quickly in one day relies on a few factors for success. First, start with a healthy mature sourdough starter. It’s the lifeline for sourdough baking. Next, for accelerated fermentation, the recipe uses a large ratio of sourdough starter and the dough is kept around 75°F/24°C to promote the wild yeast to ferment and leaven the bread.
Which flour types are best for speeding up sourdough recipes?
Whole wheat and rye flour with their retained bran and germ offer an abundance of nutrients and natural enzymes for the wild yeast to feed on compared to white flour alone. This recipe adds a minimal amount of whole wheat to promote fermentation while keeping a neutral flavor.
How does the flavor differ from traditional sourdough?
Sourdough bread develops its iconic sourdough tangy flavor from a long, slow fermentation typically during the cold fermenting or cold proofing stage. The cold temperatures brings the rate of fermentation way down and allows the flavors to deepen. A same day sourdough bread doesn’t allow enough time for the bread’s flavor to develop into a sour flavor. Instead, it has little to no sour flavor.
Can I Use all-purpose flour instead of Bread flour?
I recommend using bread flour because it has a higher protein level to improve structure and chew. It also absorbs more water than all-purpose flour, so if you change the flour, you’ll have to adjust the amount of water you add.
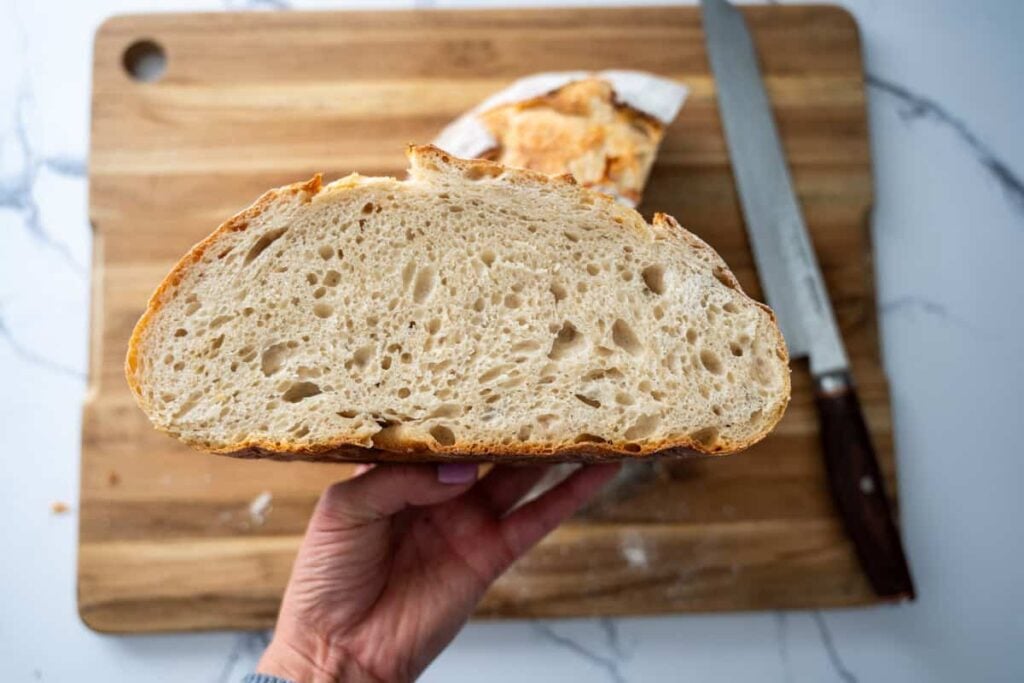
I’d love to hear from you! If you made this Same Day Sourdough Bread recipe and loved it, I would love it if you gave it 5 stars! Happy Baking!
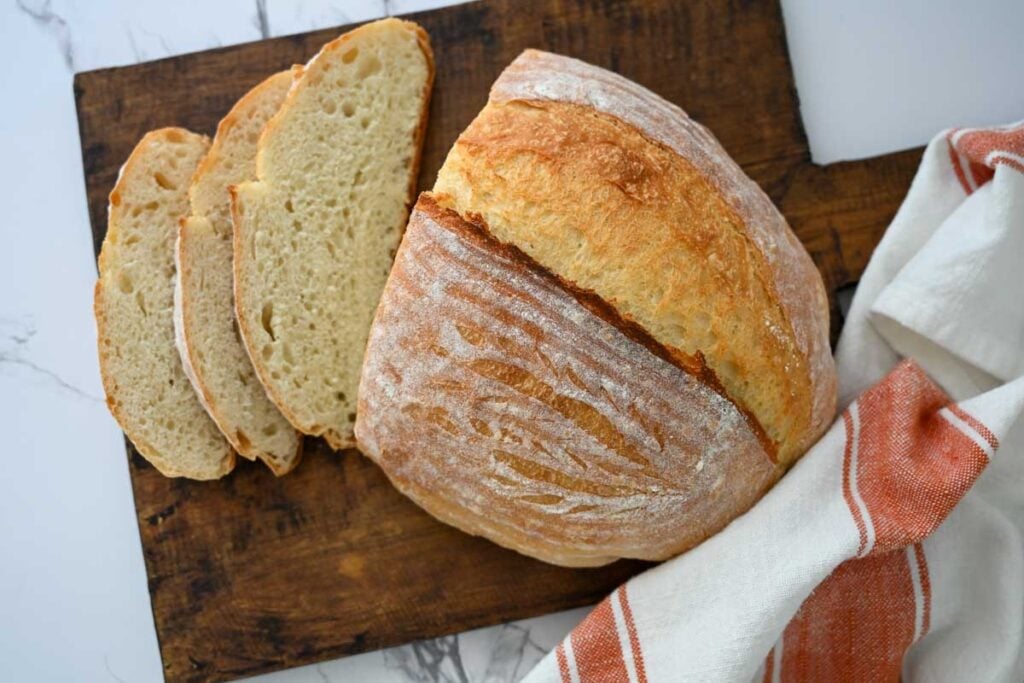
Same Day Sourdough Bread Recipe
Want to Save This Recipe?
Enter your email & I’ll send it to your inbox. Plus, get great new recipes from me every week!
By submitting this form, you consent to receive emails from Lockrem Homestead
Ingredients
- 250 g sourdough starter 1 cup
- 250 g water 1 cup
- 10 g salt 2 tsp
- 313 g bread flour 2½ cups
- 62 g whole wheat flour ½ cup
Instructions
Feed the Starter
- Ideally, you want the starter to be ready first thing in the morning. I like to feed my starter the night before as follows for this recipe: a 1:4:4 ratio, 40g starter: 160g flour: 160g water. This sourdough starter ratio gives me plenty of active sourdough starter, so it's ready at its peak in the morning.
- However, you can feed the starter and make the bread all in one day. To shorten when the starter comes to peak, I suggest a feeding ratio of 1:1:1, 120 g of starter, flour, and water.
- Cover and let it rest at 77°F/25°C – 80°F/26°C until its bubbly and doubled in size.
- Skip this step if your starter is already activated and ready to bake with.
Mix the Dough
- Add active starter, warm water, salt, whole wheat flour, and bread flour in a large mixing bowl. Mix with a dough whisk until all of the flour is incorporated. Cover with a plate or a piece of plastic wrap so the dough doesn't dry out, and allow it to rest in a warm spot for 30 minutes.250 g sourdough starter, 250 g water, 10 g salt, 313 g bread flour, and 62 g whole wheat flour
Stretch and Folds
- Perform 3-4 sets of stretch-and-folds with 30-minute intervals.
- Pull the edge of the dough straight up before folding it over itself to the middle of the bowl. Rotate the bowl 90 degrees, and repeat, working your way around the sides of the bowl. Stretch and fold the dough 10-15 times, or until you feel it start to become tight and resistant. During the first stretch and folds, the dough is shaggy and breaks easily. Remember to keep the dough warm during the stretch and folds.
- Cover the bowl and allow it to rest before the next set of stretch and folds. You'll notice the dough becomes soft and elastic by the last set of stretches.
- Perform the windowpane test to see if the gluten is developed. Stretch the dough thinly, and if it holds without breaking, it’s ready to bulk ferment. If the dough breaks, it needs another set of stretch and folds. Once the dough passes the windowpane test, its ready to bulk ferment.
Bulk Ferment
- Cover the bowl and allow to rest in a warm place. If your kitchen is cool, find a warm place like an oven with the light on or a proofing box. The dough is ready when there are bubbles below the surface, a domed top, and it has risen by 40-50%
- If it does not show these signs, continue to let the dough rise to finish bulk fermentation. At a dough temperature of 75°F, my dough is ready in 3-4 hours from the time it is mixed.
Shape and Proof
- Use a bowl scraper and turn out the dough onto a clean work surface dusted with a bit of flour.
- Shape the dough. I like to use the caddy clasp method. Its simple and easy for beginners.
- Position your hands under sides of the dough and fold together. Pinch the seams close. Reposition your hands so they’re under the top and bottom of the dough and fold together.
- Using a bench scraper, lift the dough, seam side up, into a proofing basket dusted with a bit of rice flour. Stitch the seams close if needed.
- Cover the dough and let it rest for its second rise.
- Preheat the Dutch oven at 450°F/230°C.
- The dough is done proofing when it’s light and puffy-looking. I like to do the poke test. Gently poke your finger into the dough. If it springs back fully, it needs more time. If it fills in partway, it’s ready to bake.
Bake
- Place a piece of parchment paper over the top of the banneton and flip, so the dough is resting on the parchment paper.
- Score the top of the dough with a lame, clean razor blade, or sharp knife, and carefully place it in the hot Dutch oven. Replace the lid, place in the hot oven, and bake for 30 minutes.
- Remove the lid and bake for an additional 10 minutes or until the top of the bread is golden brown. The bread is done when the internal temperature reaches 200°F/94°C with a digital thermometer. If you don’t have a thermometer, use the thump test. Invert the bread and tap the bottom of the loaf. If the bread sounds hollow, then its baked through. If it sounds dull and heavy, there’s still moisture in the dough and its not done baking.
- Remove the bread from the Dutch oven and place the bread on a cooling rack.
- Wait for the bread to cool to room temperature before slicing.
Storing Same Day Sourdough Bread
- Room Temperature – Place the bread in an airtight container and store at room temperature for up to 4 days. Over time, the bread will become soft and dry out. To revive, preheat the oven to 450°F/C. Run the loaf under water for 2 seconds and then place in the oven for 10 minutes until the crust is crispy. Freeze – Place a whole loaf into a freezer safe bag and remove as much air as possible, or wrap tightly in plastic wrap. Alternatively, preslice the loaf before freezing. To thaw, let the bread warm up on the counter for a few hours. Presliced pieces can be toasted individually right from the freezer.
Notes
Helpful Tips for Sourdough Same Day Bread
- Mature Starter – For the best results, be sure your starter is healthy and well established.
- Kitchen Scale – I recommend using a kitchen scale and weighing your ingredients rather than using volume. The amount of flour can vary so much depending how you add it to the measuring cup. A kitchen scale gives you consistent amounts so you can have dependable results.
- Cool the Dough – Pop the banneton into the freezer while the oven preheats so the bread doesn’t overproof. If you have the time, refrigerate the dough for a few hours for a short cold ferment. Cold dough is easier to score and can help with oven spring.