
Sourdough Baguette Recipe
Enjoy a beautifully shaped sourdough baguette with its soft, airy center and thin, crisp crust. Learn how simple it is to make this artisan loaf in this step-by-step recipe, ideal for any home baker!
This post may contain affiliate links. As an Amazon Associate, I may receive a small commission, at no cost to you, if you make a purchase. Please read our disclosure policy.

Baguettes are an iconic bread, known for their elongated shape, chewy crust, and rustic charm. When I think of this bread, my mind is instantly flooded with visions of quaint European markets lined with baskets of freshly baked baguettes or people leisurely gathered around French cafè tables sharing a chunk of good cheese with rustic baguettes, sipping on an espresso or glass of wine.
Whatever images stir within you, it’s sure to come with warmth and goodness. Bread, after all, is a staple food for a reason and worthy of mastery. While I don’t frequent a French bakery, I can procure freshly baked baguettes at home to serve to my family, and you can too. I invite you to master this sourdough baguette recipe so it can become a household staple at your table.
Why You’ll Love Making Sourdough Baguettes at Home
- Flavor – Making a sourdough baguette has a flavor complexity that you don’t get with commercial yeast.
- Sourdough goodness – The benefit of creating naturally leavened bread starts with cultivating a thriving sourdough starter. New to sourdough? Start by learning how simple it is to make a homemade sourdough starter. Sourdough rises through natural fermentation, which means greater digestibility, not to mention the satisfaction of a good, crusty loaf!
- Artisan bread – The home baker can achieve the same rustic aesthetics of any artisan loaf. Most home ovens aren’t big enough to bake traditional baguettes, so this recipe makes demi baguettes, or half baguettes.
Tips for Success
- Be sure that your sourdough starter is healthy and shows signs of life before using.
- The temperature of your home can delay or speed up your timeline.
- The hydration level in this recipe is formulated to use bread flour. If you use all-purpose flour, it will change the hydration level.
- If you plan to bake sourdough bread regularly, I recommend investing in a kitchen scale and weighing the ingredients rather than using volume. They’re inexpensive and will help give you consistent results with each bake.
Equipment
- Large bowl
- Kitchen scale
- Bench scraper
- Baking stone or pizza stone
- Bread lame or sharp knife
- Linen baker’s couche or kitchen towel
- Baguette pan
Ingredients
With a bit of patience and skill, these 4 ordinary ingredients transform into a tasty piece of sourdough art that’s almost too beautiful to eat…almost!
- Sourdough starter – Use an active sourdough starter that’s been fed recently and shows signs of life. It should be risen, full of bubbles, with a mild yeasty aroma. I feed my sourdough starter a ratio of 1:1:1.
- Flour – Strong bread flour has a protein content of 12-14% and is best for chewy sourdough bread.
- Water – Use warm water in the cooler months and cool water during the warmer summer season.
- Salt – Salt helps flavor the bread and helps the gluten to develop.

Homemade Sourdough Baguette Instructions
Levain
This sourdough baguette recipe calls for a levain mixed the night before you mix the dough at a 1:1:1 ratio.
Combine equal parts active starter, warm water, and all-purpose flour in a small bowl, 28 g each. Cover and let it sit at room temperature for 8 hours.
The levain is ready when it shows signs of activity: doubles in size, has lots of bubbles, and has a slightly sour aroma.
Do you have to use a levain in this recipe? No, but if you have a well-maintained and frequently refreshed starter, you can substitute 84 g ( ⅓ cup) of active sourdough starter for the levain in the recipe.
Mix Sourdough Baguette Dough
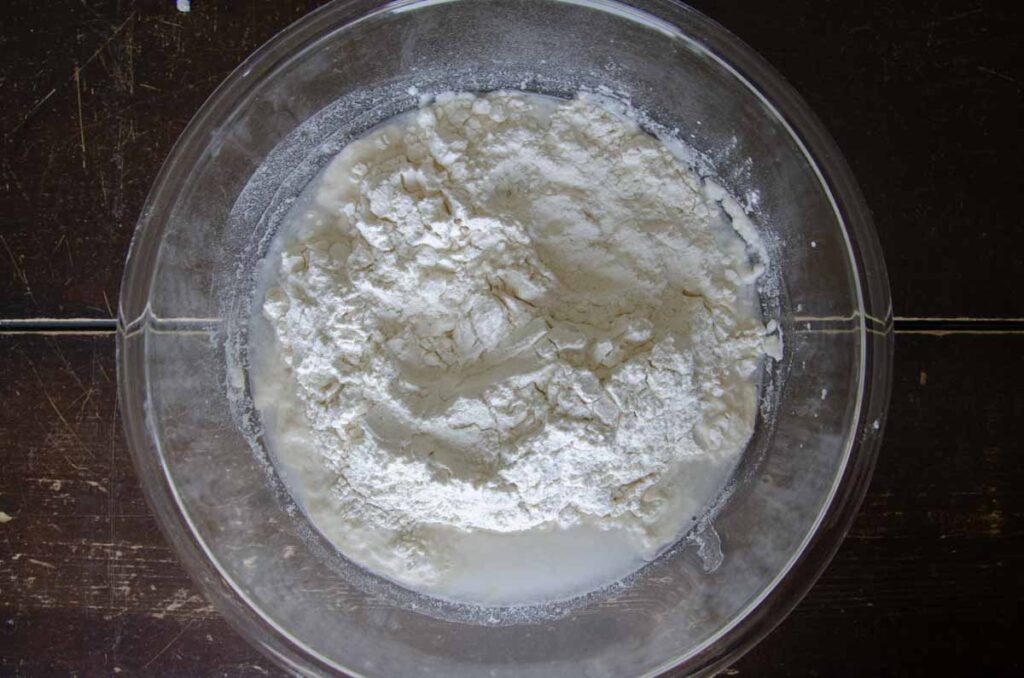
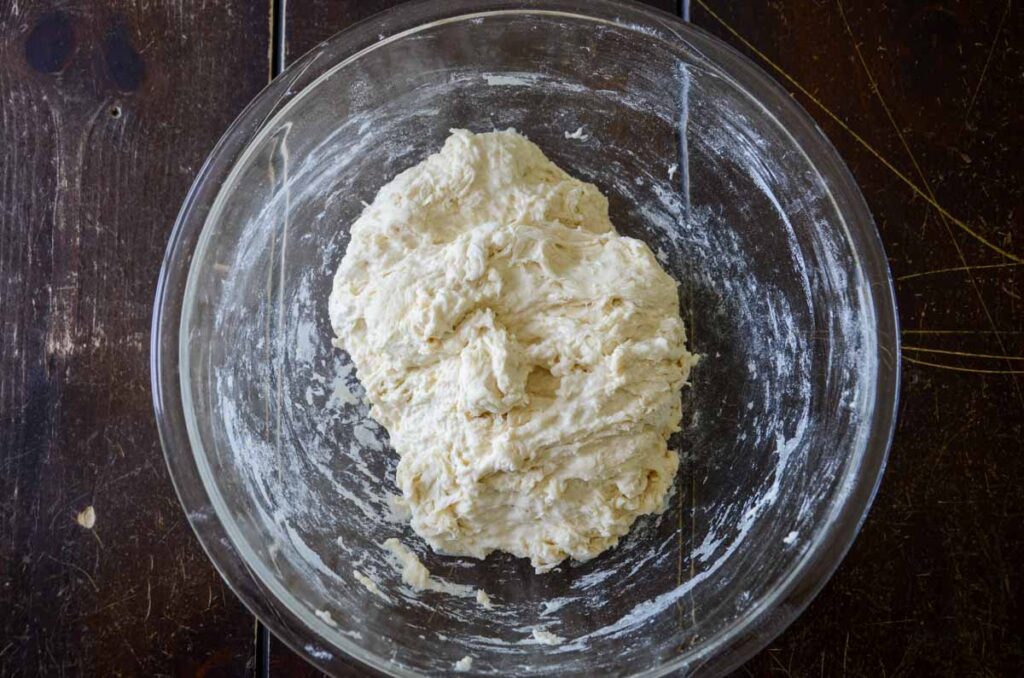
Add 84 g (⅓ cup) ripe starter, 334 g (1 ⅓ cup) water, and 10 g (2 tsp) salt to a large mixing bowl and stir with a Danish dough whisk to break up the starter. Next, add 534 g (4 ¼ cups) bread flour and combine well. Be sure to incorporate all of the flour at the bottom of the bowl. Cover the bowl with a piece of plastic or a large plate and let it rest for 30 minutes.
Letting the dough rest for a short period of time before stretching and folding, even as little as 30 minutes, gives the flour a chance to hydrate properly.
Strengthen the Dough | Stretch and Folds
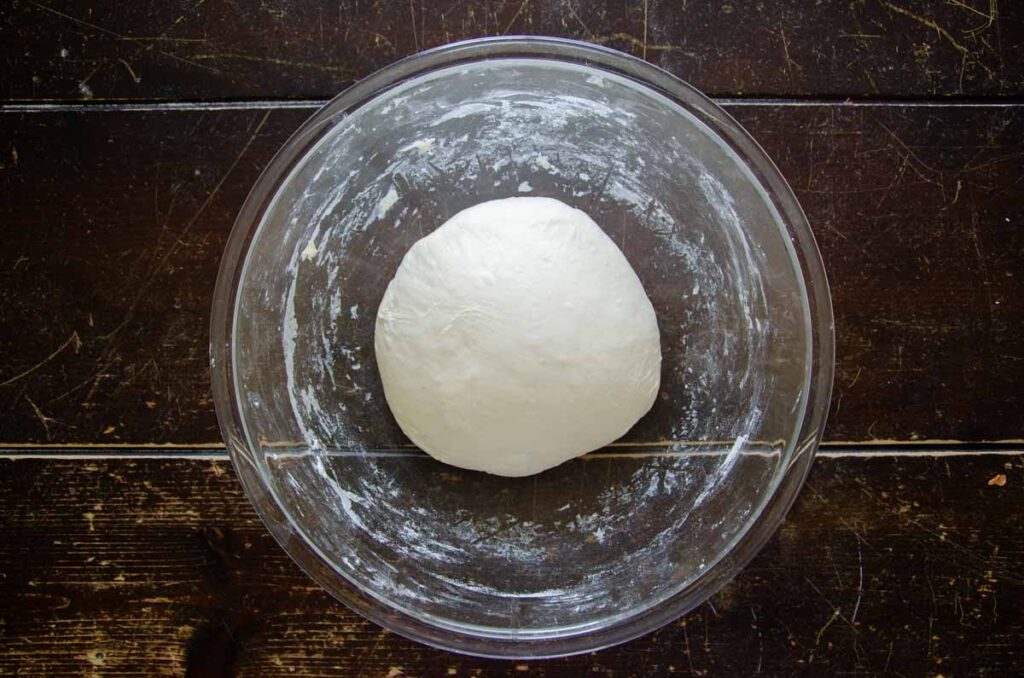
A series of stretch and folds builds up the gluten structure in the same way traditional kneading does, but with a fraction of the effort. With time, the shaggy sourdough baguette dough transforms into a smooth and elastic dough.
With one hand holding the bowl steady, use the other hand to grab the edge of the dough and lift it straight up, stretching the dough, before folding it over onto itself in the middle of the bowl.
Rotate the bowl a quarter turn and stretch and fold the next section of the dough. Repeat stretching and folding the dough as you rotate the bowl until the dough starts to feel resistant, roughly 10-15 folds. Cover the bowl to keep the dough from drying out and rest for 30 minutes.
At this point, the dough will still feel sticky and break easily as you stretch it. This completes one set of stretch and folds.
Continue for a total of 3 sets of stretch and folds at 30-minute intervals.


Bulk Fermentation
After the last set of stretch and folds, cover the bowl and let it rest at room temperature to bulk ferment.
This gives the microscopic colony of bacteria and yeast in the bread dough ferment the sugars found in the starch, and as a byproduct, release carbon dioxide.
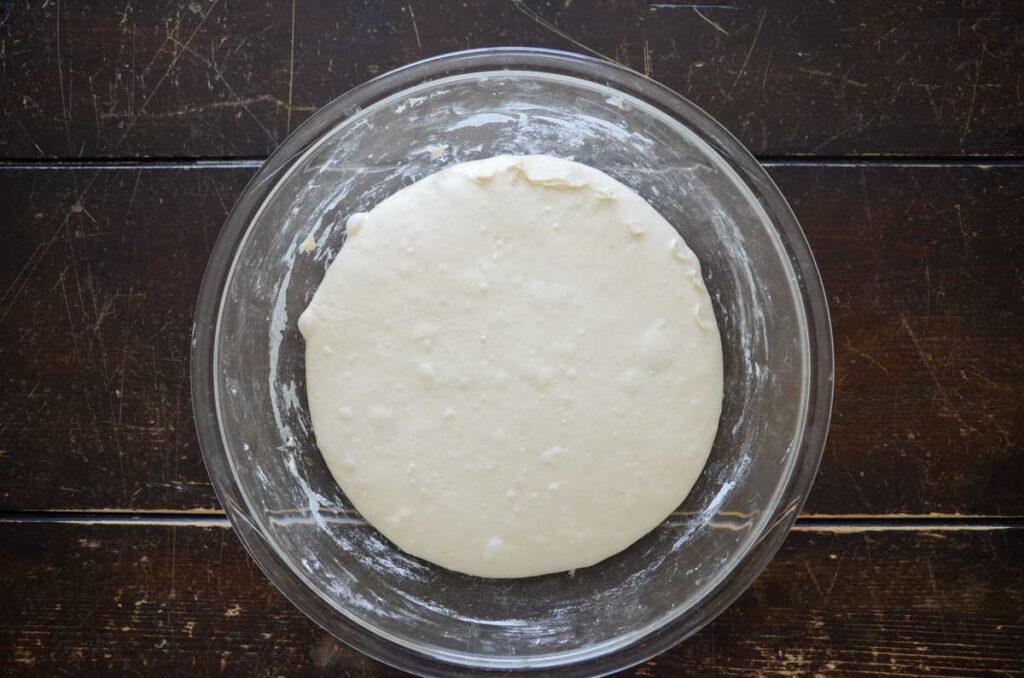
The dough is done bulk fermenting when it has risen significantly with small bubbles beneath the surface. Also, where the dough meets the edge of the bowl will be domed downward.
The bulk fermentation times largely depend on the temperature of your kitchen. If the air temperature is warmer, the dough will ferment faster. However, if the air temperature is cooler, the dough takes longer to finish bulk fermenting.
At this point, you can move on to shaping the dough or place the dough into the fridge and let it cold ferment overnight. This process, sometimes referred to as a cold retard, slows the fermentation process down, giving the bacteria a chance to continue, developing a more complex flavor.
Preshape and Bench Rest
The next day, turn the dough out on a lightly floured surface. Gently divide the dough into 3 equal portions using a bench knife, roughly 312 g each. Shape each piece of dough into a round ball with the seam side down, cover with a tea towel, and bench rest for 10 minutes.
Letting the dough rest between preshaping and its final shaping gives the gluten a chance to relax. Without the resting time, the dough will just shrink back as you try to roll it out.

Shape
Working with one piece at a time, flip the dough over so the seam side up facing up and gently flatten it into a 4″ x 7″ rectangle. Then, fold the bottom third of the dough up to the middle of the dough, pressing the edge down into the dough to seal it. Continue to roll the dough up and press the edge to seal it. Roll the rest of the dough and pinch the bottom edge of the dough into the log of dough.


With the seam side down, roll the dough using both hands, starting at the middle of the dough, working your way to the ends as you roll it. Roll the dough into a 12″ log. Taper each end of the dough for a classic baguette shape.


Proof
There are a few different options for proofing and baking the sourdough baguettes. While proofing in a linen couche takes a bit more finagling with the proofed dough, I think the finished product has a nice color and bakes up beautifully since the bread dough is resting on the hot baking stone.
The second option is to use a baguette pan. It’s straightforward and yields good results, making it a great option for a beginner sourdough baker.
Option 1:
Transfer the shaped baguette dough to a heavily floured baking couche, leaving 3 inches between each piece. Gather the linen between the dough to create sides that hold the dough as it proofs. Cover with a dish towel and allow to rise until puffy and soft-looking.


Once the dough is done proofing, transfer it to a baking sheet. Hold a rimless baking sheet close to the side of the dough and lift the couche, letting the dough roll seam side up onto the baking sheet. Roll the dough onto a piece of parchment paper so the seam is facing down. Repeat with the remaining two loaves.


Option 2:
Shape the baguettes and place the shaped baguette dough in the baguette pan. Cover with a dish towel and allow to rise until puffy and soft-looking, roughly 1-2 hours.

Preheat the Oven
Towards the end of your rising time, place an empty cast iron skillet on the lowest rack of your oven and a pizza stone or baking stone in the middle of your oven. Have the stone and cast iron pan offset from one another to allow the steam to circulate in the oven. Preheat the oven to 450°F/230°C for 30 minutes.
Start heating 1 ½ cups of water.

Option 1:
Use a bread lame held at a 45° angle and make 4 or 5 3″ long slashes lengthwise in the shaped baguettes. Slide the proofed dough onto a pizza peel and transfer to the pizza stone.
Pour the hot water into the cast iron and quickly close the oven door. Be sure to use oven mitts to protect yourself from the steam. Bake for 20-24 minutes, or until they’re a deep golden brown color.
If you don’t have a pizza peel, use a rimless baking sheet or large cutting board to transfer the baguettes from the couche to the oven.

Option 2:
Place the baguette pan on top of the baking stone. Continue to follow the baking directions outlined in option 1 above.
Remove the baguettes from the oven and place them onto a cooling rack.
Serve
With their long shape, there are a variety of ways to enjoy sourdough baguettes.
- Make sub sandwiches for a crowd. Slice the baguette lengthwise and load it with your favorite sandwich fixings.
- Cut in half lengthwise and top each half with tons of butter, garlic powder, and shredded cheese for a simple cheese bread.
- Tear a chunk off and dip into a good-quality olive oil. This bread dipping oil is my favorite!
- Cut the baguette into slices and top with a thick spread of butter for a quick and easy side. Perfect with a hot bowl of chicken and quinoa soup or creamy instant pot acorn squash soup.
Store
Like all breads, homemade baguettes are best the day they’re baked. Allow the bread to cool to room temperature and store leftovers in an airtight container up to 2 days.
If you won’t eat through the bread in that time, wrap the bread in plastic wrap or cut it in half and place in a freezer bag. Label with the name and date and freeze. For best flavor, enjoy within 3 months.

FAQs
Can I use whole wheat flour?
Yes, however, because whole wheat flour absorbs water differently than bread flour, the hydration will be different and produce a different type of crumb and rise.
Why isn’t my starter rising well?
Sometimes the starter can become sluggish because it has become too acidic. Aggressively discard the majority of your starter and add fresh flour and water to give a better environment for the yeast to thrive and multiply. Keep the starter in a warm space, as temperature can determine the speed of the fermentation.
How do I prevent a flat baguette?
Make sure that you allow the sourdough baguette to properly proof. Underproofing the dough doesn’t allow it to develop air pockets for a good rise. On the other end of the spectrum, over proofing the dough can weaken the gluten structure and cause it to grow to the point that it can’t support its own weight.
If You Like This, You’ll Also Like…
The immense satisfaction of mastering artisan bread cannot be understated, and though it takes intentionality to learn, it is worth the time and effort for the sake of beautiful bread! Let me know how the process went for you. I look forward to hearing about your stunning sourdough baguette!

Sourdough Baguette
Want to Save This Recipe?
Enter your email & I’ll send it to your inbox. Plus, get great new recipes from me every week!
By submitting this form, you consent to receive emails from Lockrem Homestead
Ingredients
Levain
- 28 g water
- 28 g ap flour
- 28 g active sourdough starter
Sourdough Baguette Dough
- 84 g All of the levain ⅓ cup
- 334 g water 1⅓ cup
- 10 g salt 2 tsp
- 534 g bread flour 4¼ cups
Instructions
Levain
- Combine equal parts active starter, warm water, and all-purpose flour in a small bowl, 28 g each. Cover and let it sit at room temperature for 8 hours.The levain is ready when it has doubled in size, has lots of bubbles, and a slightly sour aroma.
Mix Dough
- Add 84 g (⅓ cup) ripe starter, 334 g (1 ⅓ cup) water, and 10 g (2 tsp) salt to a large mixing bowl and stir with a Danish dough whisk to break up the starter.
- Next, add 534 g (4 ¼ cups) bread flour and combine well. Be sure to incorporate all of the flour at the bottom of the bowl.
- Cover the bowl with a piece of plastic wrap or a large plate and let it rest for 30 minutes.
- Letting the dough rest for a short period of time, as little as 30 minutes, gives the flour a chance to properly hydrate.
Strengthen the Dough | Stretch and Folds
- A series of stretch and folds builds up the gluten structure in the same way traditional kneading does, but with a fraction of the effort. With time, the shaggy baguette dough transforms into a smooth and elastic dough.With one hand holding the bowl steady, use the other hand to grab the edge of the dough and lift it straight up, stretching the dough, before folding it over onto itself in the middle of the bowl.
- Rotate the bowl a quarter turn and stretch and fold the next section of the dough. Repeat stretching and folding the dough as you rotate the bowl until the dough starts to feel resistant, roughly 10-15 folds.
- Cover the bowl to keep the dough from drying out and rest for 30 minutes.
- At this point, the dough will still feel sticky and break easily as you stretch it. This completes one set of stretch and folds.
- Continue for a total of 3 sets of stretch and folds at 30-minute intervals.
Bulk Fermentation
- After the last set of stretch and folds, cover the bowl and let it rest at room temperature to bulk ferment. This gives the microscopic colony of bacteria and yeast in the bread dough ferment the sugars found in the starch, and as a byproduct, release carbon dioxide.
- The dough is done bulk fermenting when it has risen significantly with small bubbles beneath the surface. Also, where the dough meets the edge of the bowl will be domed downward.
- At this point, you can move on to shaping the dough or place the dough into the fridge and let it cold ferment overnight. This process, sometimes referred to as a cold retard, slows the fermentation process down, giving the bacteria a chance to continue, developing a more complex flavor.
Preshape and Bench Rest
- The next day, turn the dough out on a lightly floured surface. Gently divide the dough into 3 equal portions, roughly 312 g each.
- Shape each piece of dough into a round ball.
- With the seam side down, cover with a tea towel, and rest for 10 minutes.Letting the dough rest between preshaping and its final shaping gives the gluten a chance to relax. Without the resting time, the dough will just shrink back as you try to roll it out.
Shape
- Working with one piece at a time, flip the dough over so the seam side up facing up and gently flatten it into a 4" x 7" rectangle.
- Then, fold the bottom third of the dough up to the middle of the dough, pressing the edge down into the dough to seal it.
- Continue to roll the dough up and press the edge to seal it. Roll the rest of the dough and pinch the bottom edge of the dough into the log of dough.
- With the seam side down, roll the dough using both hands, starting at the middle of the dough, working your way to the ends as you roll it. Roll the dough into a 12″ log. Taper each end of the dough for a classic baguette shape.
Proof
Option 1:
- Transfer the shaped baguette dough to a heavily floured baking couche, leaving 3 inches between each piece. Gather the linen between the dough to create sides that hold the dough as it proofs. Cover with a dish towel and allow to rise until puffy and soft-looking, roughly 1-2 hours.
- Once the dough is done proofing, transfer it to a baking sheet. Hold a rimless baking sheet close to the side of the dough and lift the couche, letting the dough roll seam side up onto the baking sheet.
- Roll the dough onto a piece of parchment paper so the seam is facing down. Repeat with the remaining two loaves.
Option 2:
- Shape the baguettes and place the shaped baguette dough in the baguette pan. Cover with a dish towel and allow to rise until puffy and soft-looking, roughly 1-2 hours.
Preheat the Oven
- Towards the end of your rising time, place an empty cast iron skillet on the lowest rack of your oven and a pizza stone or baking stone in the middle of your oven. Have the stone and cast iron pan offset from one another to allow the steam to circulate in the oven. Preheat the oven to 450°F/230°C for 30 minutes.
- Start heating 1 ½ cups of water.
Bake – Option 1:
- Use a bread lame held at a 45° angle and make 4 or 5 3" long slashes lengthwise in the shaped baguettes.
- Slide the proofed dough onto a pizza peel and transfer to the pizza stone. If you don't have a pizza peel, use a rimless baking sheet or large cutting board to transfer the baguettes from the couche to the oven.
- Pour the hot water into the cast iron and quickly close the oven door. Be sure to use oven mitts to protect yourself from the steam.
- Bake for 20-24 minutes, or until they're a deep golden-brown color.
Bake – Option 2:
- Place the baguette pan on top of the baking stone. Continue to follow the baking directions outlined in option 1 above.
- Remove the baguettes from the oven and place them onto a cooling rack.
Store
- Like all breads, homemade baguettes are best the day they're baked. Allow the bread to cool to room temperature and store leftovers in an airtight container up to 2 days. If you won't eat through the bread in that time, wrap the bread in plastic wrap or cut it in half and place in a freezer bag. Label with the name and date and freeze. For best flavor, enjoy within 3 months.
A baguette is a classic for a reason, and an absolute triumph to accomplish! Tell me all about your stunning loaf, along with any questions from the process!