
Sourdough Ears Guide
This comprehensive Sourdough Ears Guide covers everything you need to know about sourdough ears, including what they are, how to achieve them, and how to troubleshoot your sourdough loaf to gain a better ear. Baking a sourdough bread with ear is not only beautiful, but indicates proper techniques in many processes along the way.
Sourdough Journey
The world of sourdough comes with its own set of vocabulary, and if you’re unfamiliar, it can be confusing. I mean, who grows up hearing words like autolyse, levain, or hooch? The best advice to understand this world is to simply jump in and learn by trial and error.
Beginner bakers first learn the basics of sourdough bread, like mixing the levain, bulk fermentation, and stretch and folds. For some, this is their first exposure to baking bread from scratch and a true victory to have freshly made bread, let alone one made with wild yeast.
With more bakes under your belt and mastery of the basics of bread making, you graduate to comprehending more technical nuances of bread making. Things like learning how hydration works, how to make the bread taste more sour, or achieving beautiful designs in bread become front and center.
In the boom of social media sharing, we are left to visual cues since we can’t taste how delicious a loaf of sourdough bread is. At the top of the list are an open crumb and a nice ear.
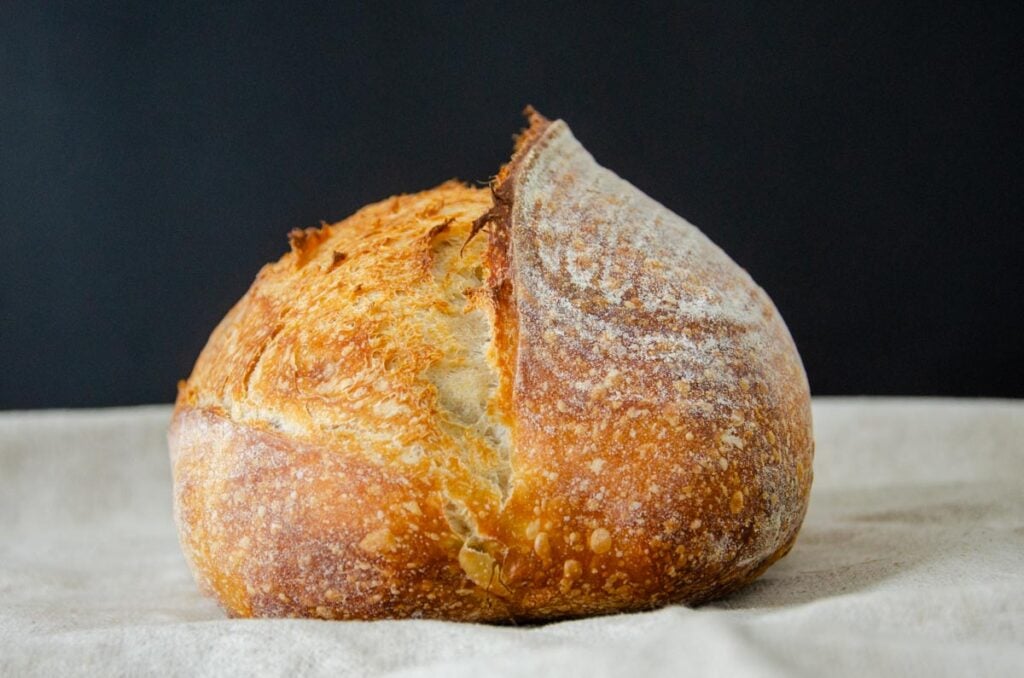
My two most anticipated moments in the process are removing the Dutch oven lid and cutting into the bread. The first reveals how the bread dough opens, displaying the sourdough ear, belly, and oven spring. The second shows the interior structure with those sought-after holes and webbing! Over time, as my skills improve, these rewarding moments happen more consistently. Practice makes perfect.
What is Sourdough Ear?
So what is the ear on sourdough bread, anyway?
As the sourdough bread bakes in a hot oven, the yeast expands quickly, causing the dough to rise and open up. Scoring the dough provides a controlled weak point to guide this expansion. The ear forms as the flap of dough lifts and curls back along the score line as the bread bakes.
Producing good sourdough ears isn’t left to chance; instead, mastering a few techniques helps master this delightful artisan feature.
Please note that these are all suggestions and guidelines to help you get better sourdough ears, but do not guarantee that you’ll get one. With numerous factors, including the environment, the health of the sourdough starter, and the type and brand of flour used, each bake is unique and distinct.
Why are they called a Sourdough Ear?
When a loaf of sourdough bread is sliced in half, it will appear like a crouching rabbit viewed from the side, with the ear of the bread acting as the rabbit’s ears. Hence, ears are sometimes called “bread bunnies” or “sourdough bunnies.” Because this little piece of dough lifts higher than the rest of the crust, the ear in sourdough is generally crunchy and darker than the rest of the crust due to the Maillard reaction.

How to Get a Sourdough Ear?
Many home bakers have asked themselves, what causes a sourdough ear? Achieving the perfect sourdough ear is the culmination of many processes done well to produce a lovely sourdough bread. There are many variables to getting a better sourdough ear (and baking sourdough generally). All of these recommendations work in tandem with each other. The more proficient you become in each step, the more likely you are to achieve a proper ear.
1. A Healthy Sourdough Starter
The foundation to all sourdough bakes begin with a healthy sourdough starter. It’s the lifeline to fermentation and demands proper care if you want successful sourdough breads. The sourdough starter should be fed regularly and show plenty of signs of fermentation, as evidenced by doubling in size with a pleasant smell. If the starter smells more acidic than yeasty, it’s likely that the pH is off balance and needs attending.
If your bread takes a long time to ferment, start by checking your sourdough starter. Other factors, like heavy enriched doughs, cooler temperatures, or dense whole wheat doughs, are slower to ferment.
New to sourdough? Begin by learning how to make a sourdough starter from scratch and the proper care instructions on how to maintain a sourdough starter.

2. Bulk Fermentation
The bulk fermentation stage is important and one of the trickiest processes to master. Part of it is because there’s no set standard of knowing when it’s been long enough. Rather, it comes by trial and error. The best way to learn it is with plenty of practice. Soon, you’ll know how the dough behaves and when it’s ready to move to the next stage. In addition, different hydration levels, flours, and ambient temperatures are factors that determine the exact length of time it takes.
The bulk fermentation stage is important to a proper ear because it’s the stage of the process when the dough forms gases and develops its gluten structure, which determines the final result of the bread. Without proper fermentation, the dough doesn’t have enough gas within the bread. If it ferments too long, you run the risk of overproofing the dough, resulting in flat bread.
3. Surface Tension
Creating the proper surface tension when shaping sourdough allows the dough to burst open once it hits the hot oven.
Once the dough finishes the bulk ferment, its gluten structure is strong enough to hold in all of the gas. A slight wobble when you jiggle the bowl indicates plenty of pockets of air within the dough.
Without proper shaping, sourdough bread bakes flatter since little surface tension is created. Think of it like stretching a rubber band to shoot it. The more it’s stretched, the greater energy it has, and when released, it has a greater reaction. Less stretch or tension created yields less of a reaction.
Shaping creates a tight outer layer of dough that protects everything inside and holds it all together. Scoring the bread breaks the tension a bit, but the bread continues to retain its shape.
Shaping the surface of the dough tautly makes it easier to score, improves the oven spring, and increases the likelihood of a sourdough with ear.

Shaping Tips: High-hydration doughs are much more slack and can be difficult to shape. For slack dough, preshaping the dough with a bench rest before its final shaping can help build the gluten structure. To create adequate surface tension, the dough needs to grip the work surface a bit as it’s shaped. Too much flour causes the dough to slide on the work surface, and difficult to pull it tight enough.
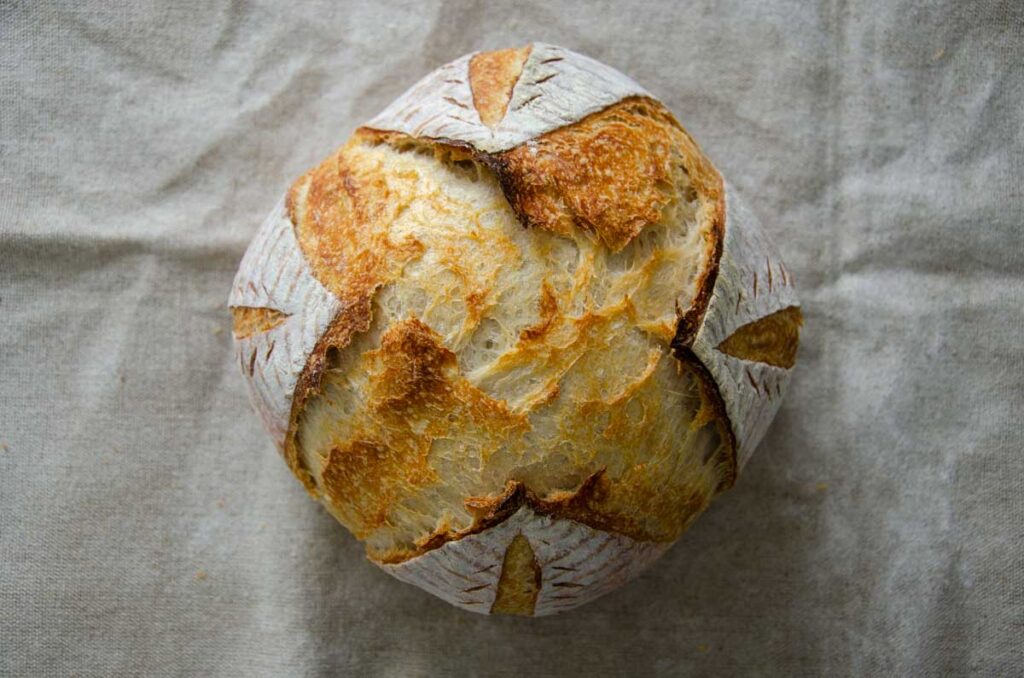
4. Score
There are many techniques when it comes to scoring bread. Whether you’re scoring sourdough batards or boules, there are two main types of scores: functional scores and decorative scores.
The best scoring method uses a sharp razor blade and scores a functional cut at a shallow angle. Learning how to score sourdough ear takes a bit of practice and is a bit of a Goldilocks situation. A deeper score can compromise the integrity of the dough, disrupting the surface tension too much. Too shallow, and the dough doesn’t have a designated weak point as it expands, causing rips in other parts of the bread.
A quick, sharp score with a straight lame proves to be more difficult on room temperature dough. A cold proof, even for a short time while the oven preheats, will make scoring easier.
For the best results, use a sharp blade for a score line at the right angle, depth, and length. Read this sourdough scoring guide for more information.

5. Oven Spring
Oven spring and surface tension go hand in hand, with one leading to the other. Sufficient surface tension creates better chances for greater oven spring.
As the dough hits a hot oven, the alcohol released by the yeast during the bulk fermentation evaporates quickly. This burst of vapor causes the dough to rise quickly and is known as oven spring.
For a sourdough perfect ear to form, there needs to be good oven spring in the dough. A preheated Dutch oven, cold dough, and plenty of steam all contribute to proper oven spring.
Sourdough Ears FAQs
Is an Ear on Sourdough a Good Thing?

Absolutely! While it’s not essential to a great loaf of artisan sourdough bread, it does show that many things went right in your sourdough-making process. Rather, it’s the result of everything that came before the moment of scoring: proper gluten formation, fermentation, shaping, proofing, steam, and heat, to name a few. The final result improves as the baker’s skill improves in each of these areas.
What Causes a Poor Sourdough Ear?
A sourdough ear not forming can be from several factors, including under-fermented dough, weak dough strength due to overproofing or poor gluten development, and improper scoring technique. Aim to improve those, and the ear will be a natural byproduct of great technique.
Baking your bread in too small a Dutch oven is another reason your bread may not be forming an ear. As the bread unfurls in the oven, it hits the lid and doesn’t expand to its fullest potential. Either bake sourdough in a larger Dutch oven or open bake.
There are two moments I look forward to…the first sight of my loaf’s ear, and the first slice to see those beautiful sourdough air pockets! But my favorite is eating it, fresh out of the oven. Yum! Be sure to leave your thoughts, questions, and comments below!