Homemade Ginger Bug Recipe
Learn how to make a ginger bug starter for natural soda using only 3 ingredients. This beginner-friendly fermentation ginger bug recipe can be used to make a variety of naturally fermented beverages, including homemade ginger beer, homemade ginger ale, homemade root beer, and other flavor combinations.
This post may contain affiliate links. As an Amazon Associate, I may receive a small commission, at no cost to you, if you make a purchase. Please read our disclosure policy.
If you’re unfamiliar with a ginger bug, in the most simple terms, it’s a culture used to kickstart the fermentation process for different ferments. In the same way that sourdough starters provide the bacteria and yeast to make bread, or a kombucha SCOBY is the mother culture that makes fizzy kombucha tea.
Our family has been loving the ginger bug! Or should I say, all the fun beverages that you can create with a ginger bug! We gather every Sunday night for a family dinner. It’s a nice touch point for all of us to connect, especially as the kids grow older and their schedules get busier. My adult kids are on the brink of getting married (Yay!), and these Sunday nights are a sweet rhythm to connect for my mama’s heart.
Why Ferment?
Adding fermented foods and beverages to your diet is a simple way to add beneficial bacteria to your diet, helping improve overall gut health. This old method of preserving is as old as time and was used before modern refrigeration kept food from spoiling. Lately, it’s been making a resurgence as people move away from processed foods and drinks to make more and more food from scratch.
I find myself in that same position, continuing my quest to provide nutritious food and drinks for my family. Over the past few years, I’ve been experimenting with different types of beverages, like shrubs, continuous brew kombucha tea, and iced herbal teas. Not only are these drinks delicious and a great replacement for soda, they are ideal to quench our thirst during a hot summer day.
The benefits go beyond enjoying drinks made from real food, we are also eliminating corn syrup, food coloring, and as many preservatives as we can from our diet. Creating a ginger bug allows us to add ginger bug soda and other natural sodas into our beverage rotation.
What Is A Ginger Bug?
A ginger bug is a wild-fermented starter culture made with 3 simple ingredients, sugar, fresh ginger root, and water. A short ingredient list with easy-to-read ingredients is my favorite.
The process of creating a ginger bug is similar to making a sourdough starter. With the right environment and time, these three ingredients create an active culture, rich in wild bacteria and yeast. The naturally occurring yeasts and bacteria on the ginger root’s skin are captured and over time, these wild yeasts and bacteria begin to ferment.
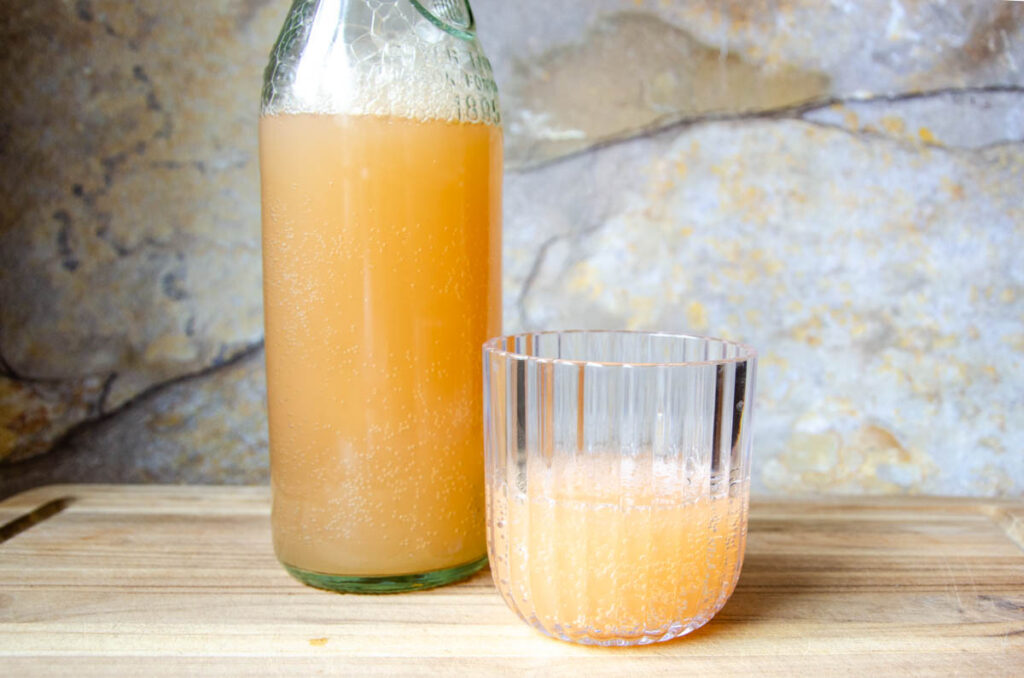
Add this bubbly and foamy starter to fruit juice, herbal tea, or other liquid before placing it into flip-top bottles. The microorganisms eat the sugar in the ginger bug and produce carbon dioxide as a byproduct, producing a homemade carbonated beverage like homemade soda. Yay, no more high-fructose corn syrup!
Equipment
Creating a ginger bug uses common kitchen equipment, making it easy to start. Like all ferments, it’s important to start with clean equipment.
- Glass jar, like a quart mason jar – A clear container makes it easy to monitor the fermentation process.
- Sharp knife – A sharp knife makes cutting the ginger easy.
- Cutting board
- Cheesecloth – You want air to pass through, but keep dirt and bugs out. Use any type of breathable material such as a paper towel, coffee filter, or piece of cheesecloth.
- A rubber band or a canning lid band – holds the top in place.
- A wooden spoon – Use a wooden spoon’s handle to stir the ginger bug.
- Measuring spoons
- Liquid measuring cup
Ginger Bug Ingredients
Making a ginger bug starter culture is simple to do with very little hands-on time using 3 basic ingredients.

- Ginger – It’s important to use organic ginger root. This skin houses all of the wild yeast and is left unpeeled before adding to a ginger bug. Stay away from conventionally grown ginger. It won’t produce the same results since it is often irradiated, killing the natural yeasts and bacteria needed for a successful fermentation process. I prefer chopping the ginger over grating it. Not only does it take less time, but it makes it easier to stain the ginger out from the ginger bug.
- Sugar – All ferments need a food source. I always use organic cane sugar, but a lot of people use white sugar with success. The microorganisms consume the majority of the sugar in the fermentation process, so don’t worry about it too much.
- Water – Use filtered water for the best results.
How To Make A Ginger Bug
Over 5 – 7 days with a bit of patience, your starter will be ready to use to make probiotic, naturally bubbly soft drinks, sodas, and herbal beers.
The First Day
Chop a 3″x 1 1/2″ (30-50 g) knob of fresh ginger root into small pieces.
Add two tablespoons of ginger pieces to a quart jar. Place the remaining ginger in an airtight container and refrigerate for daily feedings.
Add 2 tablespoons of sugar and 2 cups of water to the jar. Stir the contents with the end of a wooden spoon until the sugar dissolves.

Place a small piece of cheesecloth over the jar and fasten it in place with the metal canning band or a rubber band. Let the ginger mixture rest on the counter in a warm place out of direct sunlight for 24 hours.

Day 2 – 7 | Feed the Ginger Bug Daily
The next day, add two tablespoons each of chopped ginger, sugar, and water to the jar, stirring to dissolve the sugar. Replace the cover and leave it undisturbed for 24 hours.
Continue feeding and stirring the ginger bug daily for the next 5 days.
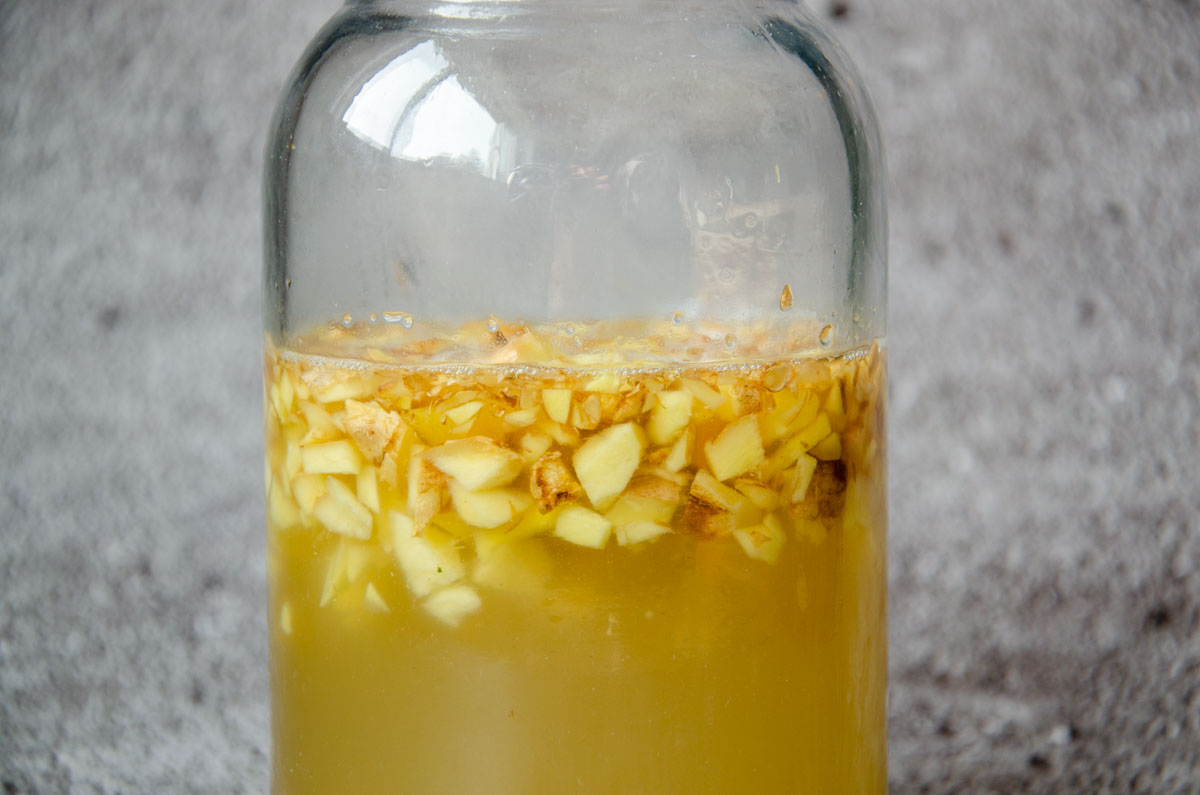
After 2-3 days, you will begin to see small bubbles forming in the jar. The ginger bug will be ready to use by the end of the week.

Fermenting Tip: Having many different types of ferments too close together can cause cross-contamination of cultures and make weird things happen to your food. Each ferment has a cloud of microscopic activity surrounding it. If allowed to get too close to another ferment’s cloud of microscopic activity, the organisms share vessels. To prevent cross-contamination, keep each type of ferment at least 5 feet away from another type. For example, keep sourdough bread dough away from a ginger bug starter. However, if you are making two types of sourdough bread, these can remain close together without issue.
Storing the Ginger Bug | Regular Maintenance
A ginger bug needs to be fed as it eats through its food supply every 24 hours. To keep the ginger bug active and ready to ferment more soda, feed it daily and store at room temperature.
However, if you want to take a break, you can refrigerate it and allow 7 – 10 days before it needs to be fed ginger and sugar again. The cold temperatures slow the fermentation, allowing more time to pass between feedings.
Once ready to use, pull it out of the fridge and feed it one or two times before using it to make homemade soda again.
Notes
- Grate or chop a large portion of ginger and store it in the fridge. This allows you to pull out a few tablespoons of ginger as you need it. In a similar way, for long-term ginger bug maintenance, place the grated ginger in a freezer-safe bag and freeze it.
- Initially, the ginger pieces will float, but over time, it’s normal to see them fall to the bottom of the jar.
- For ferments, temperature matters. A warm environment will cause fermentation to happen at a quicker pace than a cooler environment.
- You can substitute turmeric for the ginger, or use a combination of the two. Beware, turmeric can cause staining due to the compound curcumin in it.
FAQs
How Do I Know When A Ginger Bug Is Ready To Use?
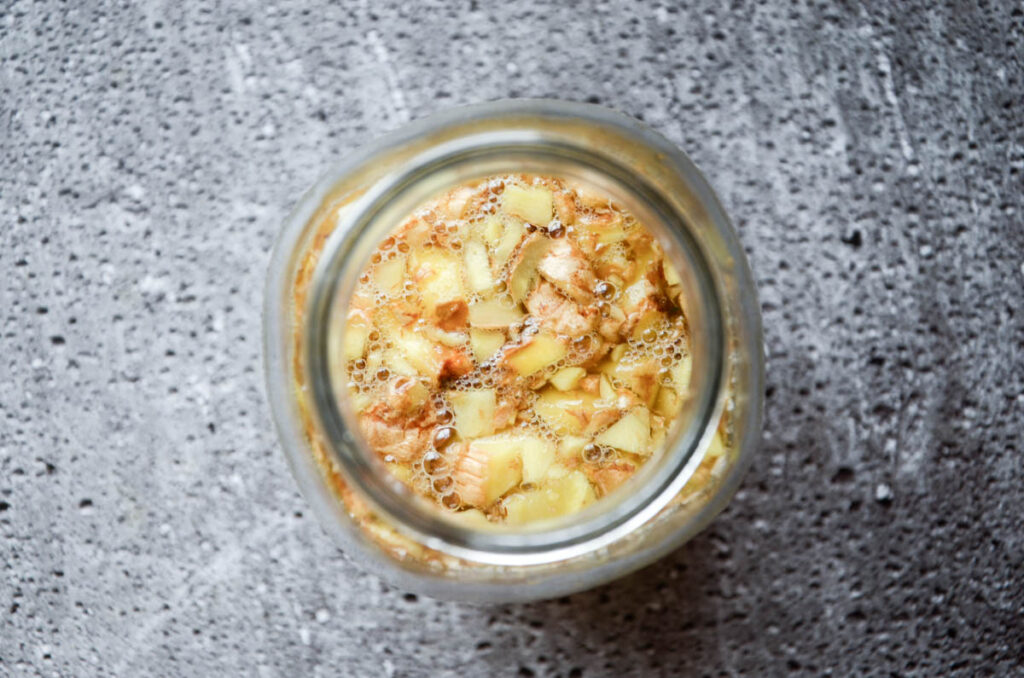
The ginger bug is ready to use when it shows signs of active fermentation, is foamy, and is full of small bubbles. In addition, the ginger bug will smell begin to have a pleasant yeasty smell, like bread or beer.
Why Isn’t My Ginger Bug Fizzy?
If your ginger bug hasn’t become fizzy yet, it’s likely that the ginger bug hasn’t had enough time to get started and requires more time before you begin to see bubbles. The environment also matters. Allow the ginger bug more time to get going in cooler climates. If you’re not seeing bubbles after a couple of days, the ginger bug may have been contaminated.
Keeping the ginger bug in an unsealed jar allows the carbon dioxide to escape in the same way an open can of pop eventually loses its carbonation over time. If you’re not seeing bubbles, try placing a tight-fitting lid on the container. Check back the next day to see if there is any change. Beware, a tight-fitting lid will need to be burped over time.
What Is the Best Container for a Ginger Bug?
A glass container is the best container to brew a ginger bug as it allows you to see what’s happening in the container, which is convenient for beginners. In addition, it’s easier to keep clean. Plastic containers degrade over time and can be scratched easily, and harbor unwanted bacteria.
Can I Use Ground Ginger to Make a Ginger Bug?
Unfortunately, ground ginger doesn’t have the microscopic life in it like fresh ginger and isn’t suitable for a ginger bug.
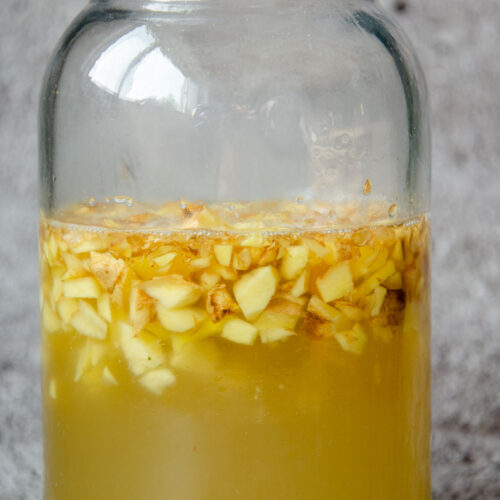
How To Make A Ginger Bug Starter
Want to Save This Recipe?
Enter your email & I’ll send it to your inbox. Plus, get great new recipes from me every week!
By submitting this form, you consent to receive emails from Lockrem Homestead
Equipment
- quart jar
- rubber band or metal band
- Knife
- Cutting Board
- measuring spoons
- liquid measuring cups
Ingredients
- ginger root fresh, organic, and unpeeled
- 1 cup sugar
- water filtered
Instructions
Day 1
- Chop a 3"x 1 1/2" (30-50 g) knob of fresh ginger root into small pieces.
- Add two tablespoons of ginger pieces to a quart jar. Place the remaining ginger in an airtight container and refrigerate for daily feedings.
- Add 2 tablespoons of sugar and 2 cups of water to the jar. Stir the contents with the end of a wooden spoon until the sugar dissolves.
- Place a small piece of cheesecloth over the jar. Fasten it in place with the metal canning band or a rubber band. Let the ginger mixture rest on the counter in a warm place out of direct sunlight for 24 hours.
Day 2-7
- The next day, add two tablespoons each of chopped ginger, sugar, and water to the jar, stirring to dissolve the sugar. Replace the cover and leave it undisturbed for 24 hours.
- Continue feeding and stirring the ginger bug daily for the next 5 days.
- After 2-3 days, you will begin to see small bubbles forming in the jar. The ginger bug will be ready to use by the end of the week.
Notes
How Do I Know When A Ginger Bug Is Ready To Use?
The ginger bug is ready to use when it shows signs of active fermentation, is foamy, and is full of small bubbles. In addition, the ginger bug will smell begin to have a pleasant yeasty smell, like bread or beer.Storing the Ginger Bug | REgular Maintenance
A ginger bug needs to be fed as it eats through its food supply every 24 hours. To keep the ginger bug active and ready to ferment more soda, feed it daily and store it at room temperature. However, if you want to take a break, you can refrigerate it, going 7 – 10 days before it needs to be fed ginger and sugar again. The cold temperatures slow the fermentation, allowing more time to pass between feedings. Once ready to use, pull it out of the fridge and feed it one or two times before using it to make homemade soda again.
Why Isn’t My Ginger Bug Fizzy?
If your ginger bug hasn’t become fizzy yet, it’s likely that the ginger bug hasn’t had enough time to get started and requires more time before you begin to see bubbles. The environment also matters. Allow the ginger bug more time to get going in cooler climates. If you’re not seeing bubbles after a couple of days, the ginger bug may have been contaminated. Keeping the ginger bug in an unsealed jar allows the carbon dioxide to escape in the same way an open can of pop eventually loses its carbonation over time. If you’re not seeing bubbles, try placing a tight-fitting lid on the container. Check back the next day to see if there is any change. Beware, a tight-fitting lid will need to be burped over time.What Is the Best Container for a Ginger Bug?
A glass container is the best container to brew a ginger bug as it allows you to see what’s happening in the container, which is convenient for beginners. In addition, it’s easier to keep clean. Plastic containers degrade over time and can be scratched easily, and harbor unwanted bacteria.Can I Use Ground Ginger to Make a Ginger Bug?
Unfortunately, ground ginger doesn’t have the microscopic life in it like fresh ginger and isn’t suitable for a ginger bug.Tips
- Grate or chop a large portion of ginger and store it in the fridge. This allows you to pull out a few tablespoons of ginger as you need it. In a similar way, for long-term ginger bug maintenance, place the grated ginger in a freezer-safe bag and freeze it.
- Initially, the ginger pieces will float, but over time, it’s normal to see them fall to the bottom of the jar.
- For ferments, temperature matters. A warm environment will cause fermentation to happen at a quicker pace than a cooler environment.
- You can substitute turmeric for ginger, or use a combination of the two. Beware, turmeric can cause staining due to the compound curcumin in it.
- Nutrition information is automatically calculated, so it should only be used as an approximation.
Our family gathers once a week for dinner, and in the summer time, a bubbly ginger drink is the perfect thing to sip on! It is so fun to experiment with. What flavor did you discover? Leave your questions and comments below!