
Homemade Greek Yogurt Recipe
This homemade Greek yogurt recipe will help the new yogurt maker gain the confidence and skills to make yogurt at home. With just 2 ingredients and a home oven, ferment milk into thick and creamy Greek yogurt.
This post may contain affiliate links. As an Amazon Associate, I may receive a small commission, at no cost to you, if you make a purchase. Please read our disclosure policy.

Along my homemaking journey, there have been pivotal moments when I realized that products I loved from the grocery store could be made from scratch. At some point in my early 30s, I wondered, “Can you make homemade Greek yogurt at home?” After some research, I was delighted to discover that I could!
The process was simple, and most of the time was passive, letting the good bacteria do the bulk of the work. With just two ingredients, this yogurt is more than worth incorporating into your weekly routine!
How Is Yogurt Made?
I will admit, I was hesitant the first time I left milk out at room temperature for an extended time. The warnings of stinky, spoiled milk came to the front of my mind. But over time, the more I understood what was happening, the more comfortable I became. Yay, science!
Making yogurt, like all ferments, is a fight to grow the beneficial bacteria so it can overtake and keep any unbeneficial bacteria at bay. The yogurt culture is full of these bacteria. Given a warm place to grow, these bacteria transform milk into thick and tangy yogurt.
In addition, heating the milk also denatures the whey proteins, restructuring the whey proteins to produce a smooth yogurt. Heating the milk to different temperatures will produce different textures and flavors in the final product.
Making your own Greek yogurt is a Goldilocks situation. You want the right temperature when incubating the yogurt. If it’s too hot, over 120˚F /49°C, then the culture dies. And on the other end of the spectrum, if it’s too cool, below 100˚F/38°C, then nothing happens. Either way, you’ll end up with a bowl of milk. You’re aiming for the sweet spot right in the middle, this is where the fermentation happens.
Why You’ll Love Homemade Greek Yogurt
- Easy – Making your own yogurt is so simple! Your patience is rewarded with delicious and nutritious food.
- Delicious – I like to use whole milk for the best-tasting plain yogurt. The high fat content helps make a smooth and creamy Greek yogurt.
- Economical – Making yogurt costs little beyond the cost of the milk. Initially, you will need to buy a yogurt culture or store-bought yogurt that has active cultures in it to get started. After that, you don’t need to buy anything besides the milk.
- Versatile – Making food homemade allows you the freedom to customize it as you wish. Use raw milk, add the type of sweetener you like, or a different type of milk, like goat’s milk.
- Longer shelf life – Yogurt can last for up to a month in the fridge and transforms my old milk into something delicious!

The Equipment You’ll Need to Make Yogurt in the Oven
There are a few methods for making yogurt at home. Some yogurt recipes use an Instant Pot with its yogurt function, an immersion sous vide circulator, a designated yogurt maker, or only the stove. However, I kept it simple and opted for the oven, along with common kitchen tools.
- Large pot – A heavy-bottomed pot, like a Dutch oven, will help the milk to heat evenly and avoid scorching the milk.
- Bowl – You want a bowl large enough to hold a half gallon of milk.
- A medium bowl
- Spoon
- Strainer – Allows the whey to separate from the yogurt for a thick and creamy texture.
- Cloth – Use a piece of cheese cloth or clean dish towel to strain the whey from the yogurt.
- Thermometer – There are a variety of thermometers you can use. An instant-read thermometer makes it easy to monitor the milk’s temperature. I like to use a candy thermometer that clips to the side of the pot so I can watch the temperature as it rises.
Greek Yogurt Ingredients
- Milk – I love the flavor and creaminess of the yogurt made from whole milk. It yields a richer, sweeter flavor than making yogurt from skim milk.
- Yogurt starter – Similar to how the fermentation process gets started in sourdough bread using a sourdough starter, plain yogurt will act as the starter to inoculate the milk with lactic acid bacteria. Use a bit of yogurt from the last time you made yogurt, or store-bought, like Chobani yogurt. When buying plain yogurt from the store, look for a high-quality yogurt that’s not filled with additives, like gums, starches, or pectin. Cheaper brands will use these to thicken their yogurts.
How to Make Homemade Greek Yogurt
Heat and Cool the Milk
Pour 8 cups (2 quarts/1892 ml) of milk into a large pot.
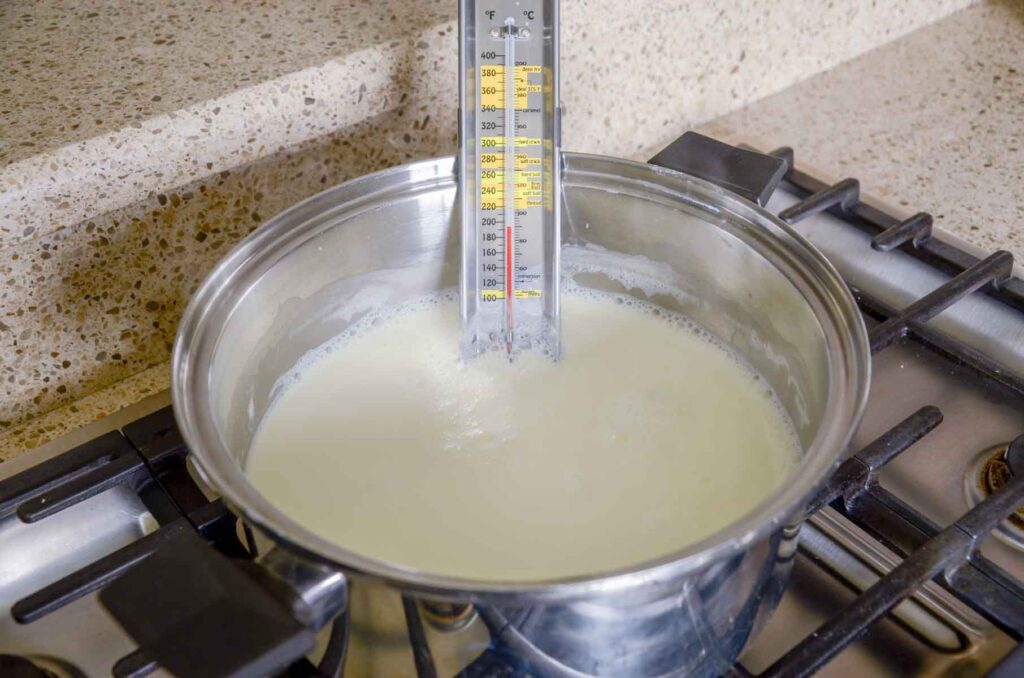
Place the pot on the stove and heat it over medium heat. While stirring occasionally, slowly warm the milk, but don’t let it boil. Heat until the milk reaches 195°F/91°C.
Continue stirring and hold the milk at this temperature for 10 minutes.
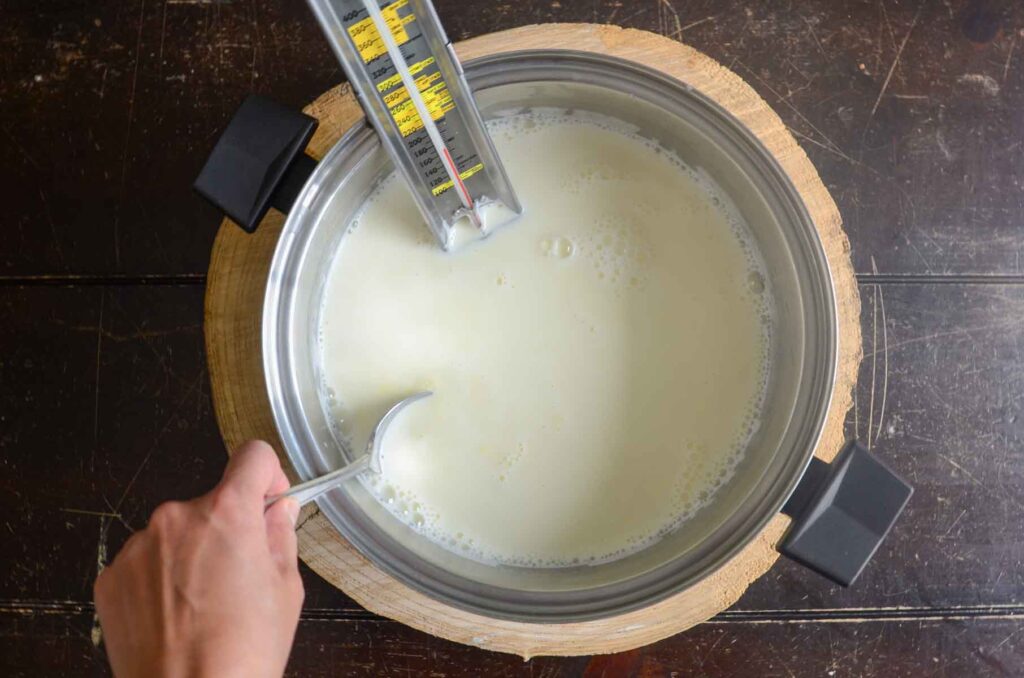
Remove the milk from the stove and let the milk cool to 100°F/38°C – 110°F/43°C. This takes about 30 minutes. Alternatively, you can place the pot in a sink filled with ice water to cool quickly.
Add Yogurt Culture
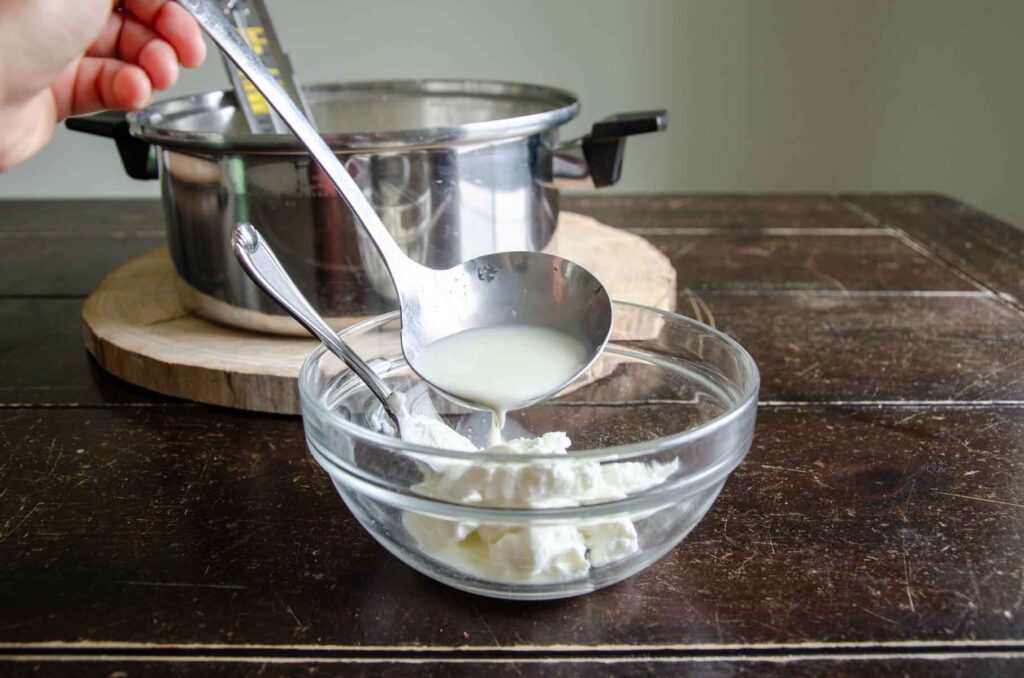
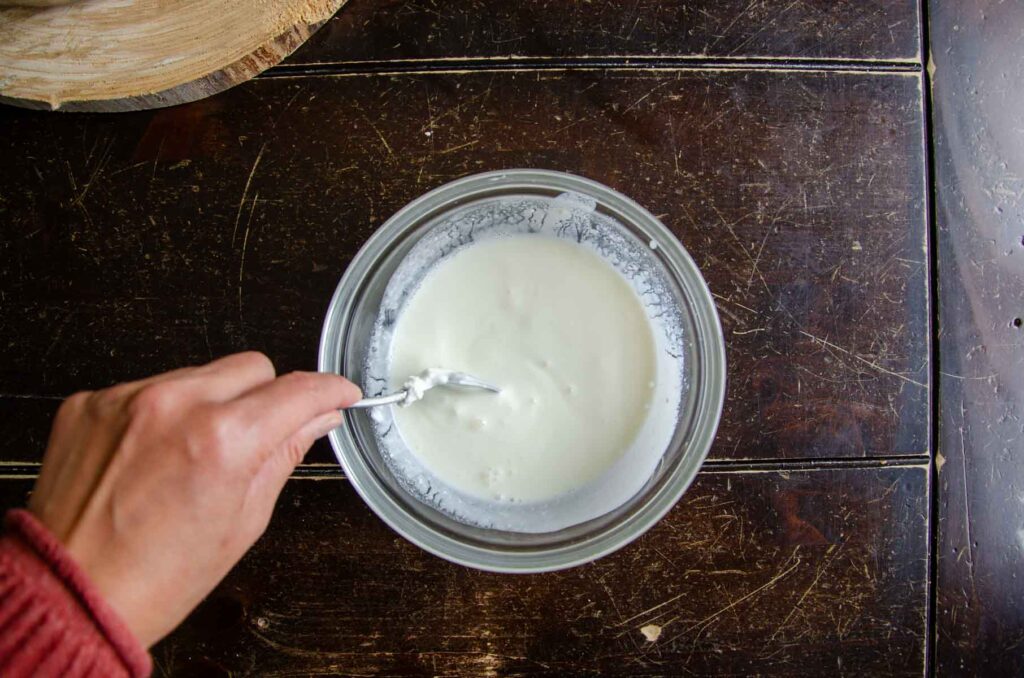
Once the milk is cool, add ½ cup of store-bought yogurt into a small bowl.
Ladle about 1 cup warm milk into the bowl and stir to thin the yogurt. Pour the thin yogurt mixture into the pot of warm milk. Stir to distribute the starter culture into the milk.
If you find yourself making yogurt often, it may be beneficial to invest in a special yogurt proofer. However, it’s one more thing to buy and store. I find that the oven with the light on creates the ideal warm place for the yogurt to ferment.
Ferment | Incubate
Cover the pot with the lid and place it in an oven with the oven light on.
Let the milk sit, undisturbed, for 8 to 24 hours. Check the yogurt at the 6-hour mark if you want a mild flavor. The yogurt is done when its set, and holds its shape when you jiggle the bowl. The longer the yogurt sits, the tangier it becomes.
Be sure to save a little bit of yogurt to act as the starter for your next batch of yogurt.
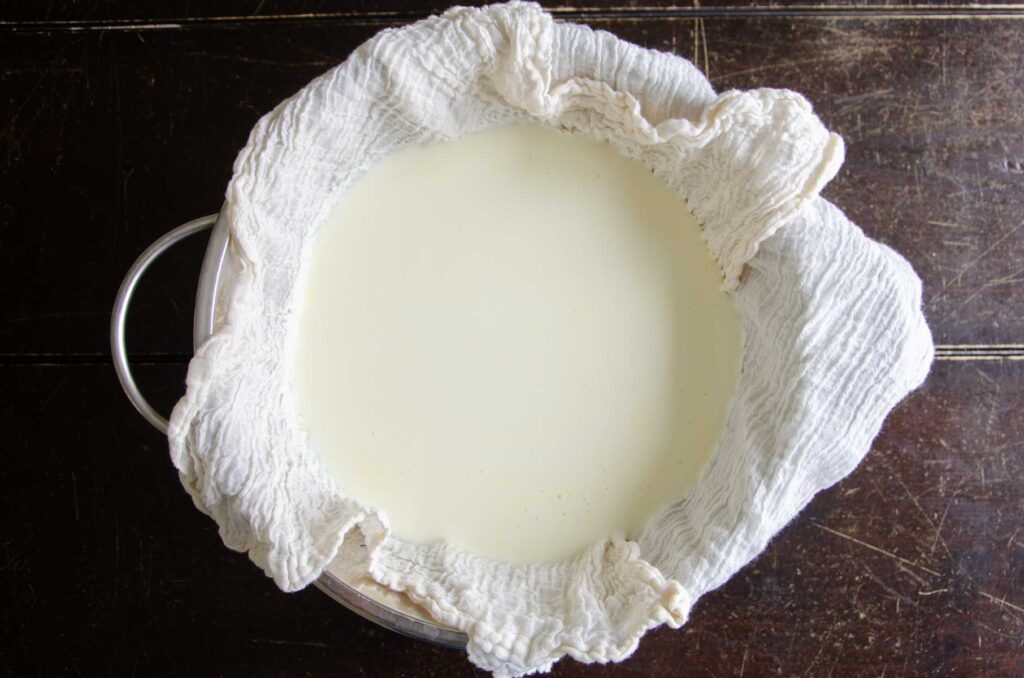
Strain
Once the yogurt is done fermenting to your liking, add it to a cheesecloth-lined strainer set over a large bowl to catch the whey. Cover the top of the strainer with a plate or a piece of plastic wrap to keep the yogurt from forming a skin on top. Place the bowl and straining set up in the fridge. This will let the whey separate from the yogurt.

Check the yogurt after an hour or two. The yogurt is done when it reaches your desired consistency. The longer you strain the yogurt, the thicker it will be!
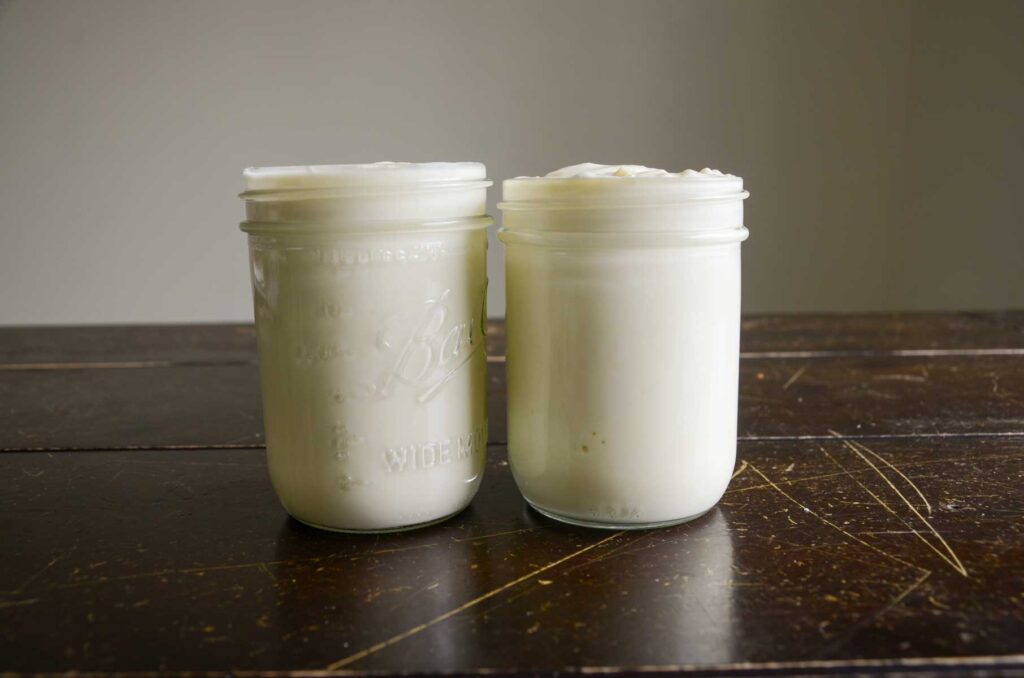
Next, gently spoon the yogurt from the cloth lining and place it into a clean container. I like to use wide-mouth pint-sized mason jars.
The finished yogurt will have a creamy, thick texture.
There will be a few cups of whey at the bottom of the bowl, depending on how long you’ve let the yogurt strain.
Store
Place the fresh yogurt into the fridge, covered, and store it for up to a month. If you added fresh fruit, the yogurt won’t last as long. If it smells off, throw it out. Like many fermented foods, the yogurt will become more acidic the longer it sits.
FAQs
What’s the Difference Between Greek Yogurt and Homemade Yogurt?
Greek yogurt has been strained, allowing the whey to separate from the rest of the yogurt, resulting in a thick, creamy yogurt.
What Kind of Milk is Best for Homemade Yogurt?
Yogurt made with whole milk will have a thicker consistency and more flavor. Using milk with a lower fat content will produce a thinner yogurt.
Can I Use Store-Bought Greek Yogurt as a Starter?
Yes, as long at the yogurt has live, active cultures in it.
Can You Turn Plain Yogurt into Greek Yogurt?
Greek yogurt is the same as regular yogurt, but thicker. After going through the straining process, the whey separates from plain yogurt, leaving behind a thick and creamy Greek-style yogurt.

Tips
- Like any fermented food, it’s important to start with clean equipment to avoid cross-contamination.
- Use good quality milk. Like most recipes that have just a few ingredients, it’s best to choose high quality ingredients because each one counts.
- If you are fermenting any other foods, like sourdough or kombucha, it’s important that each type of food has some distance from other ferments.
- Add sweeteners after the yogurt is done fermenting to avoid feeding the wrong bacteria. The lactic acid-loving bacteria will feed on lactose present in the milk.
Ways to Serve Homemade Yogurt
- Top your delicious yogurt with fresh fruit and a sprinkle of granola for a quick breakfast or snack.
- Enjoy homemade Greek yogurt salad dressing.
- Create a delicious yogurt dipping sauce for lamb meatballs.
- Stir a dollop into a bowl of curry right before serving.
If you try this recipe and love it, I would love it if you could come back and give it 5 stars!

Homemade Greek Yogurt Recipe
Want to Save This Recipe?
Enter your email & I’ll send it to your inbox. Plus, get great new recipes from me every week!
By submitting this form, you consent to receive emails from Lockrem Homestead
Ingredients
- 8 cups Milk
- ½ cup yogurt starter or yogurt with live cultures
Instructions
Heat and Cool the Milk
- Pour 8 cups of milk into a large pot.
- Place the pot on the stove and heat it over medium heat. While stirring occasionally, slowly warm the milk, but don’t let it boil. Heat until the milk reaches 195°F/91°C.
- Continue stirring and hold the milk at this temperature for 10 minutes.
- Remove the milk from the stove and let the milk cool to 100°F/38°C – 110°F/43°C. This takes about 30 minutes. Alternatively, you can place the pot in a sink filled with ice water to cool quickly.
Add Yogurt Culture
- Once the milk is cool, add ½ cup of store-bought yogurt into a small bowl.
- Ladle about 1 cup warm milk into the bowl and stir to thin the yogurt. Pour the thin yogurt mixture into the pot of warm milk. Stir to distribute the starter culture into the milk.
- If you find yourself making yogurt often, it may be beneficial to invest in a special yogurt proofer. However, it’s one more thing to buy and store. I find that the oven with the light on creates the ideal warm place for the yogurt to ferment.
Ferment | Incubate
- Cover the pot with the lid and place it in an oven with the oven light on.
- Let the milk sit, undisturbed, for 8 to 24 hours. Check the yogurt at the 6-hour mark if you want a mild flavor. The yogurt is done when its set, and holds its shape when you jiggle the bowl. The longer the yogurt sits, the tangier it becomes.
- Be sure to save a little bit of yogurt to act as the starter for your next batch of yogurt.
Strain
- Once the yogurt is done fermenting to your liking, add it to a cheesecloth-lined strainer set over a large bowl to catch the whey. Cover the top of the strainer with a plate or a piece of plastic wrap to keep the yogurt from forming a skin on top. Place the bowl and straining set up in the fridge. This will let the whey separate from the yogurt.
- Check the yogurt after an hour or two. The yogurt is done when it reaches your desired consistency. The longer you strain the yogurt, the thicker it will be!
- Next, gently spoon the yogurt from the cloth lining and place it into a clean container. I like to use wide-mouth pint-sized mason jars.
- The finished yogurt will have a creamy, thick texture.
- There will be a few cups of whey at the bottom of the bowl, depending on how long you’ve let the yogurt strain.
Store
- Place the fresh yogurt into the fridge, covered, and store it for up to a month. If you added fresh fruit, the yogurt won’t last as long. If it smells off, throw it out. Like many fermented foods, the yogurt will become more acidic the longer it sits.
Notes
What’s the Difference Between Greek Yogurt and Homemade Yogurt?
Greek yogurt has been strained, allowing the whey to separate from the rest of the yogurt, resulting in a thick, creamy yogurt.
What Kind of Milk is Best for Homemade Yogurt?
Yogurt made with whole milk will have a thicker consistency and more flavor. Using milk with a lower fat content will produce a thinner yogurt.
Can I Use Store-Bought Greek Yogurt as a Starter?
Yes, as long at the yogurt has live, active cultures in it.
Can You Turn Plain Yogurt into Greek Yogurt?
Greek yogurt is the same as regular yogurt, but thicker. After going through the straining process, the whey separates from plain yogurt, leaving behind a thick and creamy Greek-style yogurt.
Tips
- Like any fermented food, it’s important to start with clean equipment.
- Use good quality milk. Like most recipes that have just a few ingredients, it’s best to choose high quality ingredients because each one counts.
- If you are fermenting any other foods, like sourdough or kombucha, it’s important that each type of food has some distance from other ferments.
- Add sweeteners after the yogurt is done fermenting to avoid feeding the wrong bacteria. The lactic acid-loving bacteria will feed on lactose present in the milk.
I love learning the process of making our staple kitchen items! All it takes is a little extra time and effort, and it is so worth it! Leave your questions and comments below, I look forward to hearing from you!