Seeded Multigrain Sourdough Bread Recipe
This post may contain affiliate links. As an Amazon Associate, I may receive a small commission, at no cost to you, if you make a purchase. Please read our disclosure policy.
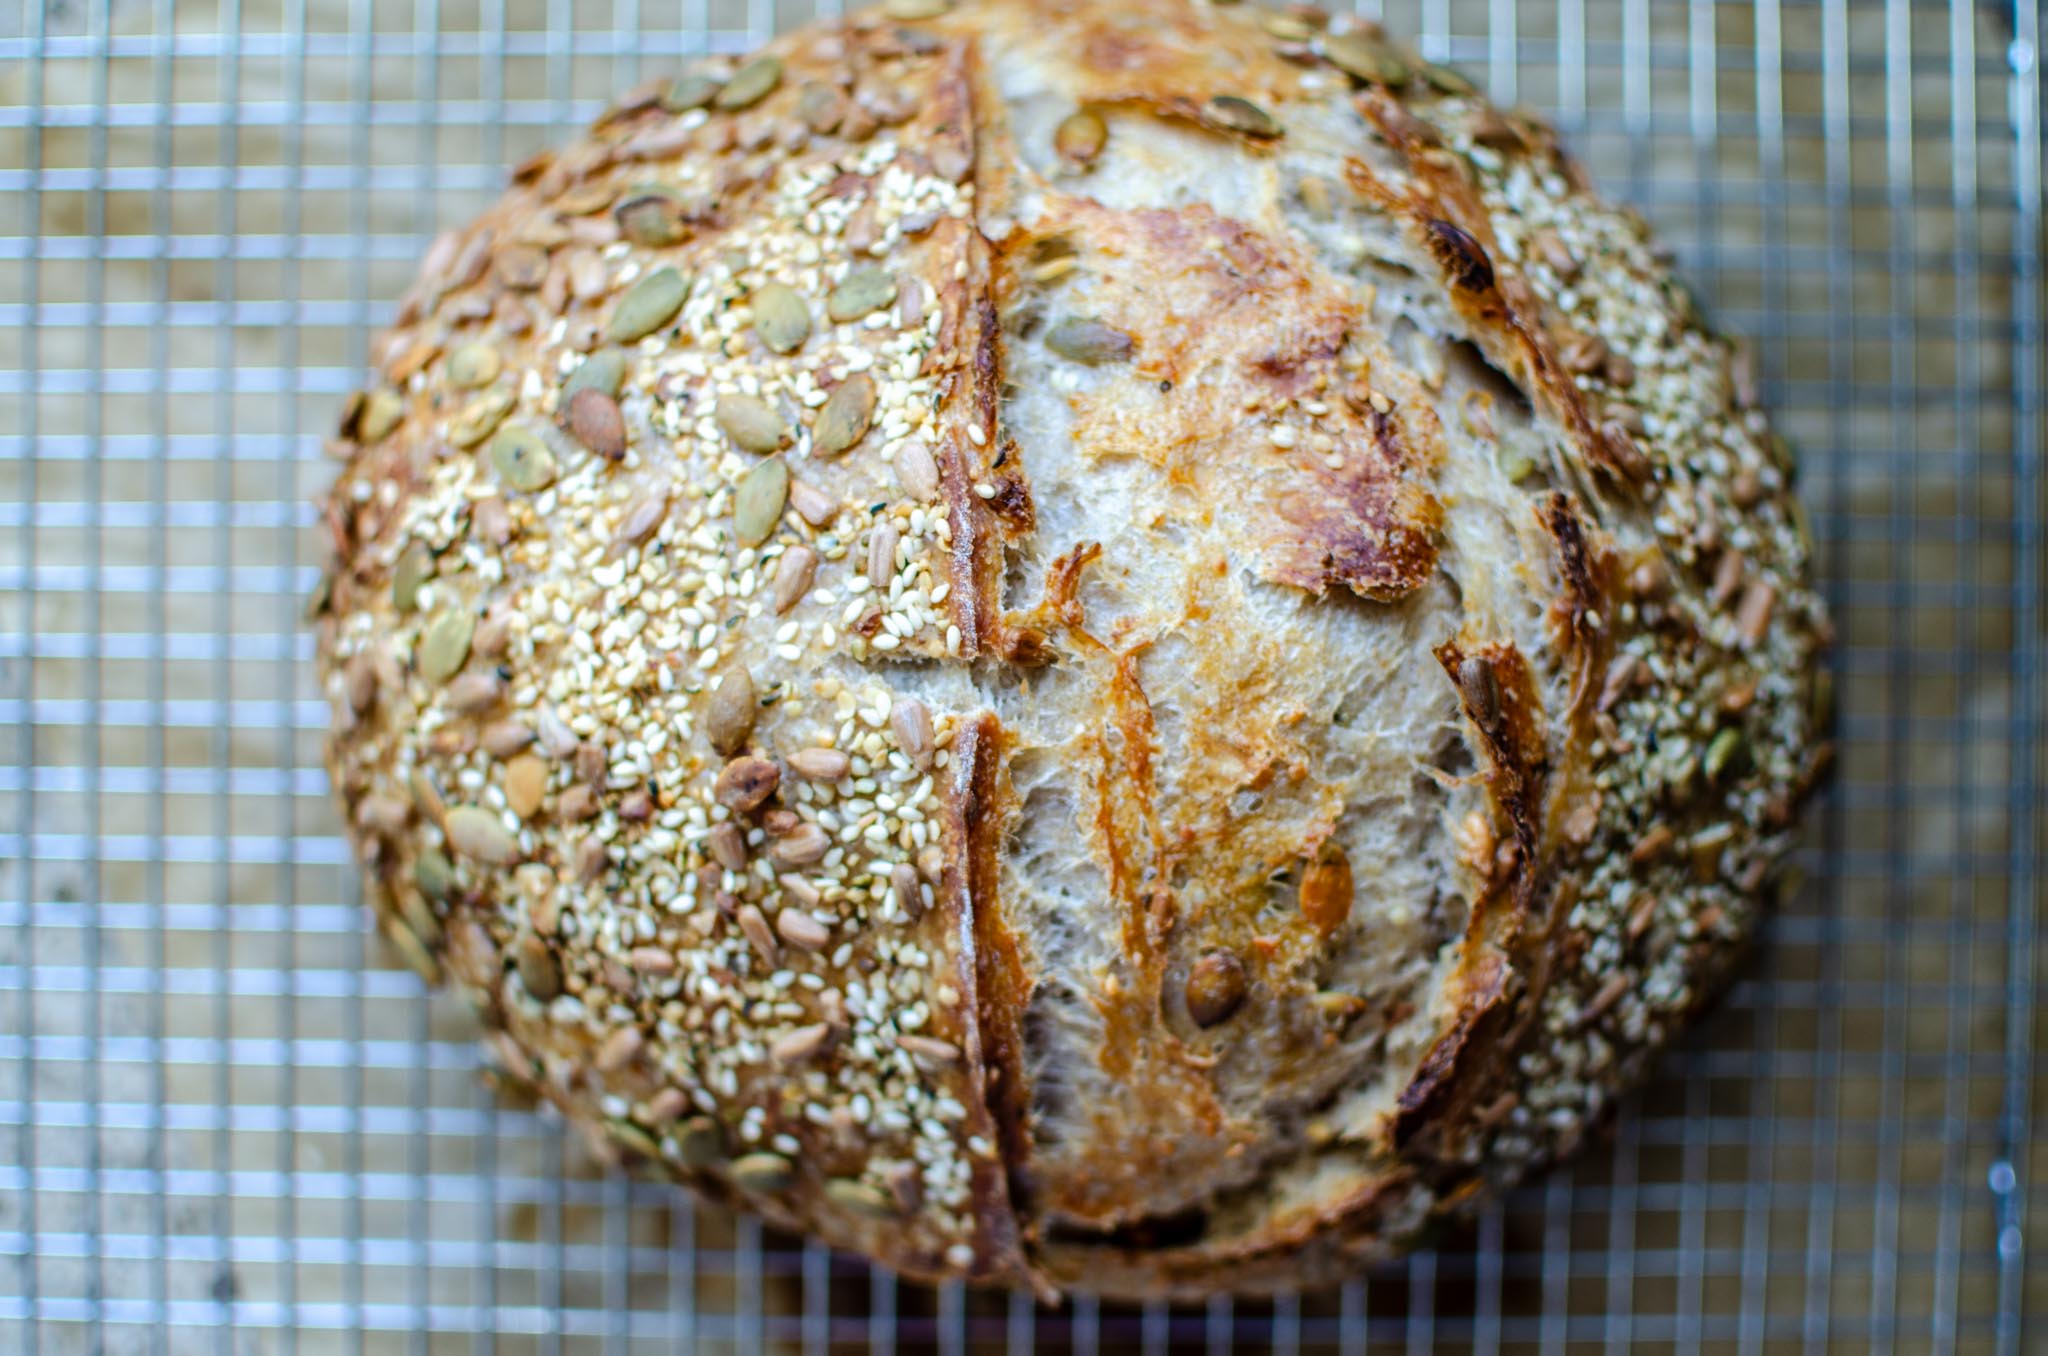
Welcome to your new favorite multigrain bread. This seeded multigrain bread is full of whole grain goodness, long fermented benefits of sourdough with its signature tang, as well as nutty, wholesome flavor from all of the seeds. Sesame, poppy, sunflower, hemp hearts, and pumpkin seeds are all woven throughout the loaf and roasted across the beautiful, crunchy crust.
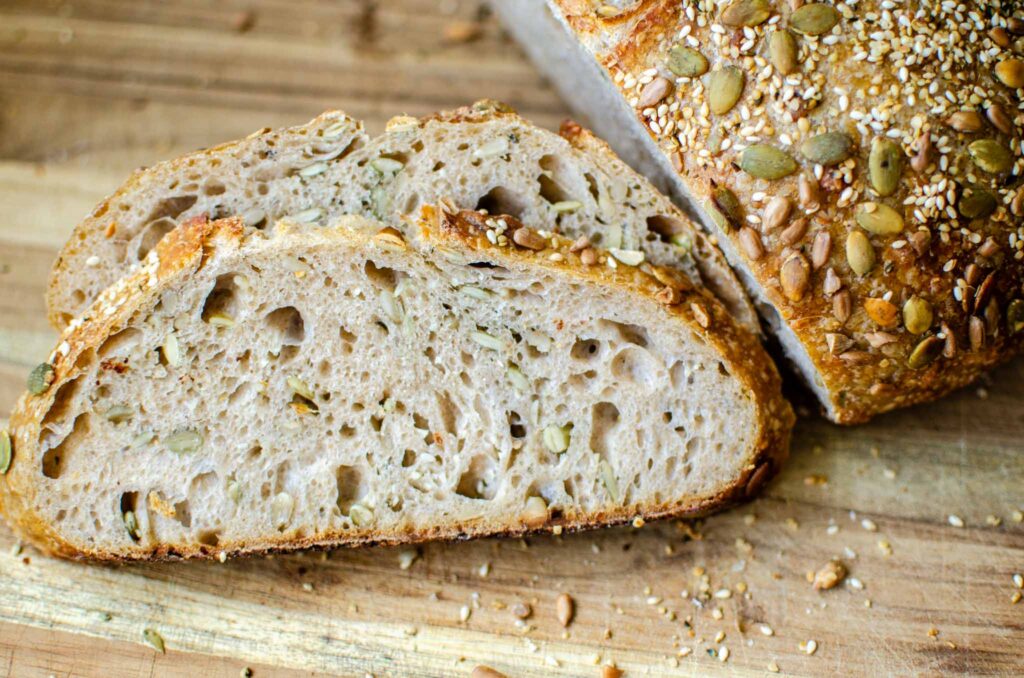
This seeded multigrain sourdough bread is like traditional sourdough bread that’s been elevated with seeds for a chewy, wholesome flavor. Not only is this seeded multigrain sourdough bread beautiful, but it’s also adaptable. Add your favorite seeds and nuts or leave some off. Some seeds pair together better than others, so it’s fun to experiment to find what you like.
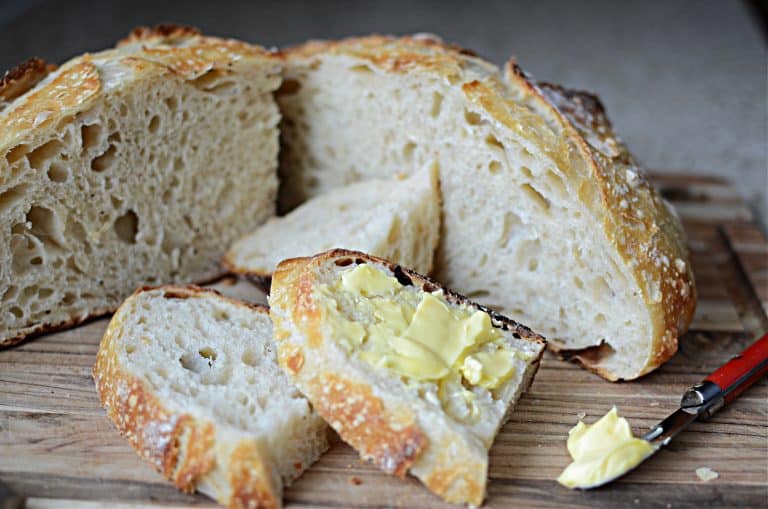
Enjoy a toasted slice with butter for a quick breakfast. This bread makes the best sandwiches. Paired with your favorite deli meats and cheeses for a sandwich with extra nutritional benefits of the whole grain. This bread will be enjoyed no matter how you serve it.
Ingredients for Seeded Multigrain Sourdough Bread
Dough:
- Active sourdough starter
- Warm water
- Bread flour
- Whole wheat flour
- Sea salt
Seeds:
- Sesame seeds
- Pumpkin seeds
- Sunflower seeds
- Chia seeds
- Hemp hearts
Instructions for Seeded Multigrain Sourdough Bread
You will need an active sourdough starter for this bread recipe. Feed starter 4-8 hours before mixing dough to allow starter to wake up. When the starter is at it’s peak, it will be full of bubbles and activity. It’s now ready to use to make the seeded multigrain sourdough bread dough.
Mixing the Dough
In a large mixing bowl combine warm water and flours. This is called the autolyze. Allow the autolyze to sit for 30 minutes to so that the flour can properly hydrate, giving the gluten development a head start for when you begin your folds. While it may seem like an extra step, it’s worth it as you will see a significant difference in the texture of your bread when its baked.
After 30 minutes add the sourdough starter, pouring over the top of the autolyze. Sprinkle the salt over the starter and mix by hand to bring it all together. I like to do a combination of stretch and folds along with squeezing the dough by clenching fistfuls of dough to incorporate it all.
Cover the dough with a damp tea towel or a plate and allow to rest for 30 minutes.
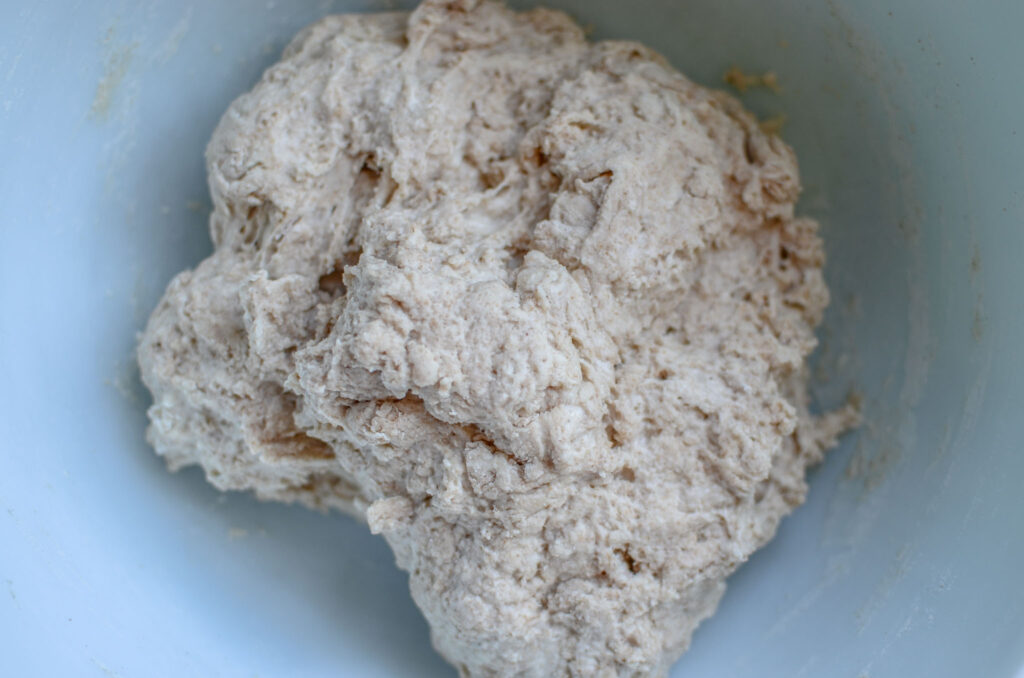
Stretch and Folds
In order for gluten to develop the dough needs to be worked in a series of stretch and folds. Don’t worry if you’re unfamiliar with stretch and folds, they’re pretty simple.
Grab the side of the dough furthest from you in the bowl and stretch it straight up. Then bring that portion of the dough towards the center of the bowl, pressing it down into the rest of the dough.
This completes the fold. Rotate the bowl a quarter of a turn and repeat the stretch and fold action. Continue to rotate the bowl and stretch and fold the dough until the dough starts to become stiff and resistant, working the entire bowl of dough.
This completes your first set of stretch and folds. Let the dough rest for 30 minutes before the next set of stretch and folds. Use wet hands if the dough becomes too sticky to work with.
On the third set of stretch and folds add the seed mixture over the top of the dough. Do the stretch and folds to incorporate the seeds throughout the dough.
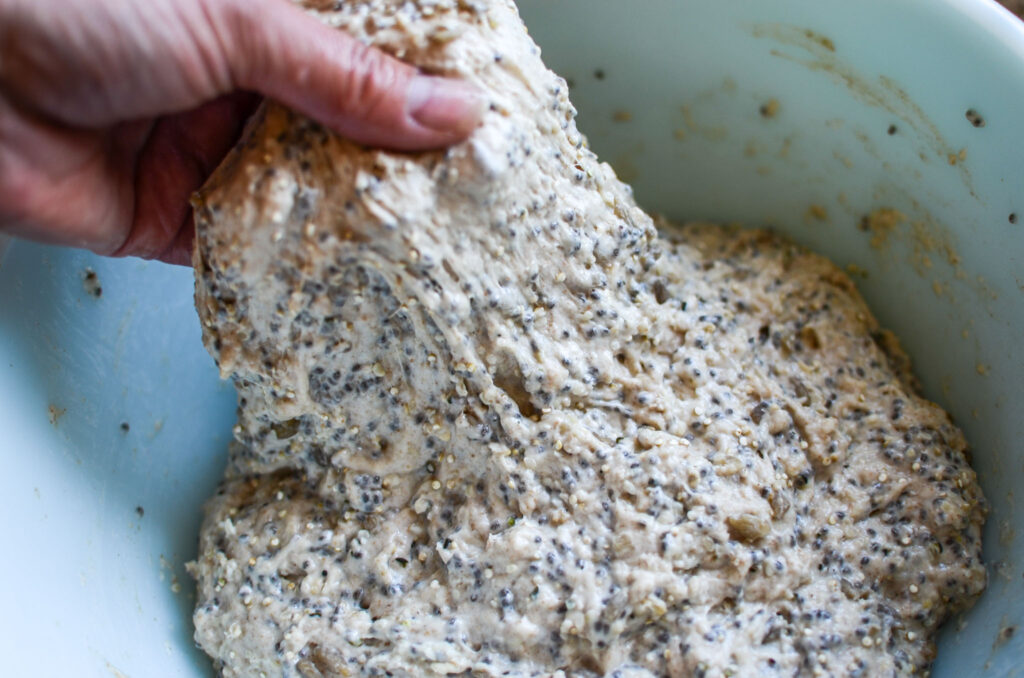
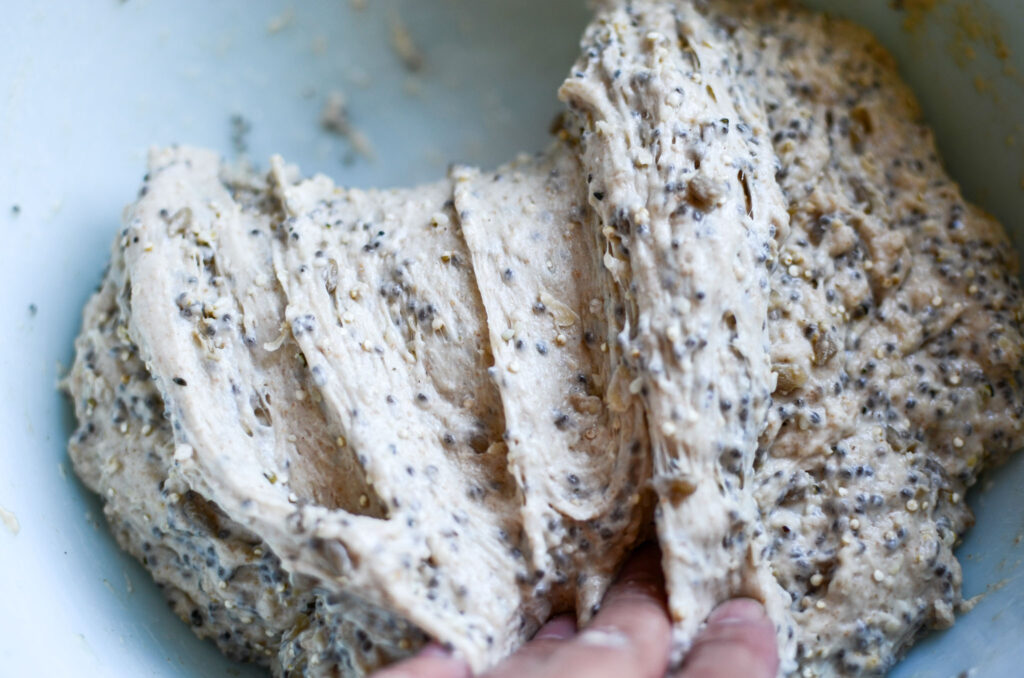
You will most likely do a total of 4 stretches and folds. More importantly of doing the right number of stretches and folds, is to work the dough enough until the gluten has been developed enough. Proper gluten development will support all of the seeds as well as provide structure to the bread.
An easy way to know if enough gluten has been developed is to do what is called the window pane test. Using both hands while holding part of the dough, stretch it out thinly to see if it is strong enough to hold. If it is, it will be transparent enough as if looking through a window pane. If the dough breaks before being able to stretch thinly, then the gluten hasn’t developed enough and will need more stretches and folds.
Bulk Fermentation:
After the final set of stretch and folds cover the bowl with a plate or plastic wrap and let the dough rise in a warm place for 8-12 hours or until the dough has doubled in size. The total time will depend largely on the temperature of your kitchen as well as how mature your starter is.
Shape and Final Proof
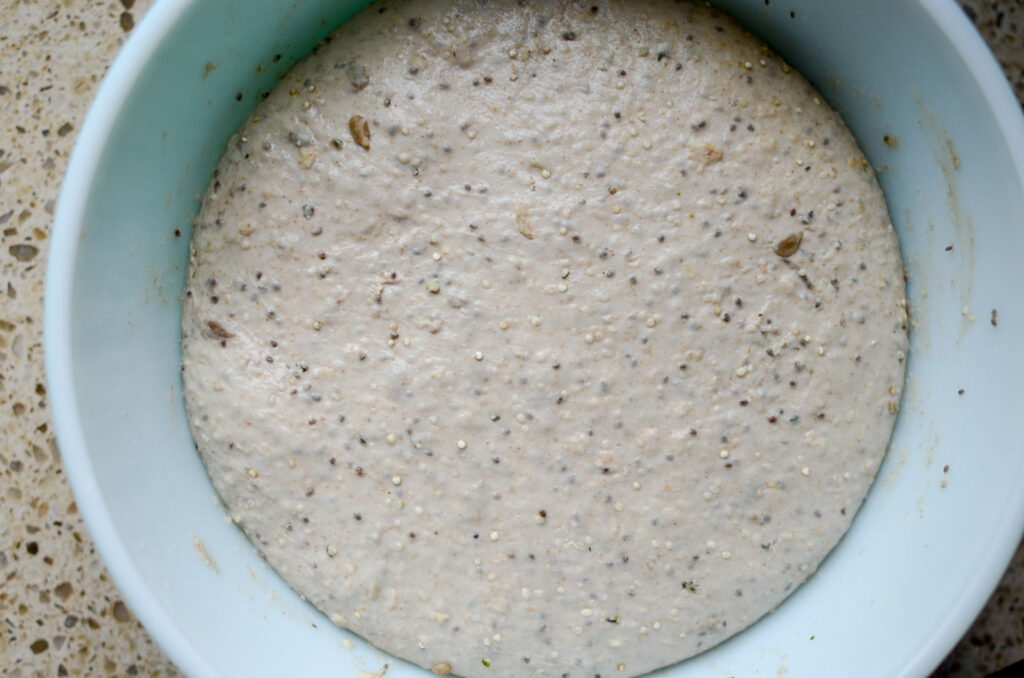
The dough will have doubled in size after the bulk fermentation and have a smooth, light appearance to it. Lightly flour your work surface. Use a bowl scraper or silicone spatula and turn out the dough.
To shape, first fold the bottom half of the dough up to the middle. Then fold each side towards the middle. You may need to use one hand to hold the folds in place. Starting at the top of the dough, start to roll the dough until its all rolled.
Using a bench knife, flip the dough ball over so that the seam is down on the work space. Tighten the top of the dough by cupping the dough with both hands and pulling towards you. Pivot the dough slightly and do another pull until the dough is round in shape with a smooth, tight top.

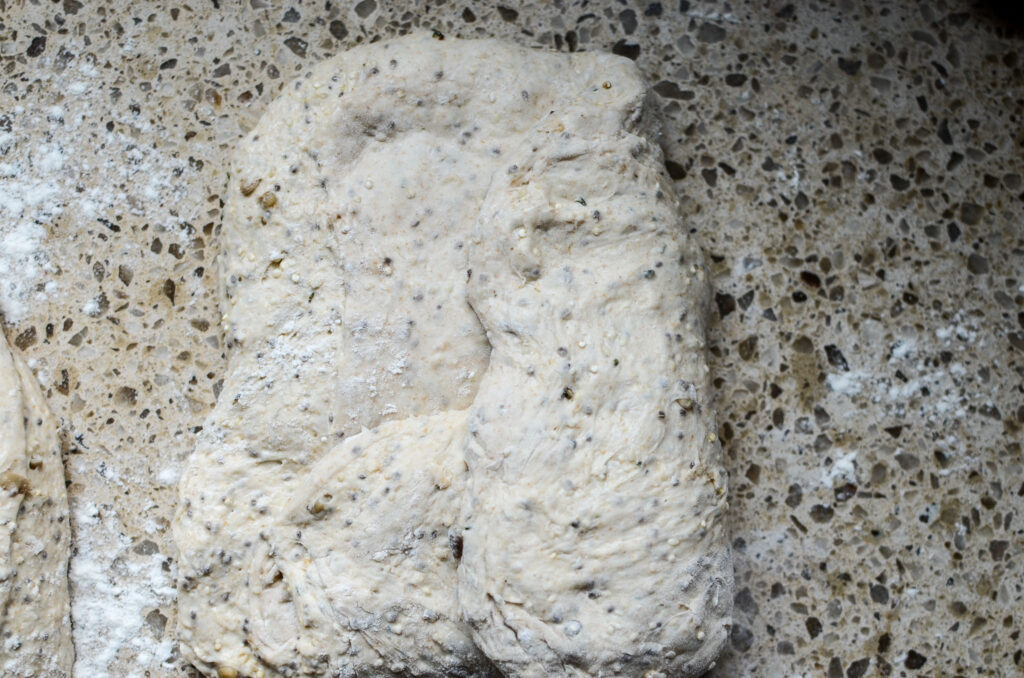
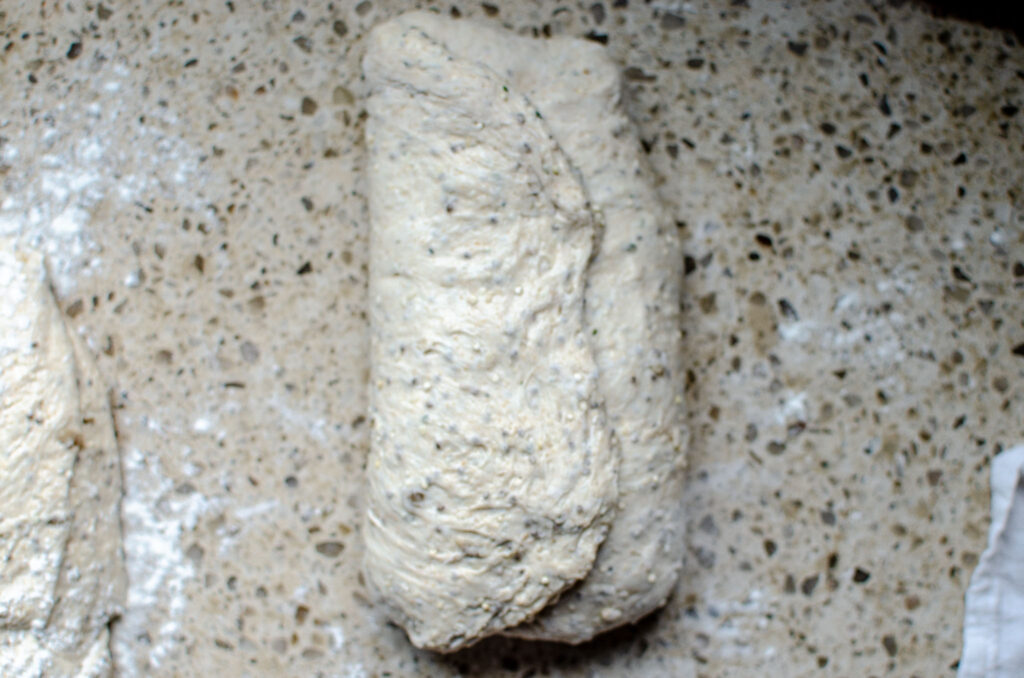
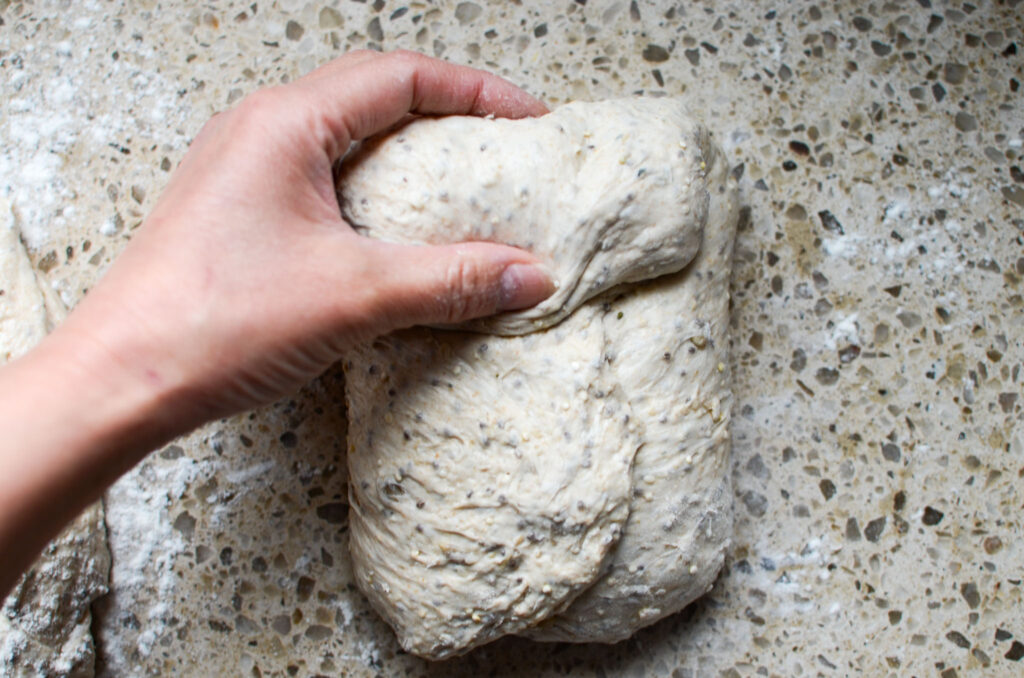
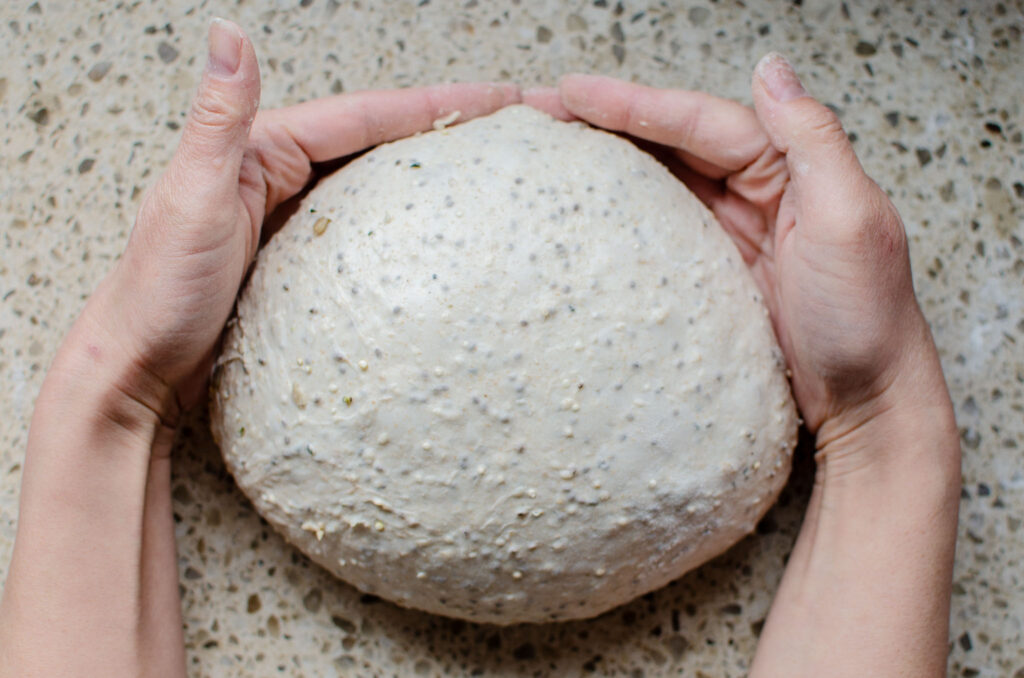
Transfer to a banneton that has been sprinkled with rice flour with the seam side up, cover and place in the refrigerator for 8-15 hours.
If you don’t have banneton, no problem. Lift the dough onto a sheet of parchment paper with the seam down. Lift the parchment paper into a bowl, cover and place it in the refrigerator to 8-15 hours for the final proof.
Bake
The next day preheat a Dutch oven at 450 degrees for one hour.
Remove the cold dough from the refrigerator. If you are using a banneton, flip the dough over onto a piece of parchment paper so that the seam is facing down.
Using a sharp knife or bread lame, score the top of the loaf holding the blade at a 45 degree angle. This will help the bread to open up and give what is called an ear, or the prominent flap of crust that rises where the bread was scored. Though not important, it’s often sought after when baking a sourdough loaf.
Brush the top of the bread lightly with water and sprinkle on the seeds. I used a combination of one tablespoon of each of the larger seeds and one teaspoon of each of the smaller seeds. The water will help the seeds to adhere to the bread.
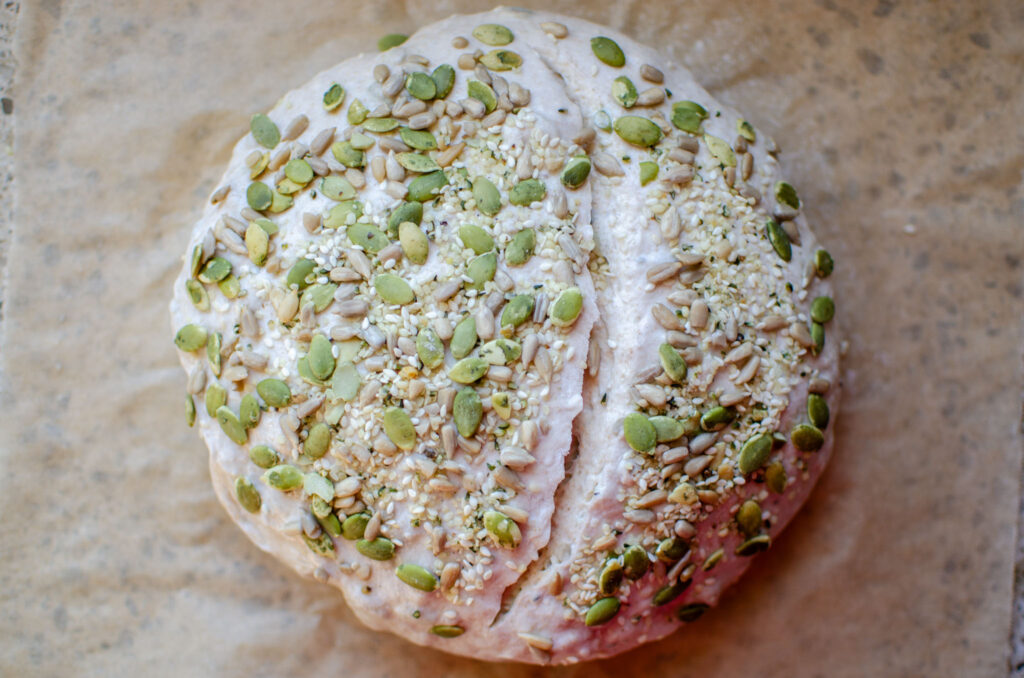
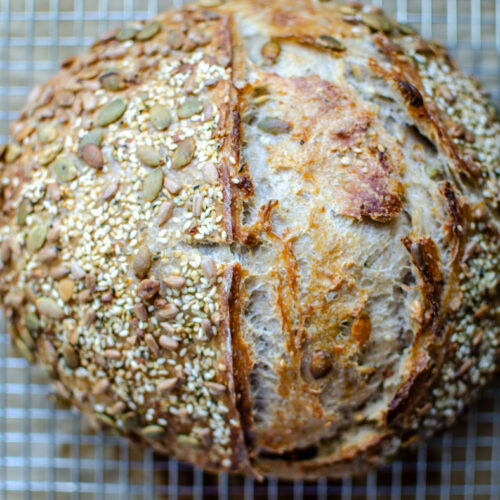
Lift the bread into the hot Dutch oven and bake for 30 minutes with the lid on. Bake for an additional 10 minutes without the lid. The internal temperature of the bread will reach 200 degrees when finished. Lift the bread out onto a wire rack to cool. Wait until the bread has completely cooled before slicing.
Storage
Storage the bread in an airtight container for 3-4 days at room temperature. Sourdough loaves, whole or sliced, can be frozen for longer storage. Wrap securely and place in the freezer, best used within three months.
Seeded Multigrain Sourdough Bread Benefits
Seeded multigrain sourdough bread provides some healthy fats and more fiber from the seeds, benefiting your digestive health and your blood sugar levels.
The fermentation process also makes the bread more digestible as well as increases the availability of nutrients. So you ask, is it healthy? I’d say that if you’re going to enjoy bread, a long-fermented bread is better than traditional bread. Adding seeds and whole grains adds even more health benefits. Like anything, moderation is key. Our family enjoys eating homemade long fermented whole grain seeded sourdough bread as a source of carbs.
What Kind of Seeds to Use?
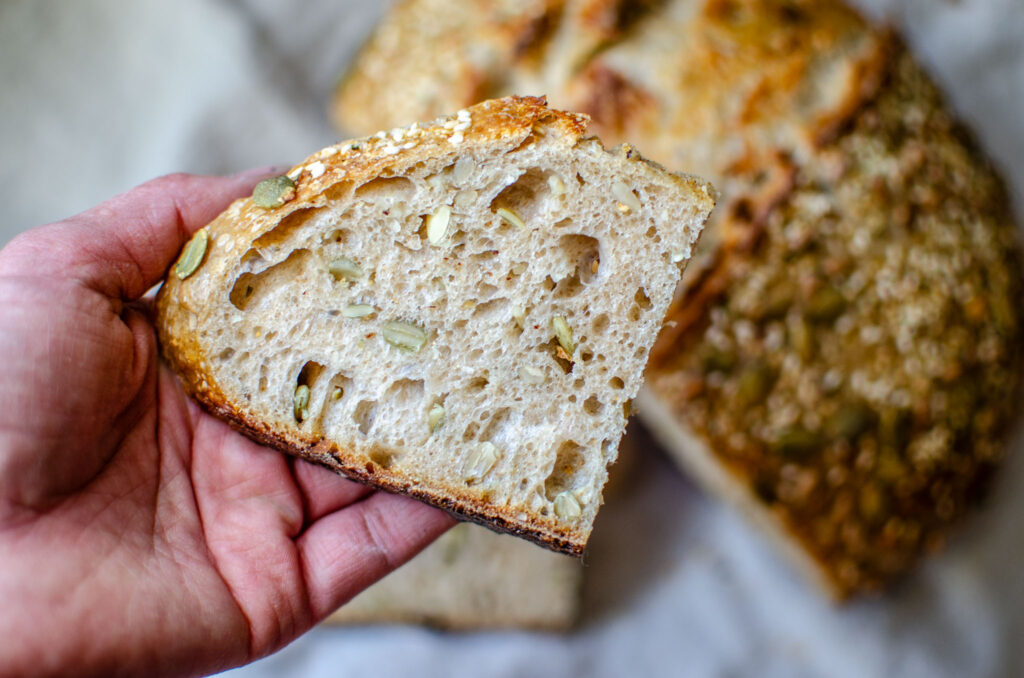
I love the combination of larger seeds as well as the smaller seeds for some variety as well as providing a great texture. There’s really an endless combination of seeds you can use. I used pumpkin, sunflower, chia, hemp and sesame seeds. Other options are poppy, flax, quinoa or fennel seeds.
I’d love to hear from you! Please rate the recipe and leave me a comment below! Don’t forget to tag #Lockremhomestead in photos of your Seeded Multigrain Sourdough Bread over on Instagram!
Seeded Multigrain Sourdough Bread Recipe
Want to Save This Recipe?
Enter your email & I’ll send it to your inbox. Plus, get great new recipes from me every week!
By submitting this form, you consent to receive emails from Lockrem Homestead
Ingredients
Seeded Multigrain Sourdough Bread Dough
- 1½ cups warm water 350 g
- 3 cups bread flour 400 g
- ½ cup + 1 tsp whole wheat flour 100 g
- 2 tsp salt 10 g
- ⅓ cup + 1 tbsp active sourdough starter 100 g
Seed Mix
- ¼ cup sunflower seeds
- ¼ cup pumpkin seeds
- 1 tbsp sesame seeds
- 1 tbsp hemp hearts
Instructions
Mixing the Dough
- You will need an active sourdough starter for this bread recipe. Feed the starter for 4-8 hours before mixing the dough to allow the starter to wake up. When the starter is at its peak, it will be full of bubbles and activity. It’s now ready to use to make the seeded multigrain sourdough bread dough.In a large mixing bowl combine warm water and flours. This is called the autolyze. Allow the autolyze to sit for 30 minutes so that the flour can properly hydrate, giving the gluten development a head start for when you begin your folds. While it may seem like an extra step, it’s worth it as you will see a significant difference in the texture of your bread when it's baked. After 30 minutes add the sourdough starter, pouring over the top of the autolyze. Sprinkle salt over the starter and mix by hand to bring it all together. I like to do a combination of stretch and folds along with squeezing the dough by clenching fistfuls of dough to incorporate it all. Cover the dough with a damp tea towel or a plate and allow to rest for 30 minutes.While that rests, combine the seed mix in a small bowl.
Stretch and Folds
- For gluten to develop, the dough needs to be worked in a series of stretches and folds. Don’t worry if you’re unfamiliar with stretch and folds, they’re pretty simple. Grab the side of the dough furthest from you in the bowl and stretch it straight up. Then bring that portion of the dough towards the center of the bowl, pressing it down into the rest of the dough. This completes the fold. Rotate the bowl a quarter of a turn and repeat the stretch and fold action. Continue to rotate the bowl and stretch and fold the dough until the dough starts to become stiff and resistant, working the entire bowl of dough. This completes your first set of stretches and folds. Let the dough rest for 30 minutes before the next stretches and folds. Use wet hands if the dough becomes too sticky to work with.On the third set of stretch and folds add the seed mix over the top of the dough. Do the stretches and folds to incorporate the seeds throughout the dough.You will most likely do a total of 4 stretches and folds. More important than doing the right number of stretches and folds is to work the dough enough until the gluten has been developed enough. Proper gluten development will support all of the seeds as well as provide structure to the bread. An easy way to know if enough gluten has been developed is to do the window pane test. Using two hands, hold part of the dough and stretch it out thinly to see if it is strong enough to hold. If it is, it will be transparent enough as if looking through a window pane. If the dough breaks before being able to stretch thinly, then the gluten hasn’t developed enough and will need more stretches and folds.
Bulk Fermentation
- After the final set of stretch and folds cover the bowl with a plate or plastic wrap and let the dough rise in a warm place for 8-12 hours or until the dough has doubled in size. The total time will depend largely on the temperature of your kitchen as well as how mature your starter is.
Shape and Final Proof
- The dough will have doubled in size after the bulk fermentation and have a smooth, light appearance to it. Lightly flour your work surface. Use a bowl scraper or silicone spatula and turn out the dough. To shape, fold the bottom half of the dough up to the middle. Then fold each side towards the middle. You may need to use one hand to hold the folds in place. Starting at the top of the dough, start to roll the dough until it's all rolled.Using a bench knife, flip the dough ball over so that the seam is down on the workspace. Tighten the top of the dough by cupping the dough with both hands and pulling it towards you. Pivot the dough slightly and do another pull until the dough is round with a smooth, tight top.Transfer to a banneton that has been sprinkled with rice flour with the seam side up, cover, and place in the refrigerator for 8-15 hours. If you don’t have banneton, no problem. Lift the dough onto a sheet of parchment paper with the seam down. Lift the parchment paper into a bowl, cover and place it in the refrigerator for 8-15 hours for the final proof.
Bake
- The next day preheat a Dutch oven at 450 degrees for one hour. Remove the cold dough from the refrigerator. If you are using a banneton, flip the dough over onto a piece of parchment paper so that the seam is facing down. Using a sharp knife or bread lame, score the top of the loaf holding the blade at a 45-degree angle. This will help the bread to open up and give what is called an ear, or the prominent flap of crust that rises where the bread is scored. Though not important, it’s often sought after when baking a sourdough loaf. Brush the top of the bread lightly with water and sprinkle on the seeds. I used a combination of one tablespoon of each of the larger seeds and one teaspoon of each of the smaller seeds. The water will help the seeds to adhere to the bread. Lift the bread into the hot Dutch oven and bake for 30 minutes with the lid on. Bake for an additional 10 minutes without the lid. The internal temperature of the bread will read 200 degrees when it is done. Lift the bread out onto a wire rack to cool. Wait until the bread has completely cooled before slicing.
Storage
- Storage the bread in an airtight container for 3-4 days at room temperature. Sourdough loaves, whole or sliced, can be frozen for longer storage. Wrap securely and place in the freezer, best used within three months.


Was very pleased with how this turned out! Can’t wait for it to cool down enough to slice and eat.
My husbands favorite bread! I make it weekly for him. Thank you
I love hearing that! You’re welcome!
Can you add linseeds to this dough and would they need to be soaked before adding to then dough mixture?
You can add linseeds, but they will adjust the ratios of the dough, whether you add them dry or soak them beforehand. If you add them dry, they will pull moisture from the dough. However, if you soak them, they’ll add moisture to the dough. Depending on how much you plan to add to the dough, I’d suggest soaking with a minimal amount of liquid and strain before adding to the dough. Let me know how it turns out!
Can you make this with more whole wheat flour? Like flip the ratio of flours?
You can experiment with adjusting the flour ratios, however, I’ve only tested this recipe. Adjusting the ingredient list in that way will give you a new recipe. Whole wheat flour absorbs more water so you may need to add more water if you swap the types of flour in the recipe. Let me know how it goes!
Hi , I was just wondering if I can bake your bread in a covered loaf pan instead in a Dutch oven?
I’ve not tried it with this recipe before. The recipe is only tested using a Dutch oven, so that’s what I can vouch for. Let me know how it goes for you!