Sourdough English Muffins – Easy Overnight Recipe
Enjoy sourdough homemade English muffins made with sourdough starter for a satisfying breakfast option. With their telltale feature, these nooks and crannies create the perfect landscape to hold your favorite spread. Properly toast for just the right amount of crunch and chew.
New to working with sourdough? No problem! This homemade English muffin recipe is made simple with a short ingredient list and easy overnight directions, leaving you satisfied as you take another bite of your toasted English muffin.
This post may contain affiliate links. As an Amazon Associate, I may receive a small commission, at no cost to you, if you make a purchase. Please read our disclosure policy.

Making English muffins is easy whether you have experience with sourdough, or if this is your first time. Just like making a sourdough bread loaf, these easy English muffins start with an active starter for its lifting power instead of commercial yeast. The dough is left to bulk ferment with a series of stretches and folds, shaped, and then finally cooked.
I have been on a journey to swap out store-bought food with a homemade version and use my sourdough starter every chance I get. I love the gut health benefits of sourdough with its long fermentation process so I knew it wouldn’t be long before the classic English muffins got a sourdough makeover.
Why You’ll Love This Recipe
- Simple – With a short ingredient list and basic sourdough knowledge, you can make easy overnight sourdough English muffins.
- Delicious – Let’s be honest, what’s not to love about a warm English muffin fresh from the oven? There’s no going back to store bought when you taste how delicious and flavorful a homemade muffin is.
- Sourdough Goodness – Enjoy the benefits of sourdough as it bulk ferments for improved digestibility. The benefits continue with an extended cold-proof option.
- Add Your Favorite Topping – Homemade English muffins with their nooks and crannies are perfect to hold homemade butter, peanut butter, jams, and jellies. Not in the mood for sweet? Try savory toppings. Eggs, sausage, bacon, and cheese are excellent choices to create a satisfying breakfast sandwich. Regardless of what you top it with, you’ll want to make these muffins on repeat.
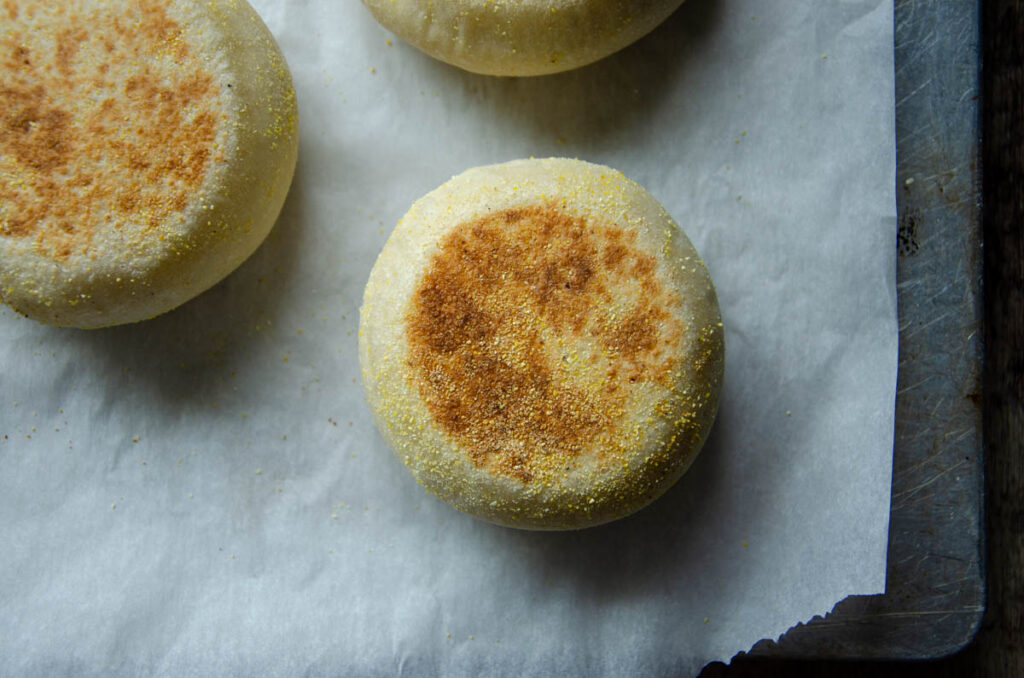
Ingredients
- Active sourdough starter -For this English muffin recipe, you will want to use an active starter, not sourdough discard. Generally, the starter is ready when it’s risen, has plenty of visible air bubbles, has a faint sour aroma, and has a loose consistency.
- Warm water – You don’t need the water temperature to be exact, but you want the water to be warm enough to encourage fermentation. Too hot and you run the risk of killing the yeast. (78°F/25°C)
- Honey or sugar – I’ve used both with success.
- Bread flour – Use a high protein flour, or bread flour, in this English muffin recipe. All-purpose flour is lower in protein and will yield different results.
- Butter – Soften unsalted butter to room temperature and cut into thin slices.
- Salt – Flavors baked goods.
How To Make Homemade English Muffins
Feed the Starter
Feed the starter 4-12 hours before you want to make the dough and let rest in a warm place. The exact time this takes will depend on the temperature of your kitchen and the ratios it was fed. Learn all about sourdough here.
Generally, the starter is ready when it shows plenty of visible air bubbles causing it to double in size, has a loose consistency that’s easily pourable, and has a yeasty, sour smell.
Mix the Dough
When the starter is at its peak, it’s ready to mix the dough.
Add 125 g (1/2 cup) active sourdough starter, 58 g (1/4 cup) whole milk, 235 g (1 cup) water, 20 g (1 tbsp) honey, 10 g (2 tsp) sea salt, and 438 g (3 1/2 cups) bread flour in the bowl of a stand mixer.
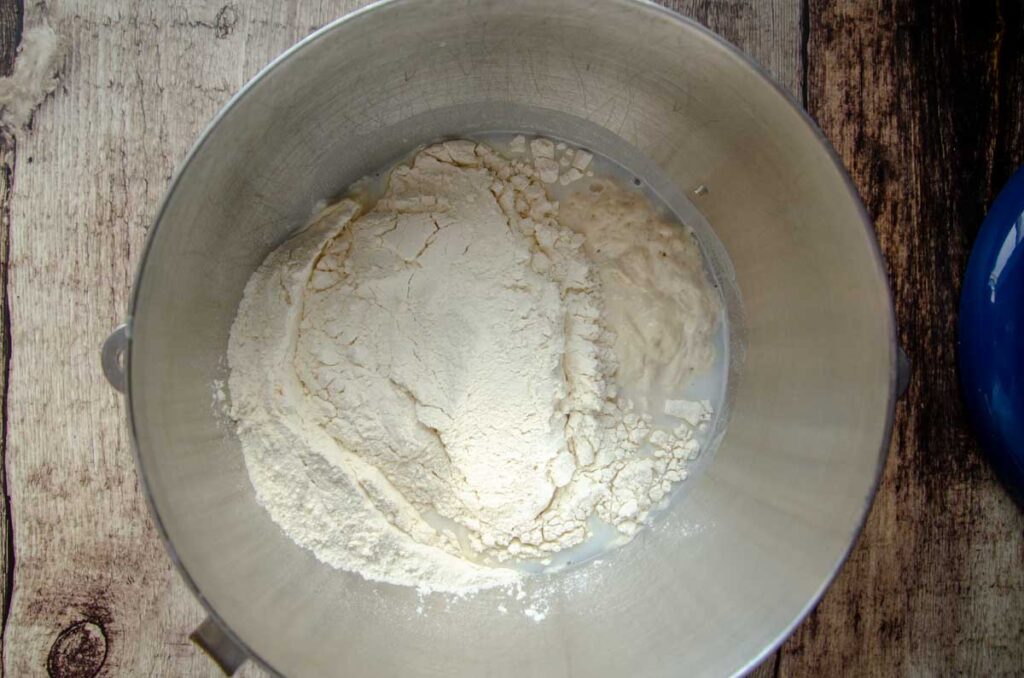
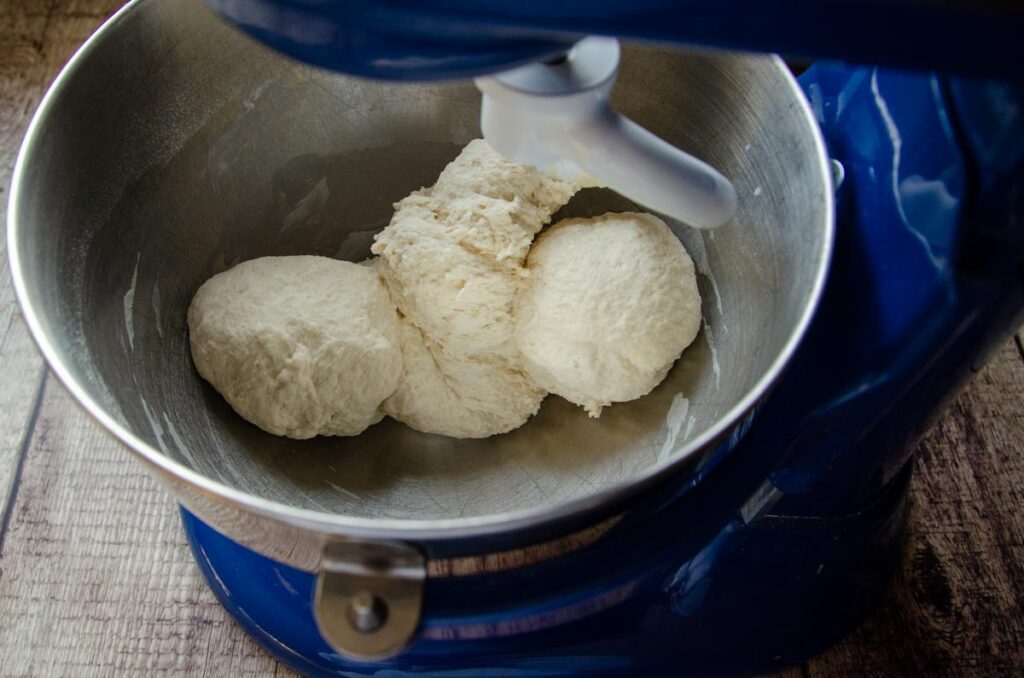
Mix the dough ingredients on medium-low speed with a dough hook attachment for 5 minutes. Pause the mixer to scrape down the sides of the bowl as needed.
Add the butter slices to the dough, one at a time, with the mixer on low speed. Mix until the butter is completely incorporated. Increase the speed to medium and continue to mix for 1-2 more minutes.
Bulk Fermentation and Stretch and Folds
The dough will bulk ferment at room temperature with 3 series of stretches and folds.
Remove the dough hook from the dough and cover the bowl. I like to use a large plate, but you can use plastic wrap, a tea towel, or a large cutting board. Let the dough rest for 30 minutes.
Do the first set of stretch and folds. Grab the edge of the dough, lift it straight up, and fold it over to the other side of the bowl, pressing it into the dough. Rotate the bowl 90 degrees and stretch and fold again. Continue to stretch and fold the dough until it starts to feel resistant, roughly 8-10 times. This completes one set of stretch and folds.
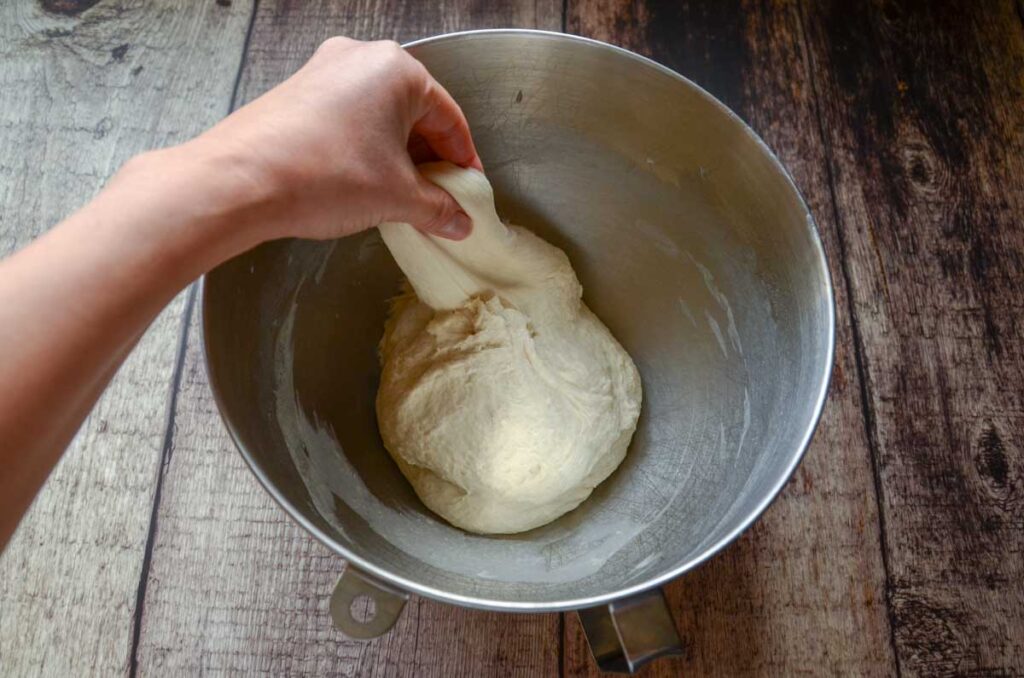
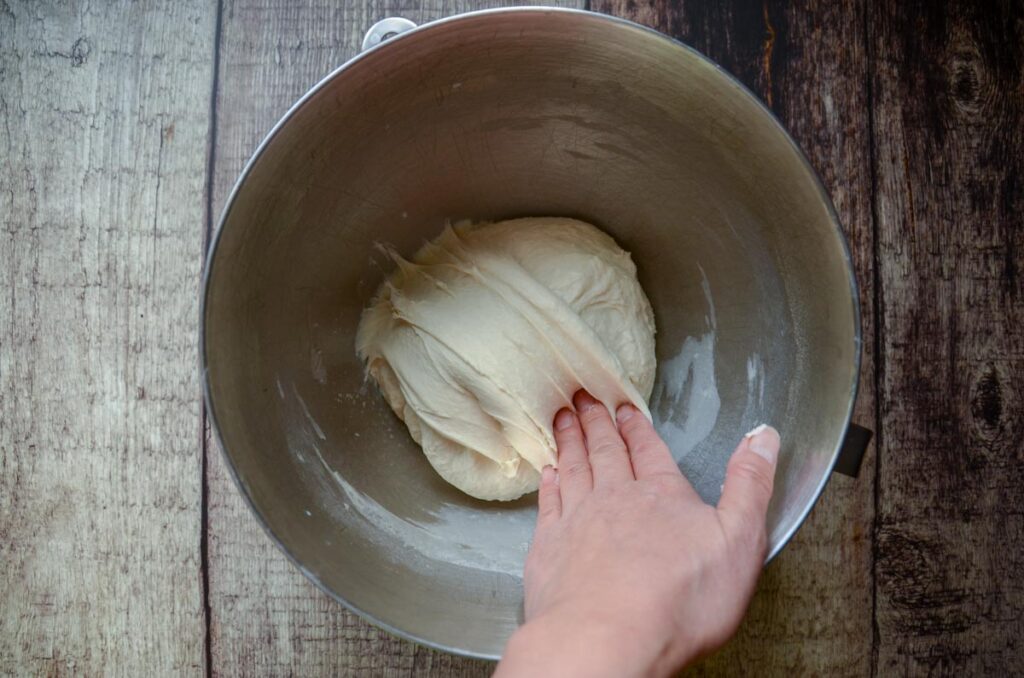
Continue to do a total of 3 sets of stretch and folds with 30 minute intervals. By the last set of stretch and folds the dough will change from a shaggy dough that breaks easily, to an elastic dough that holds as it stretches, showing signs of proper gluten development.
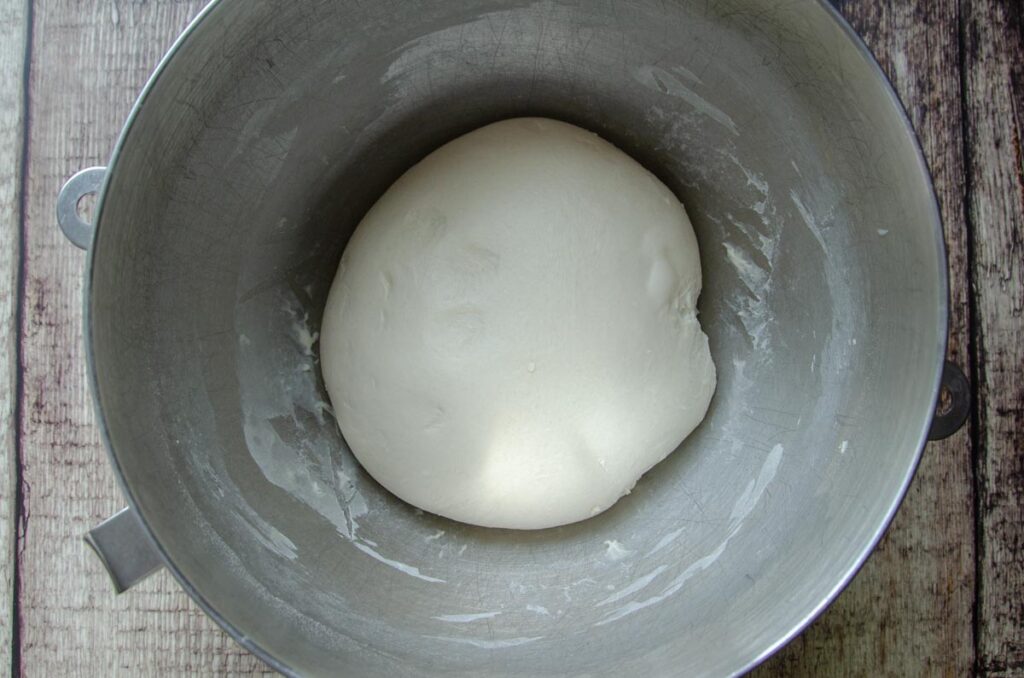
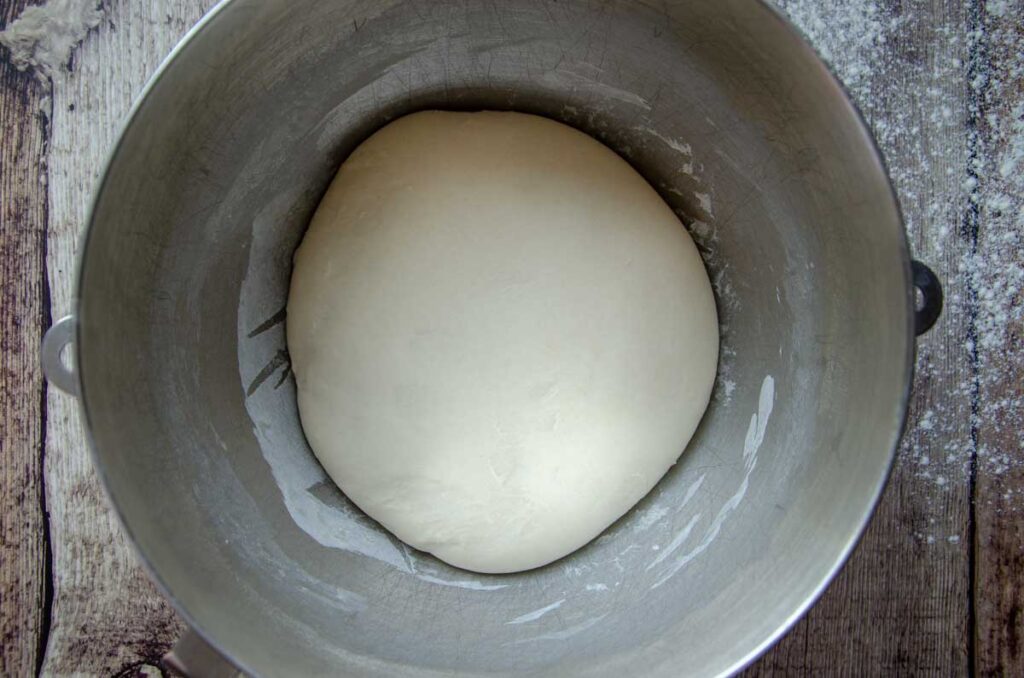
After the last set of stretch and folds, cover the bowl and continue to bulk ferment for an additional 2 hours. The dough will grow roughly 1.5 times its original size.
Divide and Shape
Line a baking sheet with parchment paper and dust with a light layer of corn meal and set aside.
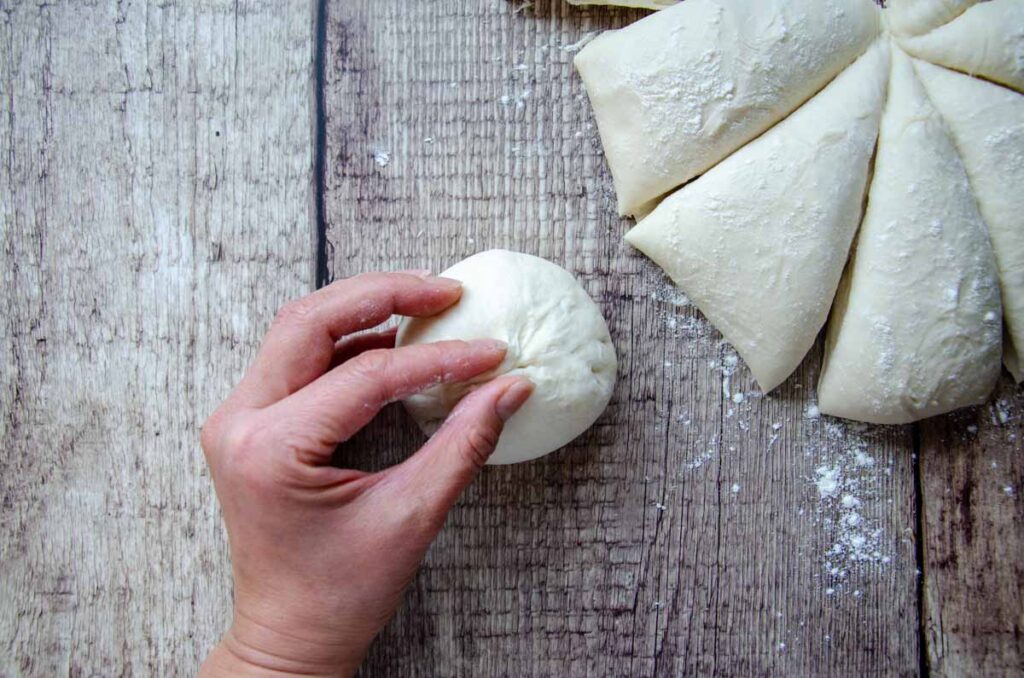
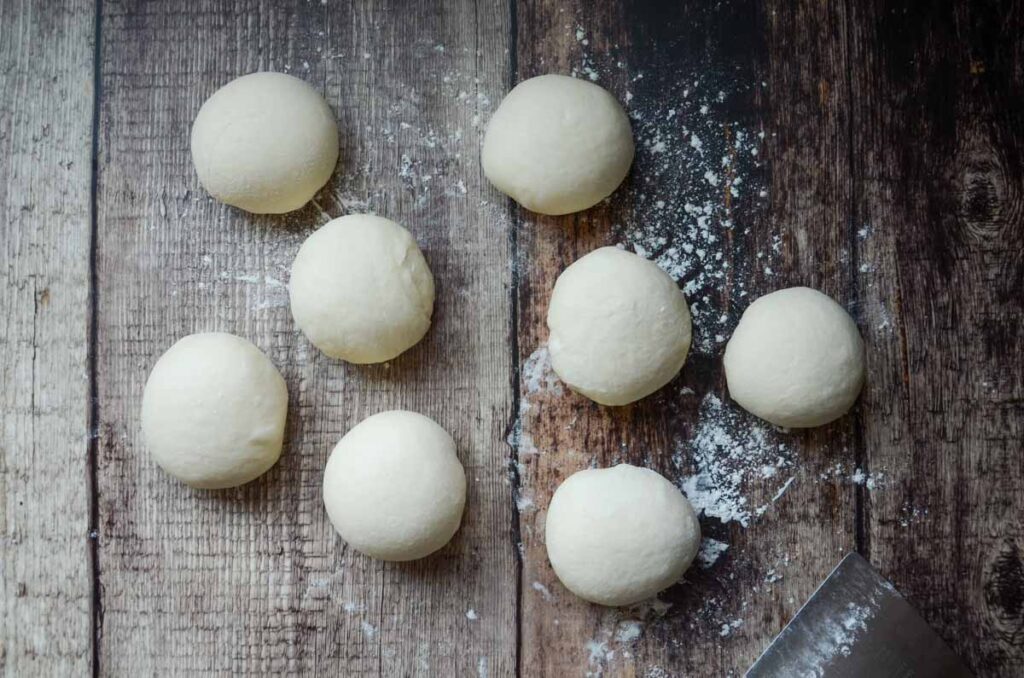
Gently turn out the dough onto a lightly floured work surface and divide the dough into 8 equal pieces using a bench scraper.
Gather the ends of each dough ball and pinch them together, forming a taut ball, and place them onto the prepared baking sheet. Continue with the remaining dough balls. Sprinkle the tops with more cornmeal and flatten slightly with your hand.
Place the pan with the English muffins into a reusable plastic bag and seal.

Cold Proof
Place the sealed pan in the refrigerator to proof overnight, up to 18 hours.
Warm Proof
Leave the sealed pan at room temperature to proof. Depending on the temperature of your kitchen, this can take 2-4 hours.
The dough is ready when it is very soft and puffy looking. It should feel delicate and full of air. If the dough still feels tight or dense, let proof for 30 more minutes and check again.


Cook
Preheat the oven to 350°F/175°C.
Heat a cast iron skillet, griddle, or non-stick pan to medium-low heat.
Use a small, thin spatula to lift the English muffins from the parchment paper to the griddle and cook for 2-3 minutes, until the bottom is a light golden brown. Check each muffin halfway through cooking time and rotate for even cooking.
Flip the muffin and cook the second side for 2-3 minutes. Transfer the muffins to a parchment-lined baking sheet pan and continue with the remaining muffins.


Bake
Place the baking pan in the oven and bake for 15-18 minutes.
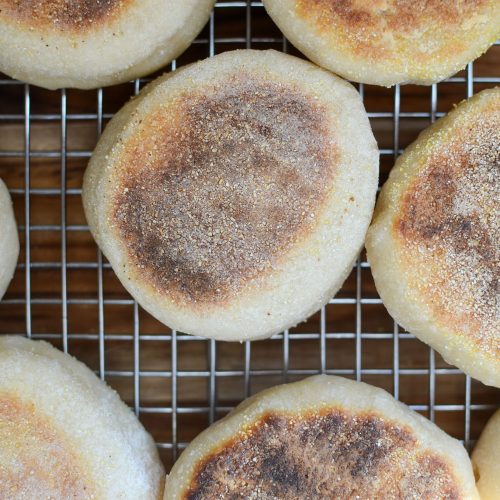
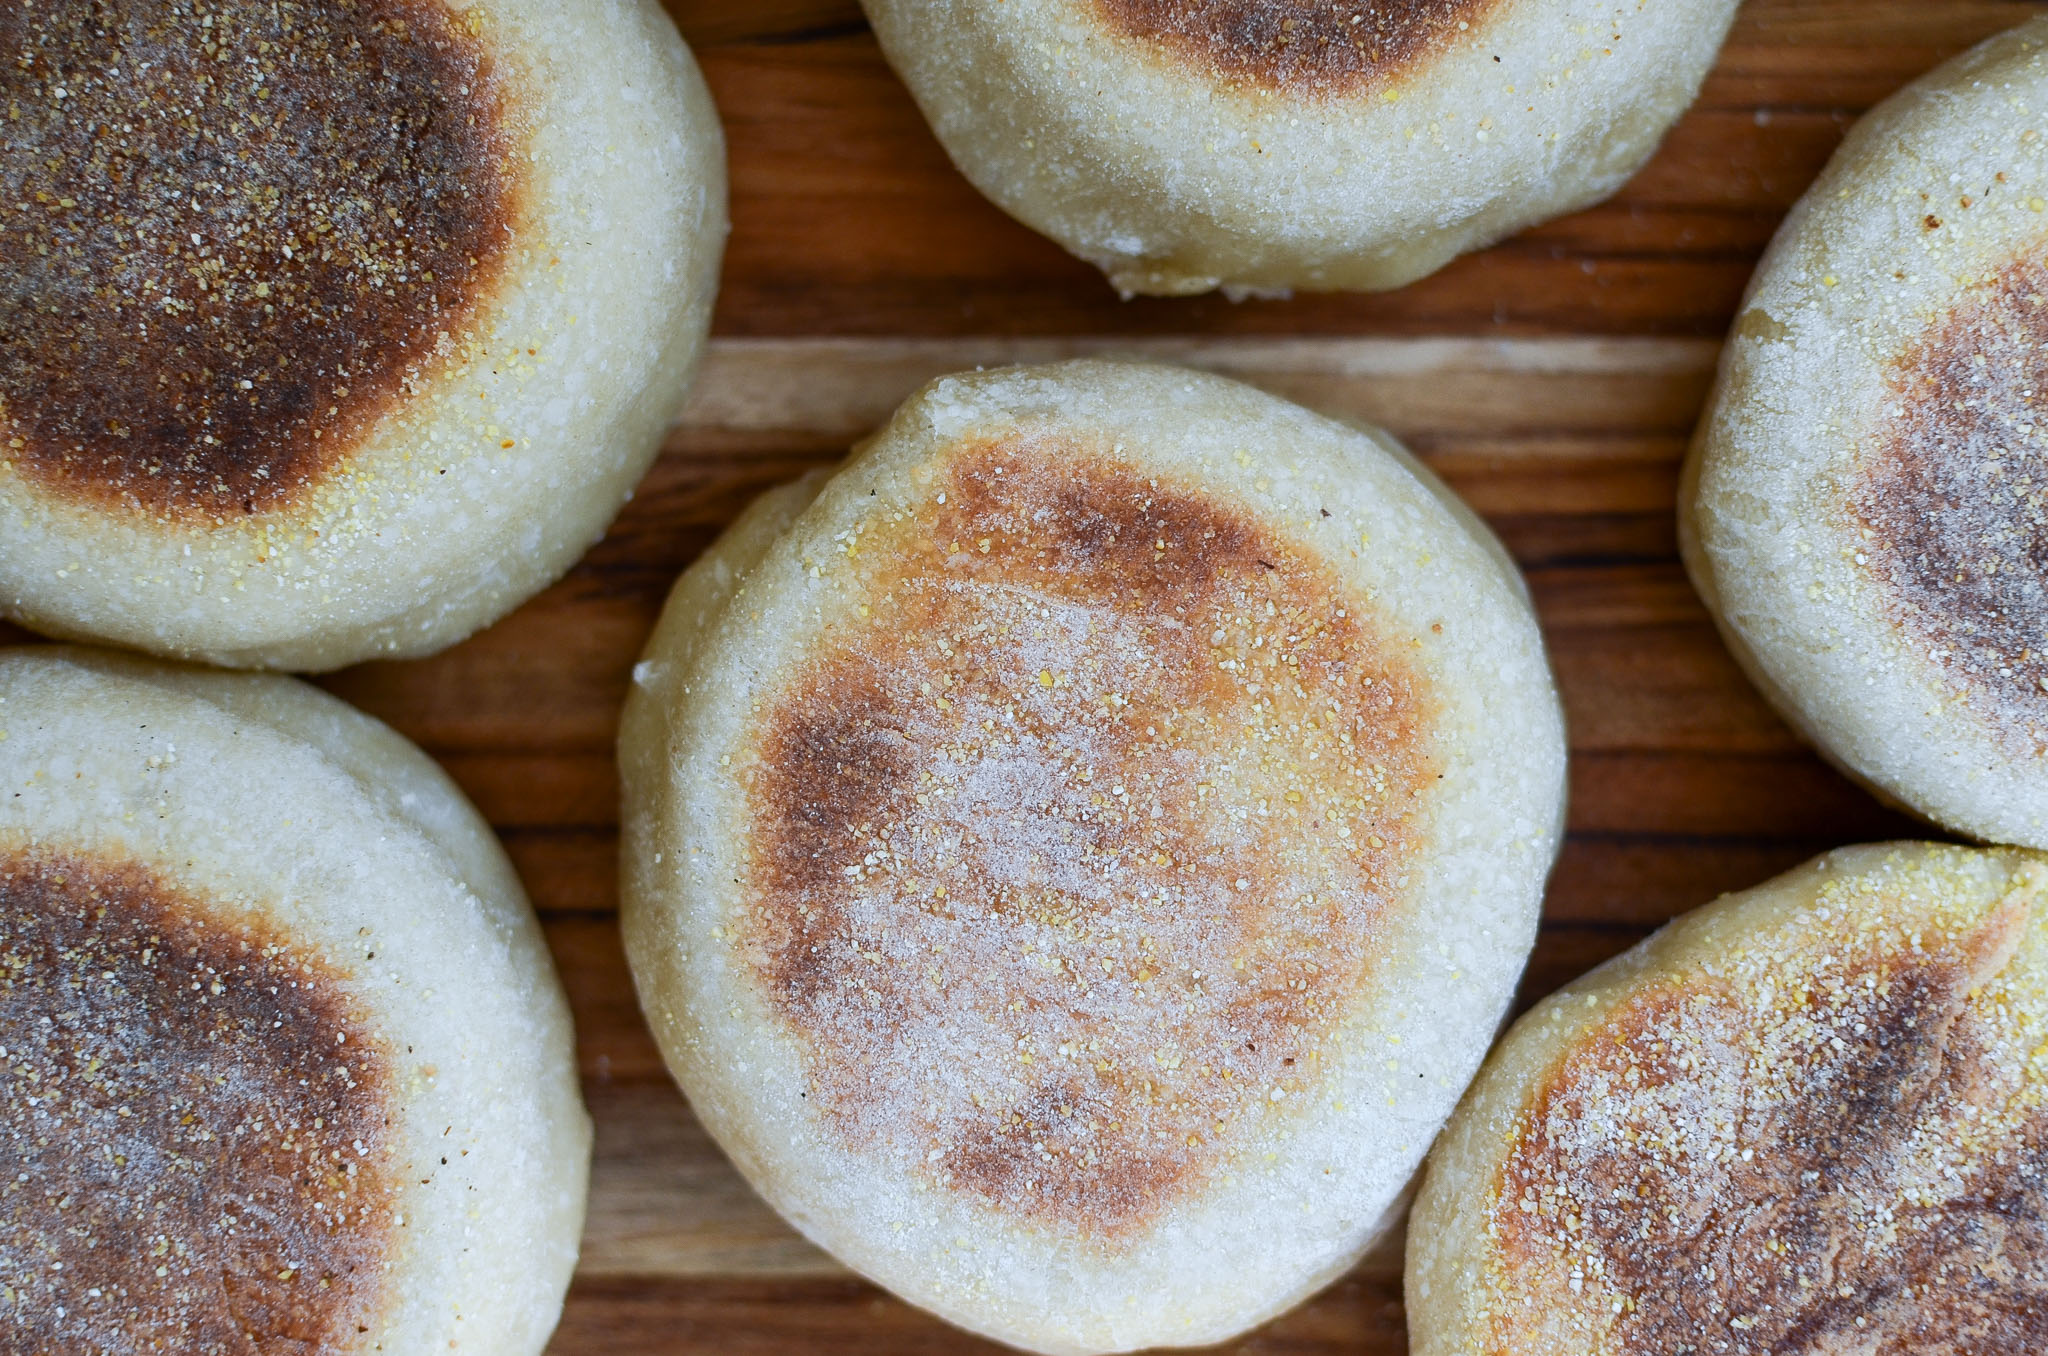
The outside of the muffin color doesn’t brown too much as it bakes. The best way to know the muffin is done is to use a digital thermometer. The internal temperature will read 200 degrees.
Place on a wire rack to cool for at least 45 minutes.
How to Store Homemade English Muffins
Once completely cool, store sourdough English muffins in an airtight container at room temperature for 3-5 days. For longer storage, place in the refrigerator for up to a week.
FAQs
Can I Use English Muffin Rings?
Some recipes roll the dough out and use an English muffin ring or biscuit cutter to cut out perfect circles. While I do love a uniform look, these tools are not necessary to make homemade sourdough English muffins.
Can You Freeze Homemade English Muffins?
Yes! Let cooked English muffins cool to room temperature before placing them into a plastic freezer bag. Squeeze out as much air as possible and store for up to 3 months.
How Do I Enjoy English Muffins?
Use a fork or your hands rather than a knife to gently split it in half to preserve the irregular texture.
My favorite way to enjoy an English muffin is to slice it in half, toast it, and top it with peanut butter and jam. I love how the gooey, melted peanut butter fills all of the nooks. I ate one of these every morning of my last two pregnancies.
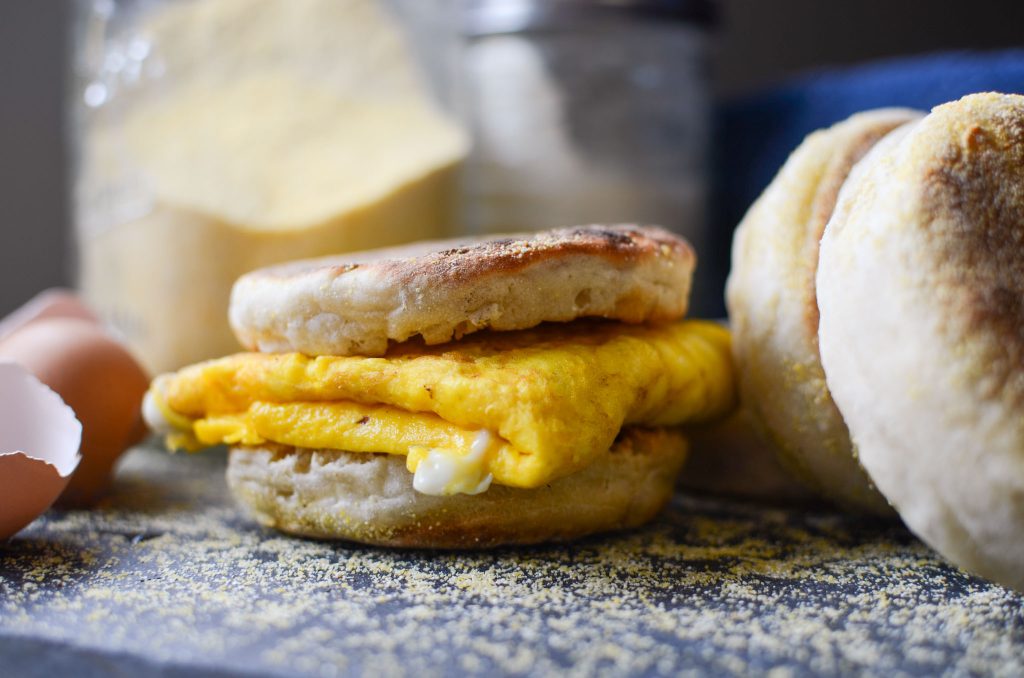
Another great way to enjoy an English muffin is to make a perfectly sized handheld breakfast sandwich with eggs, sausage, and melted cheese.
I’d love to hear from you! Please leave a comment and rate the recipe. Tag #Lockremhomestead in photos of your Homemade Sourdough English Muffins over on Instagram to share your!
Easy Sourdough English Muffin Recipe
Want to Save This Recipe?
Enter your email & I’ll send it to your inbox. Plus, get great new recipes from me every week!
By submitting this form, you consent to receive emails from Lockrem Homestead
Ingredients
- 125 g active sourdough starter ½ cup
- 58 g whole milk ¼ cup
- 235 g water 1 cup
- 20 g honey or sugar 1 tbsp
- 10 g sea salt 2 tsp
- 438 g bread flour 3½ cups
- 28 g unsalted butter 2 tbsp
Instructions
Feed the Starter
- Feed the starter 4-12 hours before you plan to mix the dough. The exact time depends on the temperature of your kitchen and the feeding ratios.
- Generally, the starter is ready when it shows plenty of visible air bubbles causing it to double in size, has a loose consistency that's easily pourable, and has a yeasty, sour smell.
Mix the Dough
- When the starter is at its peak, it’s ready to mix the dough.
- Add 125 g (1/2 cup) active sourdough starter, 58 g (1/4 cup) whole milk, 235 g (1 cup) water, 20 g (1 tbsp) honey, 10 g (2 tsp) sea salt, and 438 g (3 1/2 cups) bread flour in a mixing bowl of a stand mixer.
- Mix the dough ingredients on medium-low speed with a dough hook attachment for 5 minutes.
- Add the butter slices to the dough, one at a time, with the mixer on low speed. Mix until the butter is completely incorporated. Increase the speed to medium and continue to mix for 1-2 more minutes.
Bulk Fermentation and Stretch and Folds
- The dough will bulk ferment at room temperature with 3 series of stretches and folds. Remove the dough hook from the dough and cover the bowl. I like to use a large plate, but you can use plastic wrap, a tea towel, or a large cutting board. Rest for 30 minutes.
- Do the first set of stretch and folds. Grab the edge of the dough, lift it straight up, and fold it over to the other side of the bowl, pressing it into the dough. Rotate the bowl 90 degrees and stretch and fold again. Continue to stretch and fold the dough until it starts to feel resistant, roughly 8-10 times. This completes one set of stretch and folds.
- Continue to do a total of 3 sets of stretch and folds with 30 minute intervals. By the last set of stretch and folds, the dough will change from a shaggy dough that breaks easily, to an elastic dough that holds as it stretches, showing signs of proper gluten development.
- After the last set of stretch and folds, cover the bowl and continue to bulk ferment for an additional 2 hours. The dough will grow roughly 1.5 times its original size.
Divide and Shape
- Line a baking sheet with parchment paper and dust with a light layer of corn meal and set aside.
- Gently turn out the dough onto a lightly floured work surface and divide the dough into 8 equal pieces using a bench scraper.
- Gather the ends under and pinch them together, forming a taut ball. Place each ball onto the prepared baking sheet. Continue with the remaining dough balls. Sprinkle the tops with more cornmeal and flatten slightly with your hand.
- Place the pan with the English muffins into a reusable plastic bag and seal.
Cold Proof
- Place the sealed pan in the refrigerator to proof overnight, up to 18 hours.
Warm Proof
- Leave the sealed pan at room temperature to proof. Depending on the temperature of your kitchen, this can take 2-4 hours.
- The dough is ready when it is very soft and puffy looking. It should feel delicate and full of air. If the dough still feels tight or dense, let proof for 30 more minutes and check again.
Cook
- Preheat the oven to 350°F/175°C.
- Heat a cast iron skillet, griddle, or non-stick pan to medium-low heat.
- Use a small, thin spatula to lift the English muffins from the parchment paper to the griddle and cook for 2-3 minutes until the bottom is a light golden brown. Check each muffin halfway through cooking time and rotate for even cooking.
- Flip the muffin and cook the second side for 2-3 minutes. Transfer the muffins to a parchment-lined baking sheet and continue with the remaining muffins.
Bake
- Place the baking pan in the oven and bake for 15-18 minutes.
- The outside of the muffin color doesn’t brown too much as it bakes. The best way to know the muffin is done is to use a digital thermometer. The internal temperature will read 200 degrees.
- Place on a wire rack to cool for at least 45 minutes.



These are worth the extra effort if making at home. So yummy and definitely a new breakfast staple in our home. Just love them.
I’m so glad to hear!
Can I substitute organic bread flour for the all purpose flour?
Yes, although the English muffins may have a bit more chew since bread flour has a higher protein content.
Why is the dough so sticky??? Makes it hard to cut.
The English muffin dough is a high-hydration dough. While it is sticky and somewhat interesting to work with, it will also give you a light and airy muffin. Using flour on your work surface and over the top of the dough will help make it more manageable.
Can I add cinnamon and raisins. If so, when?
If you want a cinnamon raisin English muffin, check out this recipe! https://lockremhomestead.com/2024/08/18/sourdough-cinnamon-raisin-english-muffins-recipe/
This recipe did not turn out for me. The dough was so sticky. Not sure what happened
I’m sorry to hear that. Did you weigh the ingredients? I have a thought and a possible solution. Consider the ratio of your starter. If it has a higher percentage of water, that will adjust the dough ratios. If you decide to make the recipe again and find that the dough is still sticky, add more flour a tiny bit at a time when shaping until it’s workable. As written, the recipe is a high-hydration dough, but it shouldn’t be so sticky that you can’t shape the muffins. I hope you try again!
I’m worried it over fermented on the counter at 12 hours – I put in fridge and will see what happens in the morning
My dough doubled during the room temp bulk ferment overnight, but did not rise after shaping. Not sure what happened.
I’m sorry to hear that your muffins didn’t rise once you shaped them. I’d suggest shortening the bulk ferment window.
Is there a conversion to get cups into grams for more precise measurements?
yes, I added them to the recipe card.