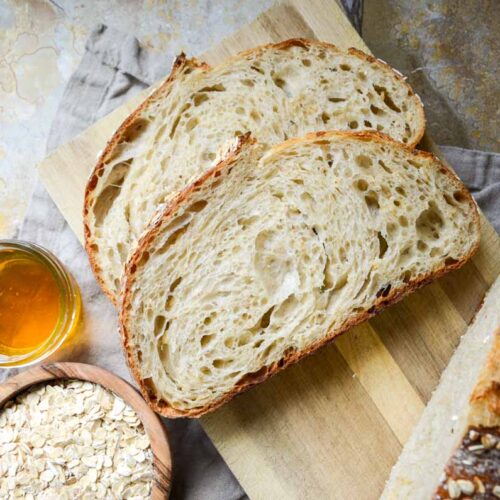
Honey Oat Sourdough Bread Recipe
This sourdough honey oat bread recipe uses honey, oatmeal, and a touch of whole wheat flour and is naturally leavened with a sourdough starter. The end result is a soft and fluffy bread similar to sourdough sandwich bread but with hearty and earthy flavors.
Want to Save This Recipe?
Enter your email & I'll send it to your inbox. Plus, get great new recipes from me every week!
By submitting this form, you consent to receive emails from Lockrem Homestead
Equipment
- 1 7 qt Dutch oven or larger
- 1 large mixing bowl
- 1 kitchen scale
- 1 Danish dough whisk
- 1 9" proofing basket
- 1 lame or sharp knife
- parchment paper or bread sling
Ingredients
- 50 g honey 2 tbsp
- 350 g water 1½ cups
- 125 g starter ½ cup
- 438 g bread flour 3½ cups
- 62 g whole wheat flour ½ cup
- 10 g salt 2 tsp
- 50 g rolled oats ½ cup, plus more for topping
Instructions
Mix the Dough
- Add 50 g (2 tbsp) honey and 350 g (1 ½ cups) water in a large mixing bowl and stir to dissolve the honey.
- Add 125 g (½ cup) bubbly sourdough starter to the bowl and stir to incorporate. Next, add 438 g (3½ cups) bread flour, 62 g (½ cup) whole wheat flour, 50 g (½ cup), and 10 g (2 tsp) salt, and stir with a Danish dough whisk until a shaggy dough forms. Be sure to mix in all the flour at the bottom of the bowl.
- Cover the bowl and allow to rest for 30 minutes. This lets the flour properly hydrate.
Stretch and Folds
- With one hand holding the bowl steady, use the other hand to grab the side of the dough and lift it straight up, stretching the dough, before folding it over onto itself in the middle of the bowl.
- Rotate the bowl a quarter turn and stretch and fold the next section of the dough. Repeat stretching and folding the dough as you rotate the bowl until the dough starts to feel resistant, roughly 8-10 folds.
- At this point, the dough will feel a little sticky and break easily as it stretches. Cover the bowl with a tea towel or plastic wrap to keep the dough from drying out. This completes one set of stretch and folds.
- Continue for a total of 3 sets of stretch and folds at 30-minute intervals.
Bulk Fermentation | First Rise
- After the last set of stretch and folds, cover the bowl and let the dough rise in a warm place in the kitchen.
- As the dough bulk ferments over the next couple of hours, you’ll start to notice small bubbles appear beneath the surface of the dough. The dough is ready when the edges of the dough where it meets the sides of the bowl are domed and it has almost doubled in size.My dough was ready after 5 hours in a 72-degree home.
Shape
- I like to preshape the dough before its final shaping.
- Turn out the dough onto a lightly floured work surface and spread the dough into a round shape. Use a bench knife set at a shallow angle to the counter, gently push the dough towards you in a sweeping motion, tucking the ends of the dough under itself with your other hand. Continue the rounding motion while tucking the dough under itself until the dough is a uniform ball with a taut top.
- Let the dough rest uncovered on the counter for a 15 - 30 minute bench rest.
- After the bench rest, use the bench scraper to flip the dough over so that the smooth side is on the counter. Fold the top of the dough down to the center of the dough. Next, pull each upper sides of the dough to the middle, followed by each lower sides of the dough, alternating sides as you go.
- Finally, starting at the bottom of the dough, roll the dough up into a ball. Pinch the ends to seal the sides of the dough.
Cold Proof
- Prep the banneton by dusting it evenly with rice flour to prevent the dough from sticking. Sprinkle 1 tbsp of rolled oats evenly on the bottom of the banneton.
- Lift the shaped dough into a banneton with the seam side facing up. Pinch together any seams that aren’t sealed close.
- Place the banneton in a plastic bag and refrigerate for 12 – 24 hours.If you choose to bake the bread the same day you mix the dough, let the bread have its second rise covered in the banneton at room temperature for a few hours until the dough is puffy and jiggles when shaken a bit. Preheat the oven and bake as directed.
Bake
- The next morning, preheat the Dutch oven and lid at 450°F/230°C for 45 minutes.
- Remove the dough from the fridge and turn it over onto a piece of parchment paper.
- Score the top of your dough with a sharp knife or razor blade. I find that a simple cut is best for inclusion loaves. Carefully lift the dough into the hot Dutch oven, replace the lid, and place the Dutch oven back into the oven.
- Bake for 30 minutes with the lid on. Remove the lid and bake for 10-15 minutes. The bread is done when the top is golden brown and the internal temperature reaches 200°F/93°C with a digital thermometer.
- Remove the bread from Dutch oven and place on a wire rack. Cool completely before cutting to avoid a gummy texture.
Store
- Store leftover honey oat sourdough bread in an airtight container or bread bag for 2 days. Freeze any bread beyond day 2 and pull out a slice or two as you eat them.
Notes
-
- The exact amount of time the bread dough takes to bulk ferment largely depends on the temperature of your kitchen. Warm air temperature will ferment the dough faster than in a cool kitchen.
- Honey will accelerate the bulk fermentation stage, so be sure to watch the oat bread dough as it bulk ferments so it doesn't overproof.
-
- If you find the oats aren't sticking to the bread after you turn it out onto the parchment paper, add a bit of water to the top of the dough with a damp towel or wet hands before adding more oats.
Nutrition
Calories: 140.5kcalCarbohydrates: 28.8gProtein: 4.4gFat: 0.8gSaturated Fat: 0.1gPolyunsaturated Fat: 0.3gMonounsaturated Fat: 0.1gSodium: 244.4mgPotassium: 54.4mgFiber: 1.4gSugar: 2.7gVitamin A: 0.9IUVitamin C: 0.02mgCalcium: 8mgIron: 0.5mg
Tried this recipe?Let us know how it was!
