Beginner’s Guide for Raising Backyard Chickens
This post may contain affiliate links. As an Amazon Associate, I may receive a small commission, at no cost to you, if you make a purchase. Please read our disclosure policy.
You’ve decided that you want to raise backyard chickens for fresh eggs instead of depending on the grocery store. But now what?
This is a beginner’s guide for raising backyard chickens. We knew we wanted to raise our own chickens when we moved to our homestead, so we read as much as we could to learn about them. And frankly, the information seemed daunting. So, it is my hope that I can share what our family has learned over the past few years of caring for our chickens to make it seem more approachable.
Things to Consider Before Getting Chickens
- First, check with local ordinances to see if you can even have chickens in your neighborhood and if the city limits how many you can keep at one time.
- That you have enough space for a coop in your yard.
- Will need clean water and food. Check what the cost of chicken feed is in your area. We can get a 40-pound bag of organic, soy-free feed for about $23 at out local feed store. How long this lasts will depend on the number of chickens you have.
- Throughout the spring, summer and into the fall fresh eggs are collected daily.
- If you plan to go on vacation you will need to find a reliable chicken sitter.
Types of Chickens
People raise chickens for egg production, as meat birds, or as a combination of the two called dual-purpose birds. Egg layers are birds that excel in that, with the Leghorn being one of the most prolific layers, with 280-320 eggs annually. The Cornish Cross is a meat bird that grow large amounts of meat in a very short amount of time. Because of how they are bred, they can’t reproduce making it a crop that needs to be bought annually.
Dual purpose birds provide both egg production and meat production. These birds take longer to come to a full-size weight than the Cornish Cross, but the trade-off is that they can reproduce and are a great option if you’re looking for sustainability. Some dual purpose breeds are Rhode Island Reds or Speckled Sussex.
Life Stages of Chickens
Chickens essentially have 4 life stages, egg, chick, pullet and chicken. Learn what happens and the care each stage needs.
Stage 1: Egg
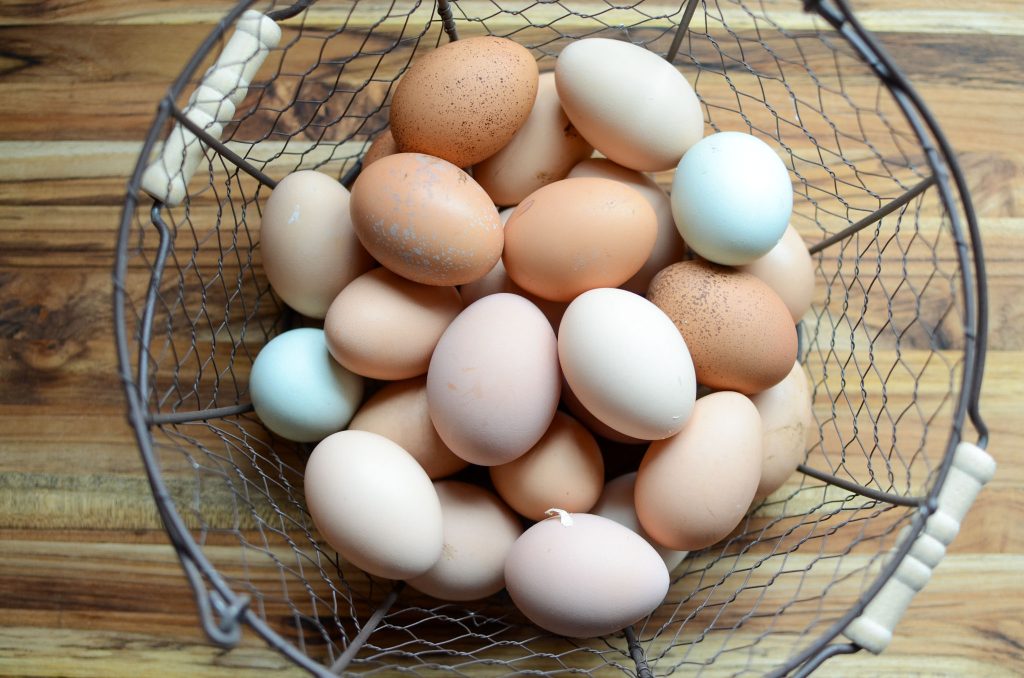
A hen will lay an egg every 25-27 hours. The egg remains unfertilized unless a rooster has fertilized the hen.
An interesting fact, a hen can eject the sperm of a bottom-tier rooster with preference given to roosters higher in the pecking order. Most often a hen doesn’t have choice of which rooster mates with her because they are generally larger and can be quite aggressive. Rather than fight them off, hens have figured out a more subtle way to reject these roosters.
After the egg has been fertilized a baby chick starts to develop. The hen will continue to lay fertilized eggs and gather them until she feels like it’s an adequate amount. After 21 days, a fully developed chick will peck its way out of the egg with an egg tooth, a temporary, sharp horn-like growth on the top of its beak.
Stage 2: Chick
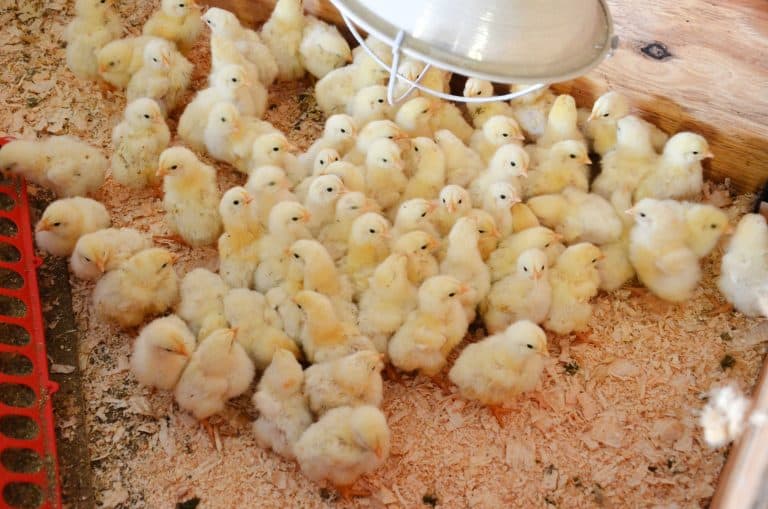
After the chicks hatch they will appear wet. Within a few hours, the chicks go from wet looking to having soft fluffy down, but not true feathers. If the mother hen is raising them, there’s very little you need to do. She will attend to most of their needs, keeping them under the warmth and protection of her wings.
Do give them a separated area to have some peace and safety from the rest of the flock. The chicks will also need to have a starter feed and access to fresh water at all times. Keep the water in a shallow dish so the chicks don’t fall in and drown.
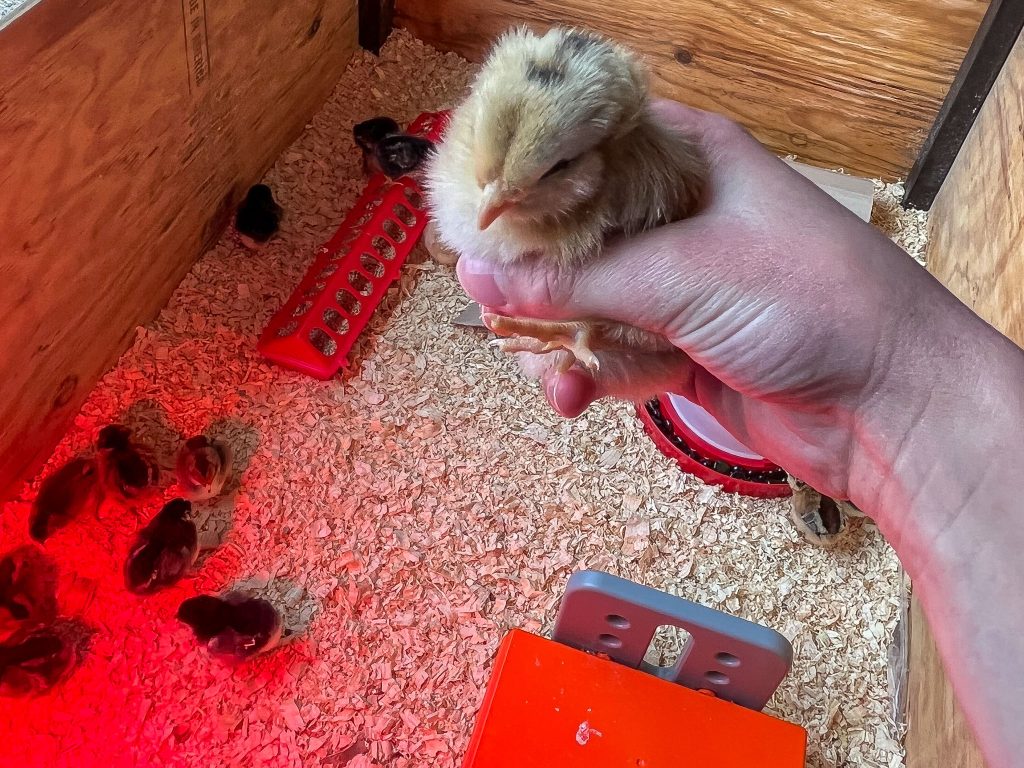
If you incubated the chicks or have gotten chicks from a supplier, you will need to provide them with food, water, warmth and safety. Since there’s no mother hen to lead them, you will need to show them their water by dipping their beaks into the water. Also lead them to the food dish so they know where to eat. Their feed should be a chick starter feed, which is higher in protein (18-20%) meeting their developmental needs. Make sure they have access to food at all times.
For their safety, keep them separate from the rest of the flock in a brooder box. Scott made our brooder box and it’s basically a large wooden box with a removable lid which is made out of chicken wire. To keep things simple, you could easily use a large cardboard box as a brooder box. There are many different bedding options, such as hay, straw, newsprint, paper towels, or sand, each with their pros and cons. We used large wood shavings because they were inexpensive and easily accessible. Just be sure not to use small shavings because the chicks may eat them. I’d also warn against sand because the risk of ingesting and sand retains heat and can become quite hot with a heat lamp.
The chicks need to be kept warm, using either a heat lamp or brooder heating plate. We have used both with success. A heat lamp can get quite hot, so make sure it’s at the right height. It should feel warm at their level, roughly 95 degrees. There is also a risk of fire if the lamp should fall, so make sure that its secure. The chicks will move near or away from the heat source for what’s comfortable for them. A heating plate’s heat is more regulated and doesn’t get quite as hot. Depending on how many chicks you have, you may need multiple heating plates for all of the chicks to be underneath. The only downside of the heating plate is having to clean off chicken poop from the chicks jumping on top of it.
Every week, slowly reduce their supplemental heat so they can acclimate to the ambient temperature by raising the height of the heat lamp and the heat plate.
Chirping is normal for chicks. It should be a pleasant, low-level chirping. However, if you find that the chirping becomes louder and more insistent, the chicks may be uncomfortable. If the chicks huddle under the heat source, they may be too cold. If they are all spread out and away from the heat source, they may be too hot. Other factors can be if they’re scared, hungry, or thirsty.
The best way for the chickens to be familiar and friendlier with you is to spend time with them when they are chicks.
As the Chicks Grow
The young chicks will start to get their real feathers about the second week. Its about this time that you can start to add some grit to their feed. Since birds don’t have teeth to grind their food, they eat small rocks, or grit to grind their food in their stomachs. This is also an ideal time to add a perch to the brooder.
By 5 weeks of age the chicks should have all of their feathers in and be able to regulate their own body temperature and not need any additional heat. You can start to bring them outside, gradually increasing their time out, just make sure it’s in a protected area to keep safe from predators.
By 8 weeks of age they can spend more time outside and expand their eating tastes: grains, mealworms and grass. At this point they are called pullets or cockerels.
Stage 3: Pullet (Adolescent)
The pullet stage is an awkward teenage stage. They will be skinny, lots of leg and somewhat out of proportion compared to adult chickens. This stage is comprised mainly of filling out and practicing adult-like behaviors, like taking dust baths, scratching and foraging.
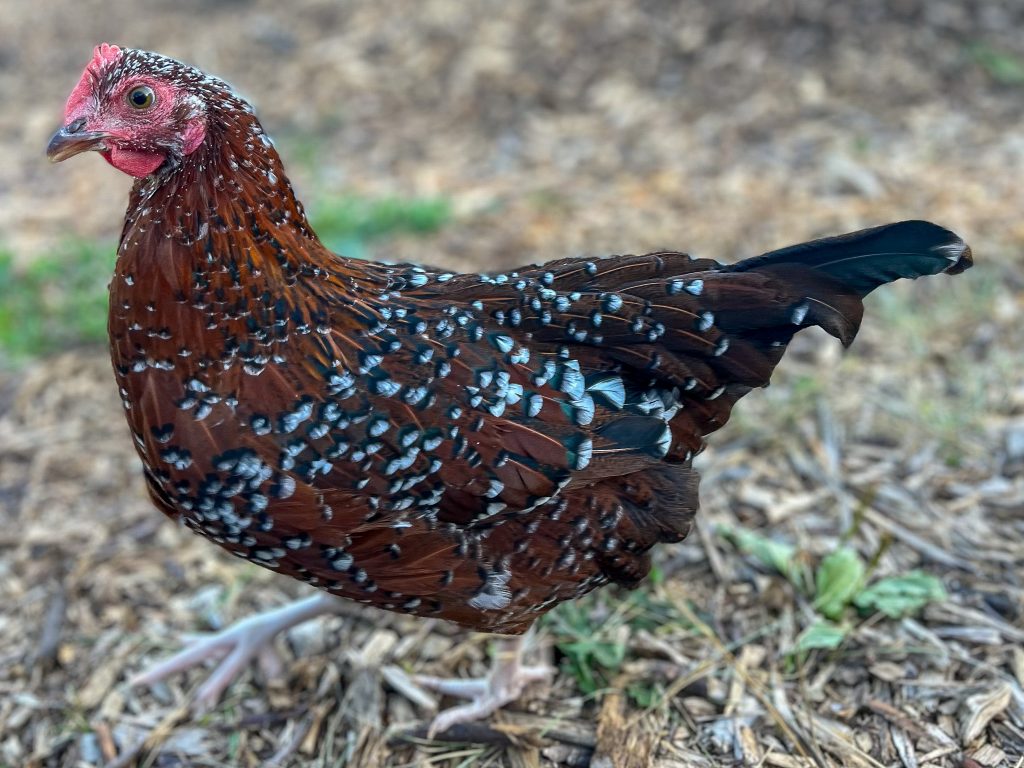
Around the 18-week mark, a pullets will lay their first egg. This will vary based on the breed. They have now graduated to being an adult chicken. Though technically an adult, their eggs will be small at first, sometimes referred to as a ‘pullet eggs’.
Some people will choose to buy their egg laying chickens at this stage. The pro to this is that they are that much closer to laying eggs and will cost you less money in feed to get to this point, even with the higher cost of purchasing a pullet verses a chick. Because you bypass the chick stage when buying pullets, you will need less equipment and all of the care that chicks require.
Stage 4: Chicken
Your pullet has laid her first egg and is now considered a hen. Congratulations!
By this stage, chickens protein needs are less than when they were chicks, needing only 16-18%.
Egg production will vary by chicken breeds so be sure to do your research and choose a breed to that matches your desires. Some people choose color over production, others don’t care what they look like and just want a high yield.
If you got your chicks in the spring, then they will most likely be laying eggs by the time fall rolls around. Their first winter they will continue to lay, even in cold regions. If your climate gets very little daylight, then you may experience a short break, but they’ll resume in early spring when the days get longer. Chickens have a set number of eggs, so if you force production with a light bulb to replicate longer days in the cooler months, your chicken will be finished laying eggs younger.
Chickens will have their annual molt around the age of 16-18 months, which occurs once a year in the fall. The shorter daylight signals the chickens to regrow their feathers in preparation of winter. Throughout the year, the feathers become dull and break. This is no problem during the summer months but to prepare for cold winters the chickens need healthy feathers to help stay warm. The molting starts at the head and continues down to the tail feathers.
The best egg layers are the ones that go through the molting process the fastest. This molting process usually takes 3-8 weeks, but each bird will have a different start and end time. Because so much energy is expended in making new feathers, they will stop laying eggs.
Chicken Coop
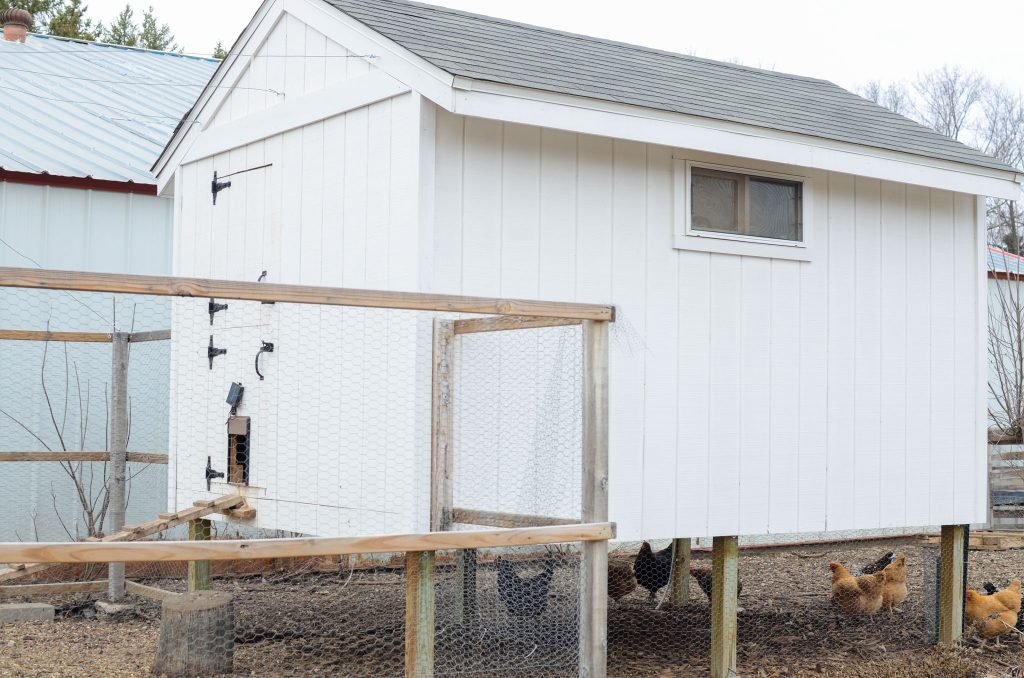
Chicken coops can come in a variety of designs based on preference, climate and the size of your flock. Mobile coops and traditional coops both need to have these basic requirements.
- Keep safe from predators.
- Ventilation-The coop must have ventilation so that humidity doesn’t build up within the coop. Too much humidity can cause frost bite. Plus, the smell of their waste is strong and too much ammonia can cause damage to their respiratory system.
- Draft free-This might seem like it counters the previous need for a chicken coop, but while the coop needs to have proper ventilation, it needs to be in a place that won’t be on the chickens. Make sure the ventilation and air flow is above the roosting bars, keeping the chickens out of the draft.
- Roosting Bars- Untreated 2X4 are the best material for building a chicken roost. In the colder months, chickens will often sit on their feet, and if they need to hold tightly to something smaller in diameter, this will leave the ends of their toes exposed.
- Nesting box-There is such a variety of shapes and materials used to make nesting boxes. Chickens like to kick the bedding out of the nesting boxes so be sure to have sides to the boxes to help keep the bedding contained. You will want to keep the boxes filled with bedding to help keep the eggs clean.
- Adequate space- General rule of thumb is 4 square feet for medium to large birds and 2 square feet for bantam breeds.
- Easy to clean. We use the deep litter method. In very simple terms, bedding is added over their waste in layers throughout the season. This layered concept is the same as creating compost and helps to manage the smell while also creating some heat in the cold months. We clean our coop in the spring and the fall. Use the bedding and chicken manure to make compost for the vegetable garden.
Chicken Run or Free Range?
All chickens need access to an outdoor area beyond the coop, each come with their pros and cons. Its worth knowing so you can make an informed choice.
Outdoor Run
The good thing about an outdoor chicken run is that it will offer protection from predators, which there are many. A run can be as simple as chicken wire and some t-posts to keep land predators from your girls. Be sure to extend the wire on the ground a few feet out from the run and bury with dirt and grass. This will stop any animals that would be able to dig their way into the coop.
You can also choose to build a run with a roof. This will provide shade as well as protection from ariel predators, or animals that can climb in, like raccoons. If you choose to completely enclose the run, use hardware mesh on the lower half of the run. Raccoons can reach their paws through chicken wire and still grab at your chickens, pulling them through. The more enclosed the run is, the better chances your chickens have to survive.
Chicken runs not only keep your girls in a designated area but also their mess. Because chickens like to scratch, the chicken run will likely lose any grass or vegetation in it, giving less access to eat vegetation. If you have a mean chicken or rooster, being confined to a chicken run can mean that the chickens getting picked on will have less opportunity to escape.
Free Range
Free ranging your chickens means that they can come and go as they please, having full access to fresh grass, insects, worms and even mice. Pasture-raised eggs will have a darker yolk from having access to such a wide variety of food.
With free ranging, even if you have a mean chicken or rooster, the other chickens have a higher chance of protecting themselves by keeping their distance. The downside is that predators will have easy access to your chickens. Unfortunately, many animals are looking for a quick dinner, making your girls an easy target.
Chicken Feed
Chickens need a balanced diet of carbohydrates, fats, protein, vitamins and minerals.
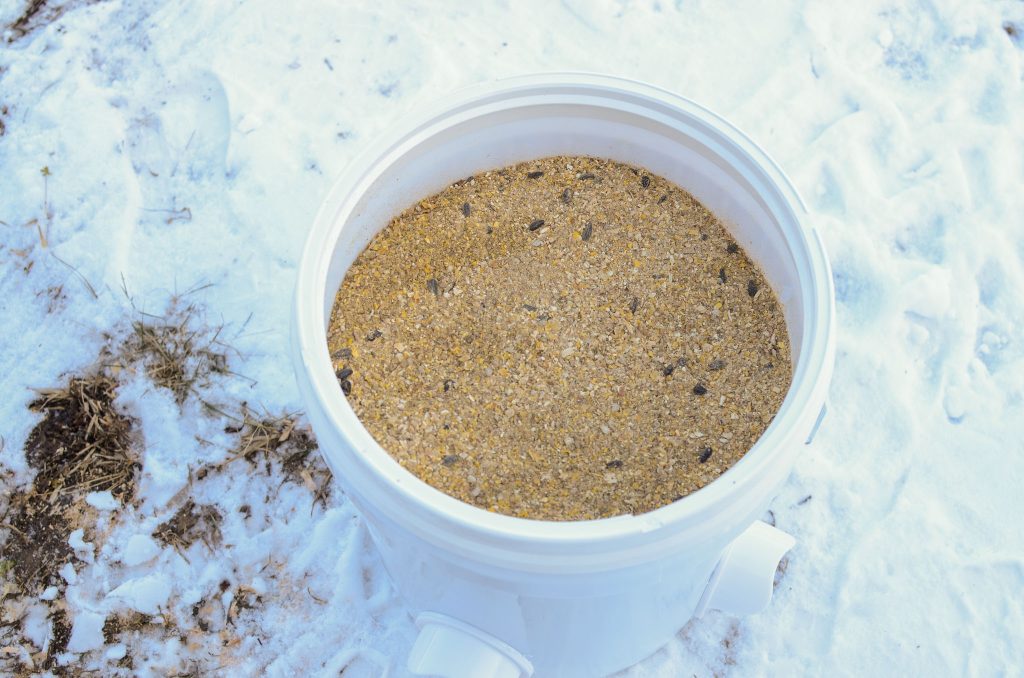
We mentioned what the chicken feed protein requirements are at the various life stages above but there are other things to consider. Do you want your feed to be organic, GMO-free, soy-free, corn-free? Some areas of the country have more access to some of these specialty attributes than others, so you will need to do some research for what’s available in your area. Most good quality feed will have all of the mineral requirements needed without additional supplementation.
Another option is that you can make your own feed by buying all of the various seeds and grains and mix together. Getting the right balance with homemade feed is difficult and may not be cost effective either. If chickens don’t have the proper nutrition they can become weak and are more susceptible to disease.
To maximize your feed, you can create fodder. I’ve never done this before, but the basic idea is that the seeds are soaked and sprouted in a series of steps. This will not only stretch your chicken feed, helping to reduce your feed costs, but also add nutritional value to your feed.
Chickens are perfect for utilizing all of your kitchen scraps that would normally be thrown away, with some exceptions. Onion and garlic peels are best composted because the chickens won’t eat them. Avoid feeding your chickens citrus, candy, chocolate, avocados, coffee, tea, apple seeds, potatoes, raw eggs and rhubarb leaves.
Grubs and meal worms make for a high-protein treat. But like any treat, moderation is key.
Raising chickens is pretty simple and straight forward and the rewards by far outweigh any challenges. I hope this information helps you to feel more confident to raise some chickens and that you take one more step toward raising your food!
I’d love to hear from you and know if this was helpful! Leave a comment below about if you decided to dive into the world of chickens. Be sure to tag a photo #Lockremhomestead over on Instagram of your chickens!

