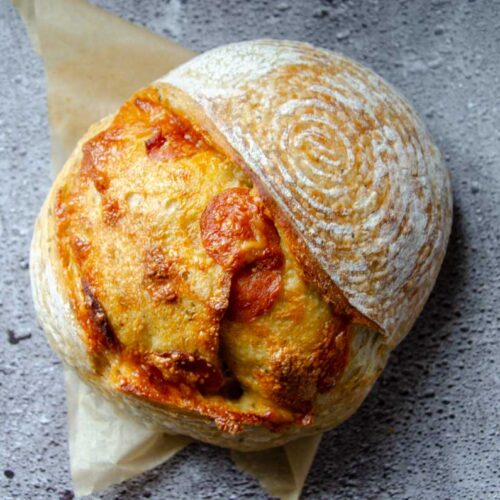
Sourdough Pepperoni Bread
This sourdough pepperoni bread is loaded with pepperoni slices, shredded mozzarella cheese, shaved parmesan cheese, and plenty of flavor. The bread is soft, chewy, and perfect for sandwiches, dipping in marinara or oil, or on its own.
Want to Save This Recipe?
Enter your email & I'll send it to your inbox. Plus, get great new recipes from me every week!
By submitting this form, you consent to receive emails from Lockrem Homestead
Equipment
- 7 qt Dutch Oven
- mixing bowl
- kitchen scale
- Danish dough whisk
- lame
- parchment paper or baking sling
Ingredients
Bread Dough Ingredients
- 125 g sourdough starter ½ cup
- 500 g bread flour 4 cups
- 350 g water
- 10 g salt
- 1 tbsp dried basil
Inclusions
- 75 g parmesan cheese 1 cup
- 100 g mozzarella cheese 1 cup
- 180 g pepperoni slices ¾ cup
Instructions
Mix the Dough
- Add 125 g (1/2 cup) active sourdough starter, 500 g (4 cups) bread flour, 350 g (cups) water, 10 g salt, and 1 tbsp dried basil to a large mixing bowl. Combine using a Danish dough whisk until all ingredients are mixed.
- Cover the bowl and let the dough rest in a warm spot for 30 minutes. This allows the flour to properly hydrate.
Stretch and Fold | Strengthening the Gluten
- Stretching and folding the dough strengthens the gluten, transforming it from a shaggy dough to a smooth, elastic dough by the final set of stretch and folds.
- Grab the side of the dough and lift it straight up, stretching the dough, before folding it over onto itself in the middle of the dough. Rotate the bowl a quarter turn and stretch and fold the dough again. Repeat stretching and folding the dough as you rotate the bowl until the dough starts to feel resistant, roughly 8-12 folds. At this point, the dough will stick to your hand and have low extensibility.
- Cover the bowl with a kitchen towel or a piece of plastic wrap and let the dough rest for 30 minutes. This completes the first set of stretch and folds.
- Continue for a total of 3 sets of stretch and folds at 30-minute intervals. By the final set of stretch and folds, the dough is smooth and stretches easily with minimal dough sticking to your hand.
Bulk Fermentation
- After the last set of stretch and folds, cover the bowl and allow the dough ball to bulk ferment in a warm place in the kitchen.
- The dough is ready when the top of the dough is domed, you see bubbles beneath the surface of the dough, and it has almost doubled in size.
Adding Inclusions
- Turn the dough out onto a lightly floured work surface using a bowl scraper or silicone spatula. Stretch the dough into a 10 X 10 square. Sprinkle two-thirds of the mozzarella cheese and parmesan cheese over the dough, leaving a 1-inch border. Next, layer two-thirds of the pepperoni slices on top of the cheese.
- Fold the bottom half of the dough up to the middle of the dough. Next, fold the top down, overlapping the bottom half.
- Add the remaining cheese and pepperoni on top of the folded dough. Roll the dough, starting at one end of the dough, until it forms a large ball.
- Once the dough is rolled into a large ball, pinch the sides together, sealing the inclusions into the middle of the dough.
Shape
- Gently shape the dough by cupping the far edge of the dough and pull it towards yourself. This creates tight surface tension which helps for a tall loaf. Keep shaping until the pinched ends are at the bottom of the ball of dough. Be gentle so that the top of the dough doesn’t rip, exposing any of the inclusions.
- Make sure the cheese and pepperoni are tucked inside of the dough before transferring to a proofing bowl. Anything outside of the dough will melt and possibly burn, causing a messy crust. Using a dough scraper can help create tension in the dough, promoting a better consistent shape.
Proof | Second Ferment
- Prepare a banneton by dusting it with a bit of rice flour to prevent the dough from sticking.
- Use a bench scraper and lift the shaped dough into the prepared banneton; the top of the dough is facing down and the seams facing up. Pinch together any open seams close.
- Place the banneton in a plastic bag and refrigerate for 12 – 24 hours. (See notes if you plan to bake the bread the same day.)
Score and Bake
- The next day preheat the Dutch oven and lid at 450°F/230°C for 45 minutes.
- Remove the dough from the fridge, place a piece of parchment paper on the banneton, and flip it over, letting the dough fall onto the piece of parchment paper. Score the top of the dough with a sharp knife or razor blade. I find that a simple cut is best for inclusion loaves. Carefully lift the dough into the preheated Dutch oven, replace the lid, and place the Dutch oven back into the oven.
- Bake for 35 minutes with the lid on. Remove the lid and bake for an additional 15 minutes. The bread is done when the top is golden brown and the internal temperature reaches 200°F/95°C with a digital thermometer.
- Remove the bread from the Dutch oven and place it on a wire rack. Let the bread cool to room temperature before cutting to avoid a gummy texture.
Notes
- The exact amount of time this takes largely depends on the temperature of your kitchen. If the air temperature is warmer, the dough will ferment faster. However, if the air temperature is cooler, the dough takes longer to finish bulk fermenting.
- If you choose to bake the bread the same day you mix the dough, leave the dough to rise covered in the banneton in a warm place for a few hours until the dough is puffy, and jiggles when shaken a bit. Preheat the oven and bake as directed.
- If you don’t plan to eat the bread quickly, slice the bread, place it into a freezer-safe bag, and freeze it. This allows you to pull out one piece at a time.
- Sometimes the bottom of the sourdough bread gets too hot in the oven and burns. If this happens, preheat the Dutch oven with a baking sheet on the rack beneath it. This will help shield the heat and prevent the bottom from getting too dark.
Nutrition
Calories: 214.3kcalCarbohydrates: 24.7gProtein: 9.2gFat: 8.4gSaturated Fat: 3.7gPolyunsaturated Fat: 0.8gMonounsaturated Fat: 3.1gTrans Fat: 0.2gCholesterol: 19mgSodium: 536.3mgPotassium: 77.8mgFiber: 0.9gSugar: 0.2gVitamin A: 81.3IUVitamin C: 0.002mgCalcium: 100.3mgIron: 0.7mg
Tried this recipe?Let us know how it was!
