Fermented Honey Garlic | Recipe and Benefits
Fermented honey garlic is one of the best things to have on hand heading into the colder months to keep your immune system at its prime during cold and flu season. Both honey and garlic have strong medicinal benefits, making this ferment a favorite to have on hand.
Want to Save This Recipe?
Enter your email & I'll send it to your inbox. Plus, get great new recipes from me every week!
By submitting this form, you consent to receive emails from Lockrem Homestead
Equipment
- 1 pint jar
Ingredients
- 4 bulbs garlic cloves
- 1½ cups raw honey
Instructions
- Start with clean equipment. A sterilized jar makes the perfect container, but any clean, non-metal container will work.
Prepare the Garlic
- The longest and most labor-intensive part of preparing the ingredients is peeling the garlic. First, separate the heads of garlic into individual cloves of garlic. Then, peel the garlic cloves and trim the ends with a sharp knife. Rinse off any remaining paper from the garlic cloves and pat dry.
- If you are cautious about botulism, coat the garlic with a few splashes of apple cider vinegar before adding it to a clean jar. (Read the text above why I'm not)
- Fill the jar 2/3 of the way full with garlic cloves, leaving enough room at the top for the ferment to expand.
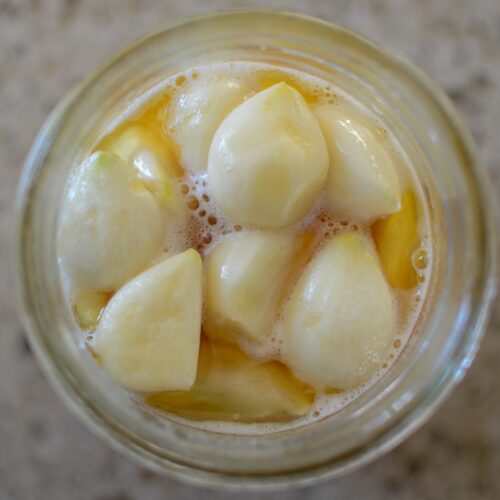
Add the Honey
- Pour enough honey over the fresh garlic cloves to cover completely. Stir the honey to release any air bubbles caught amid the garlic cloves, adding more honey if needed.
Cover
- Loosely place a lid on the jar and move it to a dark place at room temperature to let the garlic and honey ferment. Don't screw the lid on tight so the carbon dioxide can escape.
Stir
- Over time, you will notice evidence of the fermenting process doing its thing with tiny bubbles forming in the honey. In addition, the garlic cloves will float to the surface of the honey. If left alone for an extended period, exposure to the air will create the right environment for mold to grow. To ensure this isn't an issue, stir the honey daily, pushing the garlic cloves beneath the surface of the honey. They will bob back up, but this little bit of disruption is enough to prevent mold from growing. This is my preferred way because once you're done stirring, you get to lick the spoon. Just no double dipping!
- The other method is to screw the lid on tightly and flip the jar upside down so that all of the garlic stay coated with honey. Then return to its upright position and loosen the lid. The challenge with this method is that you MUST make sure the lid is on tight, otherwise you have a sticky mess. Plus, you need to circle back to readjust the lid.
Ferment and Store
- Let the garlic ferment for 4-6 weeks out of direct sunlight, continuing to stir or flip daily. It's normal to see the garlic cloves transform into a softened, darker clove of garlic by the end of the fermentation time.
- After the garlic is done fermenting, wipe off any sticky residue from the outside of the jar and place it in the refrigerator for up to 12 months.
Notes
Nutrition information is automatically calculated, so should only be used as an approximation.
Nutrition
Calories: 64.7kcalCarbohydrates: 17.5gProtein: 0.1gFat: 0.001gSodium: 0.9mgPotassium: 11.7mgFiber: 0.05gSugar: 17.4gVitamin A: 0.01IUVitamin C: 0.2mgCalcium: 1.6mgIron: 0.1mg
Tried this recipe?Let us know how it was!
