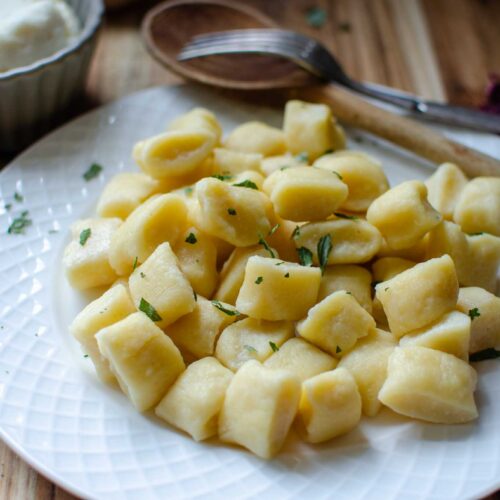
Easy Homemade Ricotta Gnocchi Recipe
Light and pillowy ricotta gnocchi are a lovely alternative to the classic potato gnocchi. Delicious paired with a simple tomato sauce for a lovely night in. You can easily double the recipe to serve a crowd or freeze some for a later date.
Want to Save This Recipe?
Enter your email & I'll send it to your inbox. Plus, get great new recipes from me every week!
By submitting this form, you consent to receive emails from Lockrem Homestead
Ingredients
Ricotta Gnocchi Dough
- 2 cups ricotta cheese measure roughly 2 ½ cups of ricotta and then drain
- 2 eggs
- ½ cup parmesan cheese grated
- ½ tsp salt
- 2 cups all-purpose flour 250 g
Instructions
One Day or Hour Ahead of Time
- This is a good step to do a few hours or even the day before you plan to make gnocchi. Drain the ricotta cheese by spooning about 2 ½ cups into a fine mesh strainer that’s lined with a few layers of cheesecloth with the ends tied together. Place a bowl underneath to catch the liquid as it drains.
- If you find you don’t have the time to let the ricotta drain you can press the ricotta between layers of paper towels or cheesecloth to extract any excess moisture.
- After draining, you should have about 2 cups of ricotta cheese. The texture willl be firm and dry, not moist. Wet ricotta will make for a gummy gnocchi, which isn’t what you want.
Making the Dough
- Combine drained ricotta cheese, parmesan cheese, salt, and eggs in a large bowl until just mixed.
- Add the all-purpose flour and mix until the dough has just come together. Be careful to not over work your dough.
- Turn the gnocchi dough onto a lightly floured surface. Sprinkle the top of the dough with a little bit of flour shape into a round ball. The soft dough should feel pliable and slightly damp, but not sticky.
- Prep a cookie sheet by sprinkling it with a little bit of flour. This is where you will place the cut gnocchi.
Shaping the Gnocchi
- Using a bench scraper, divide the dough into 4 portions. Roll each portion into long ropes roughly the thickness of your finger.
- Cut the ropes into ¾ to 1-inch pieces using the bench scraper or a sharp knife. You can leave them in this shape and place onto the cookie sheet, this is what I usually do for the sake of time. However, you can shape them by lighlty pressing and rolling down a wood gnocchi board to give the gnocchi some texture and is said to help hold some of the sauce. If you don’t have a board, using the back of a fork will give you a similar shape.
- Place the gnocchi pieces onto the sheet pan as your shape them.
Cooking the Gnocchi
- Bring a large pot of water to a boil and salt it well.
- To cook the gnocchi, drop the gnocchi into the water in batches to avoid over crowding the pot. They will sink initially, but within a few minutes they will float to the top of the water to signify they are done. Use a slotted spoon to lift the gnocchi out.
- Test the first one or two. They will be soft and pillowy with no flour taste. If they still taste like flour, they need a minute longer.
- Serve this homemade gnocchi with a simple tomato sauce, brown butter, and sage sauce, or your favorite sauce.
Storing the Gnocchi
- Store any leftovers in an airtight container in the refrigerator for up to 3 days.
Freezing Gnocchi
- To freeze, place uncooked gnocchi on a baking sheet in a single layer and into the freezer until the dough has hardened. Gnocchi freezes typically within two hours.
- Once hardened, transfer them to a plastic freezer bag or an air-tight container and place them back in the freezer.
- To cook remove them from the freezer and drop the frozen gnocchi into boiling water. They will float to the surface of the water when they’re done.
Notes
Nutrition information is automatically calculated, so should only be used as an approximation.
Nutrition
Calories: 523.7kcalCarbohydrates: 52gProtein: 27.7gFat: 22gSaturated Fat: 13.1gPolyunsaturated Fat: 1.2gMonounsaturated Fat: 6.3gTrans Fat: 0.01gCholesterol: 153.6mgSodium: 627.6mgPotassium: 239mgFiber: 1.7gSugar: 0.7gVitamin A: 768.2IUCalcium: 426.6mgIron: 3.9mg
Tried this recipe?Let us know how it was!
